
Store setup
1. Opening Settings
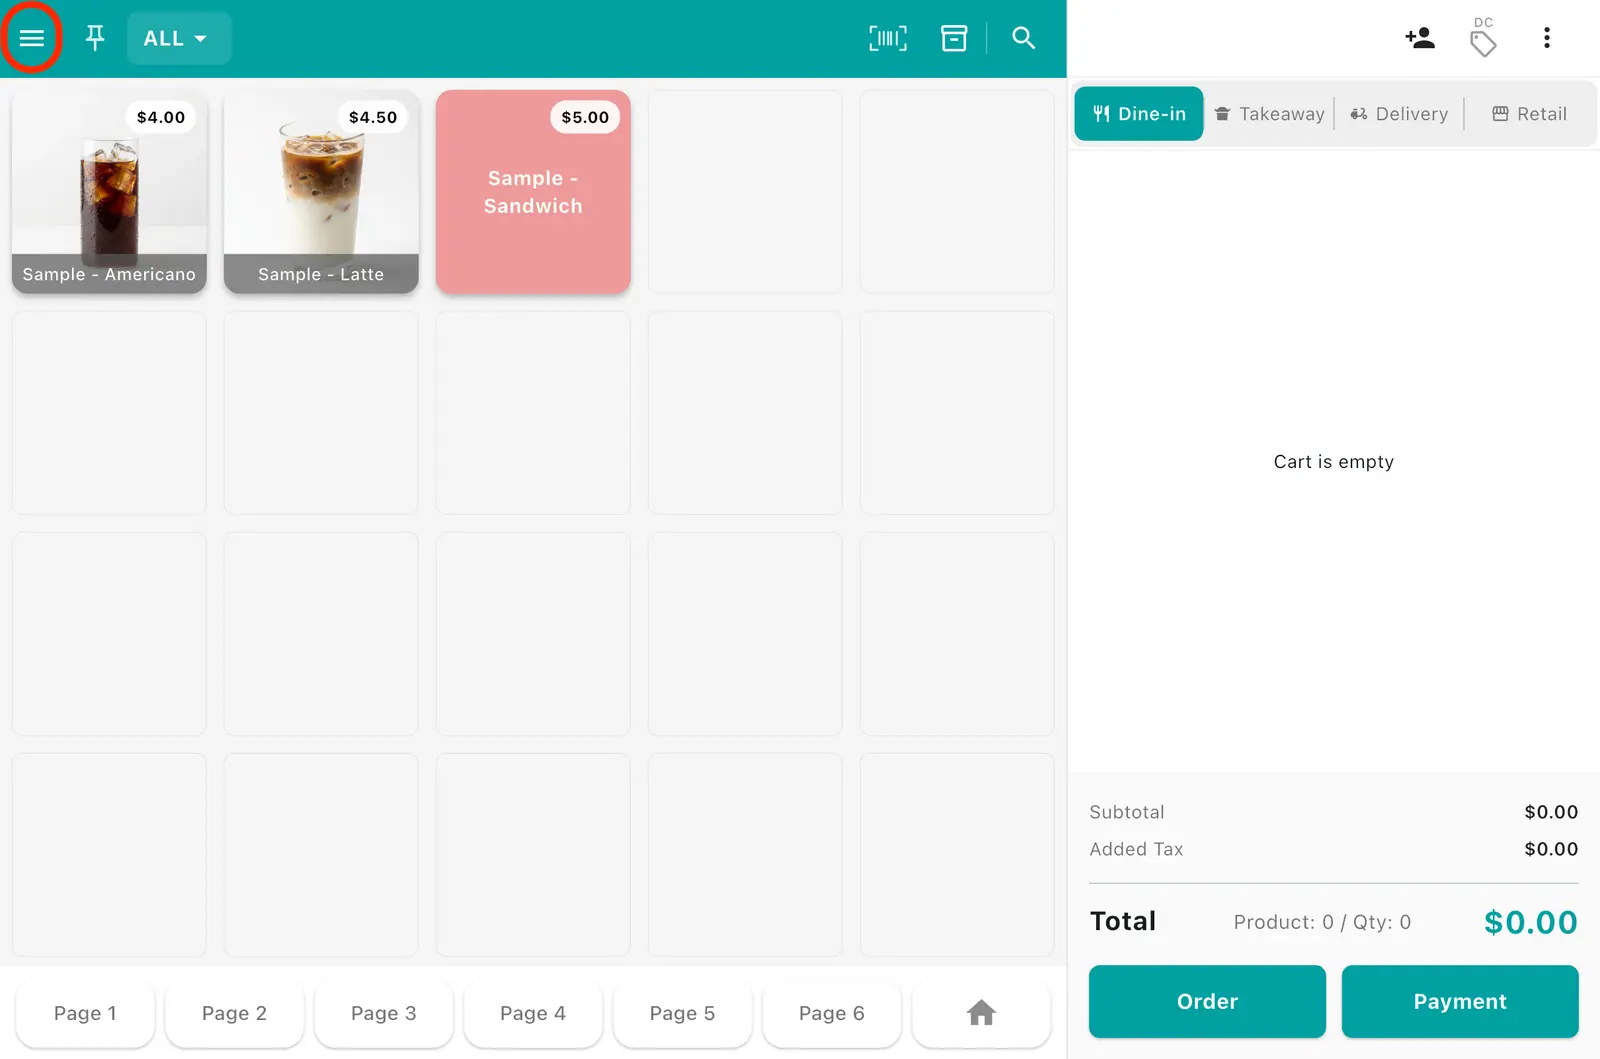
1Tap the ≡ (menu) button at the top left.
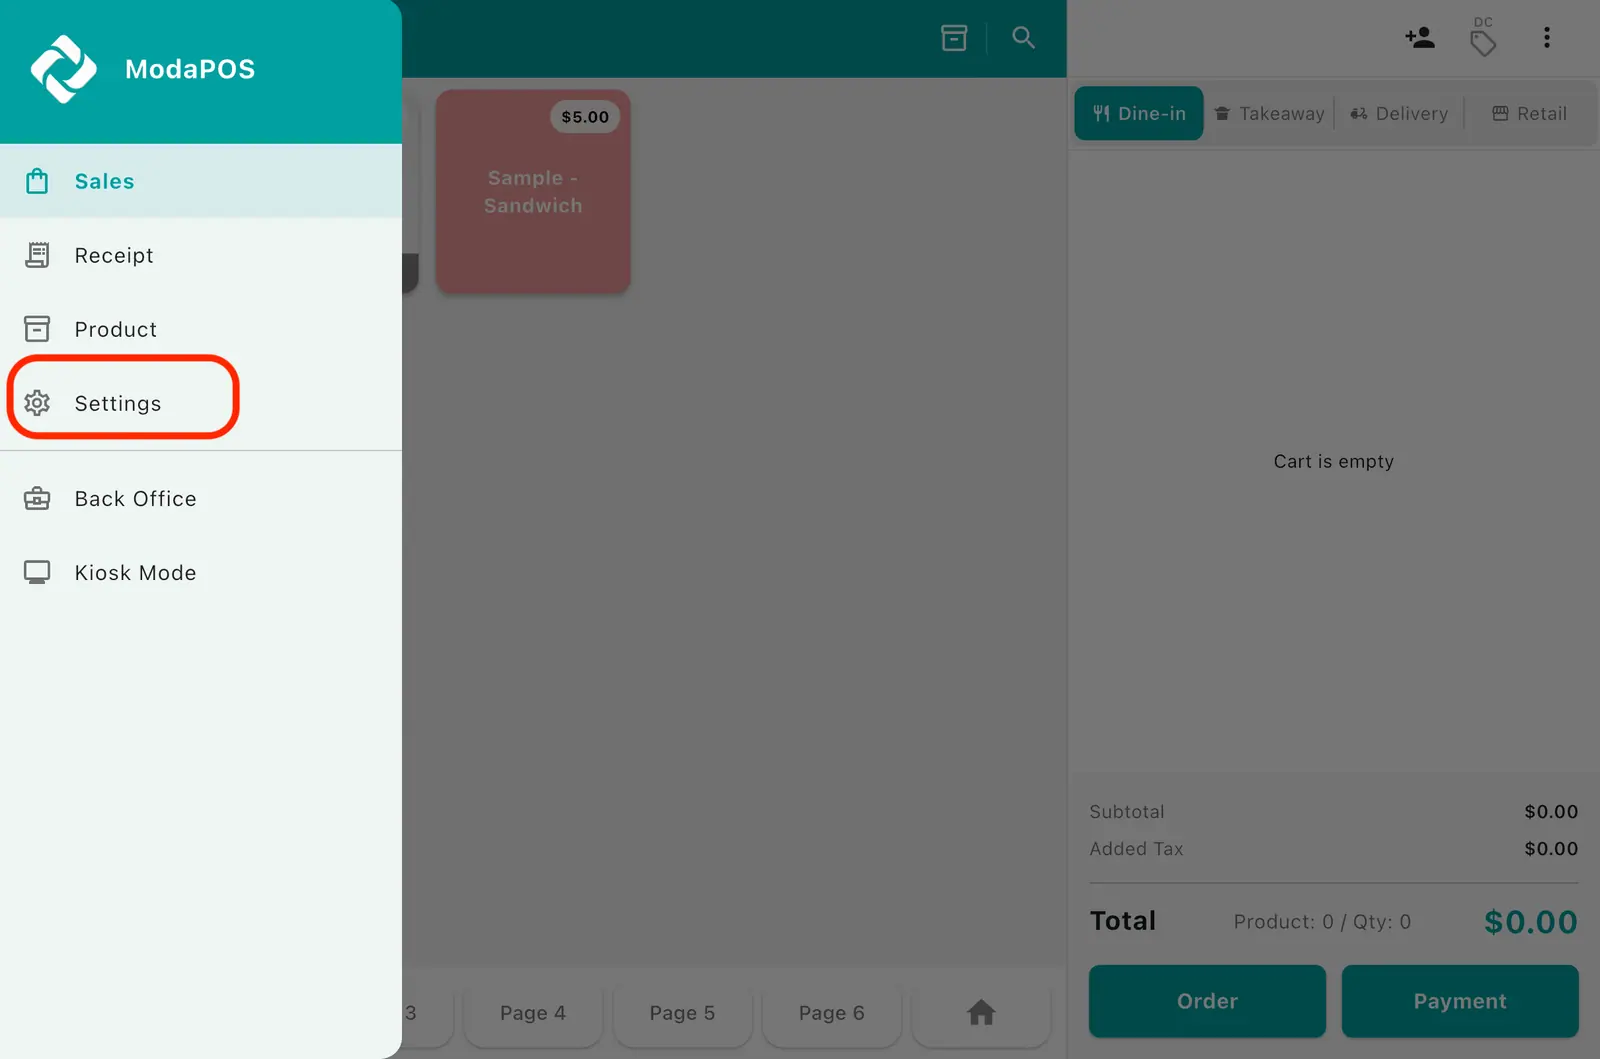
2Tap Settings in the side menu to open the Settings screen.
3The menu runs down the left side of the Settings screen.
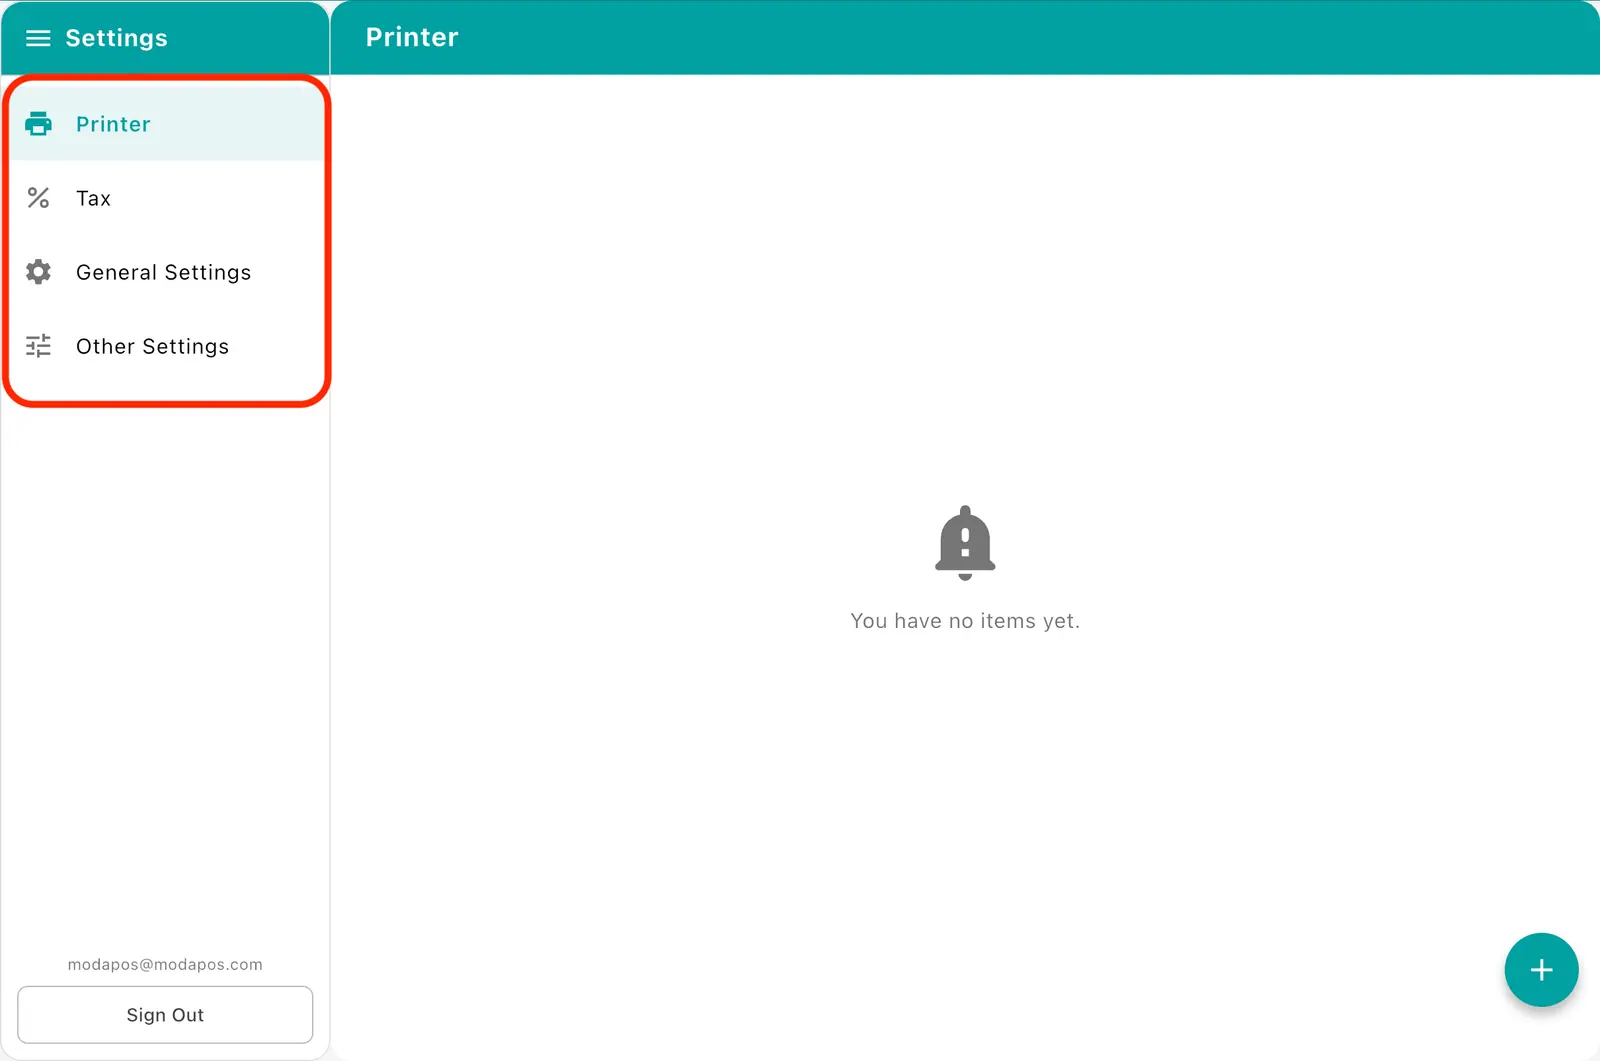
| Left menu | What it does |
|---|---|
| Printer | Connect receipt printers and the cash drawer |
| General | Auto-print, POS ID, language |
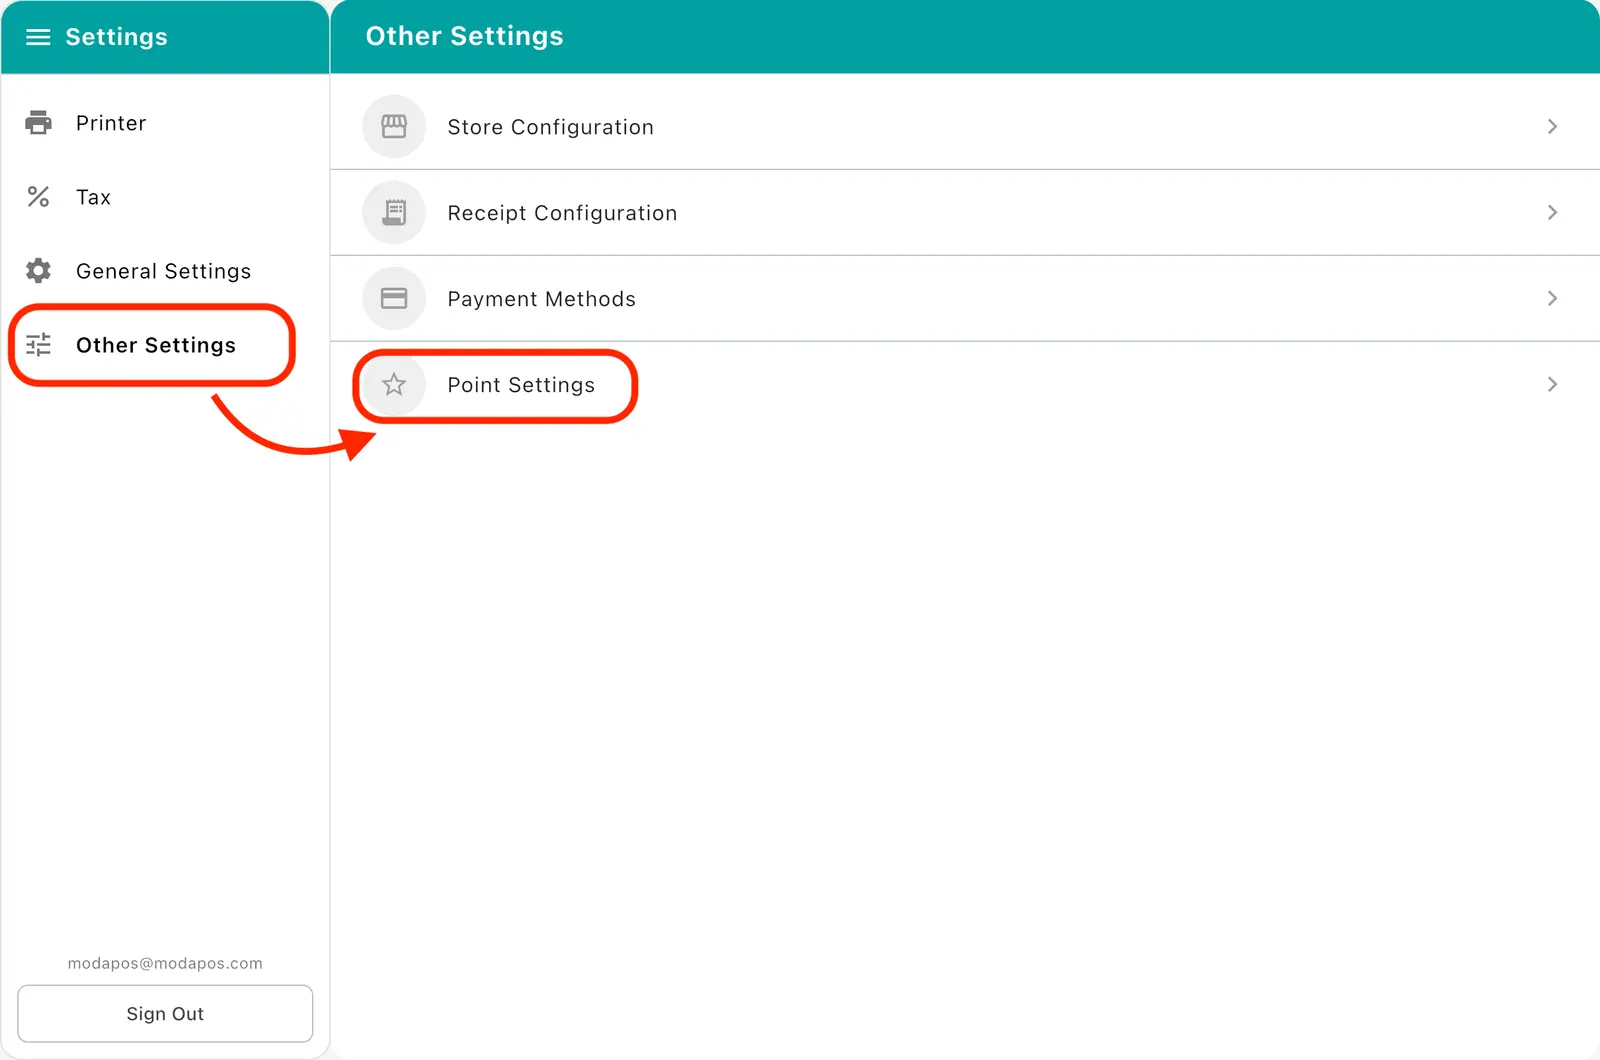
| Other | Store settings, receipt settings, payment methods, points |
| Card terminal | Card terminal (VAN) integration |
The Tax item shows only for overseas stores. It does not appear for Korean stores.
2. Entering store details
1Tap Other → Store settings.
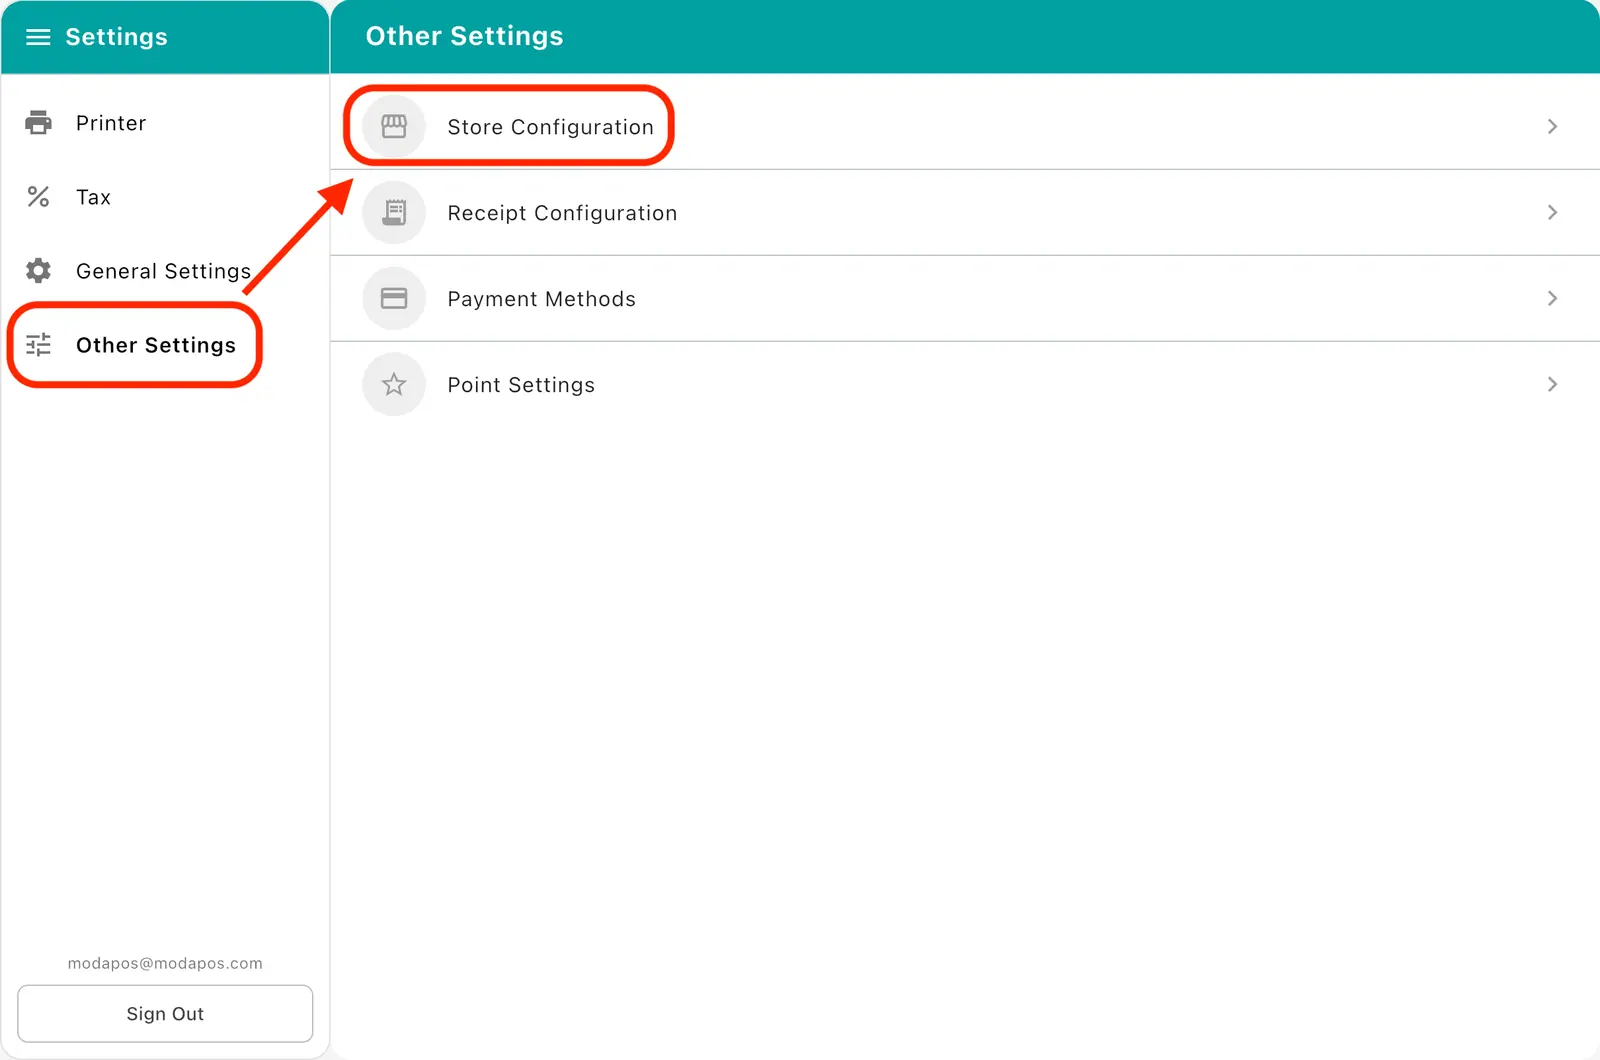
2Enter the business number, store name, owner name, phone, email, and address, then tap Save.
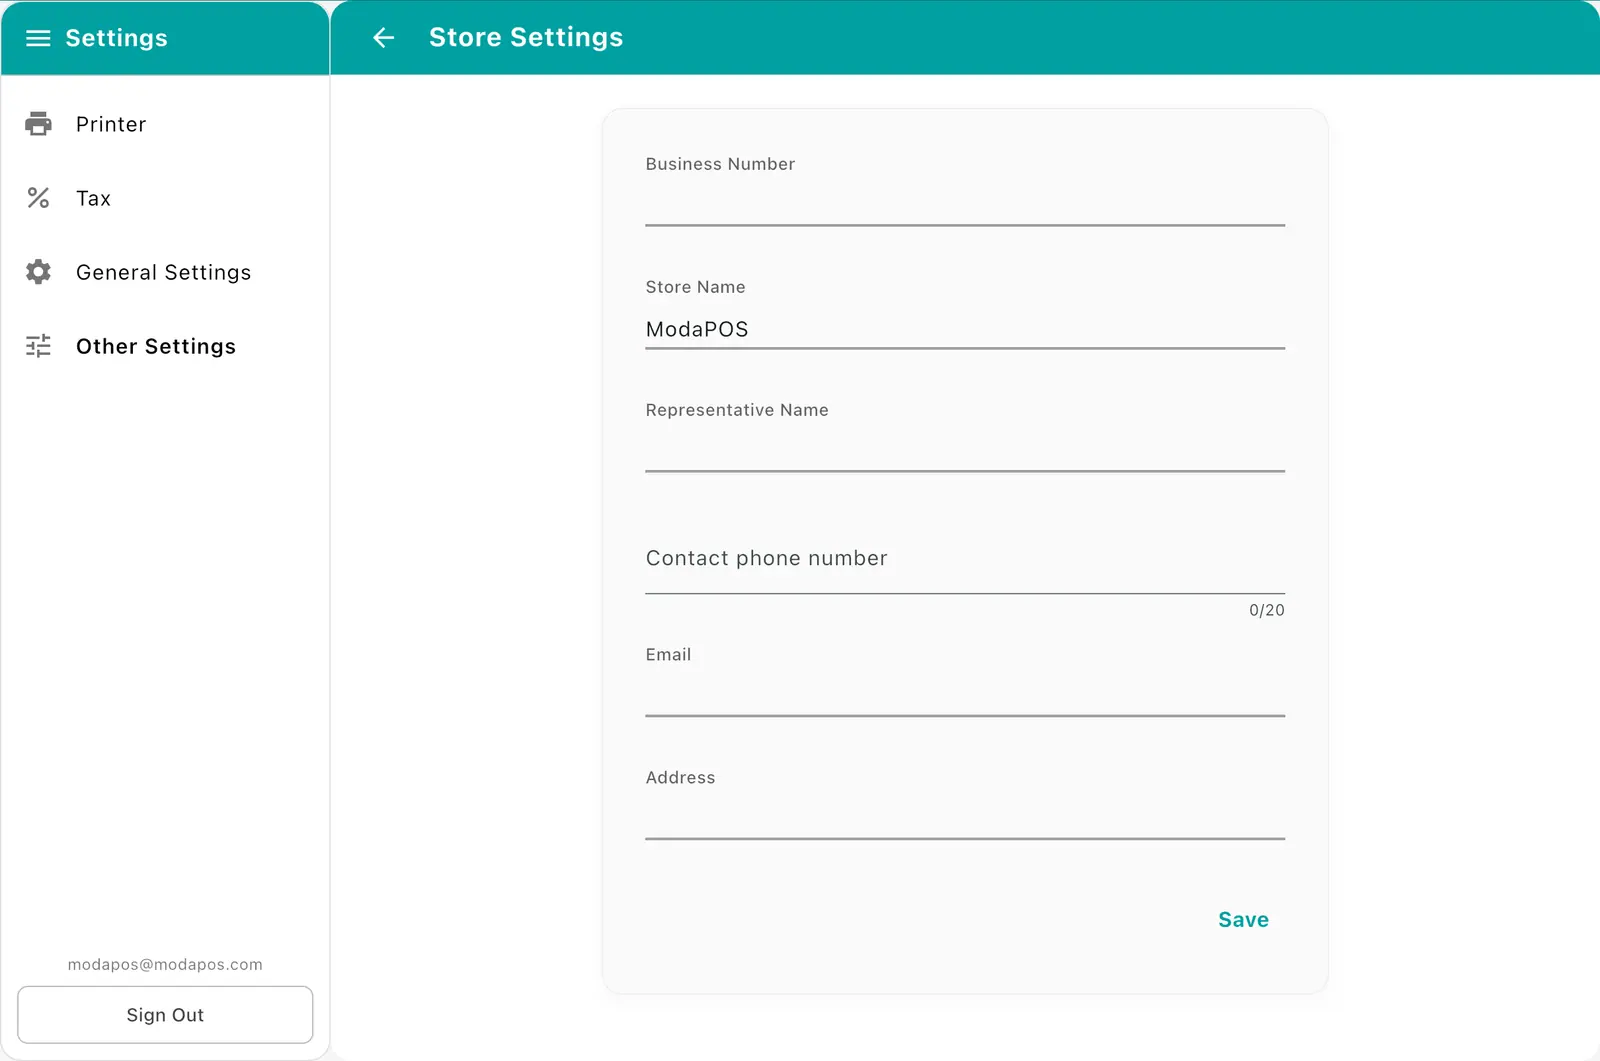
Store name cannot be left blank. Whitespace alone will not save.
3. POS ID
If your store runs several tablets, give each one a different POS ID so you can tell which device made a sale. The value goes into the receipt number.
1Tap General → POS ID.
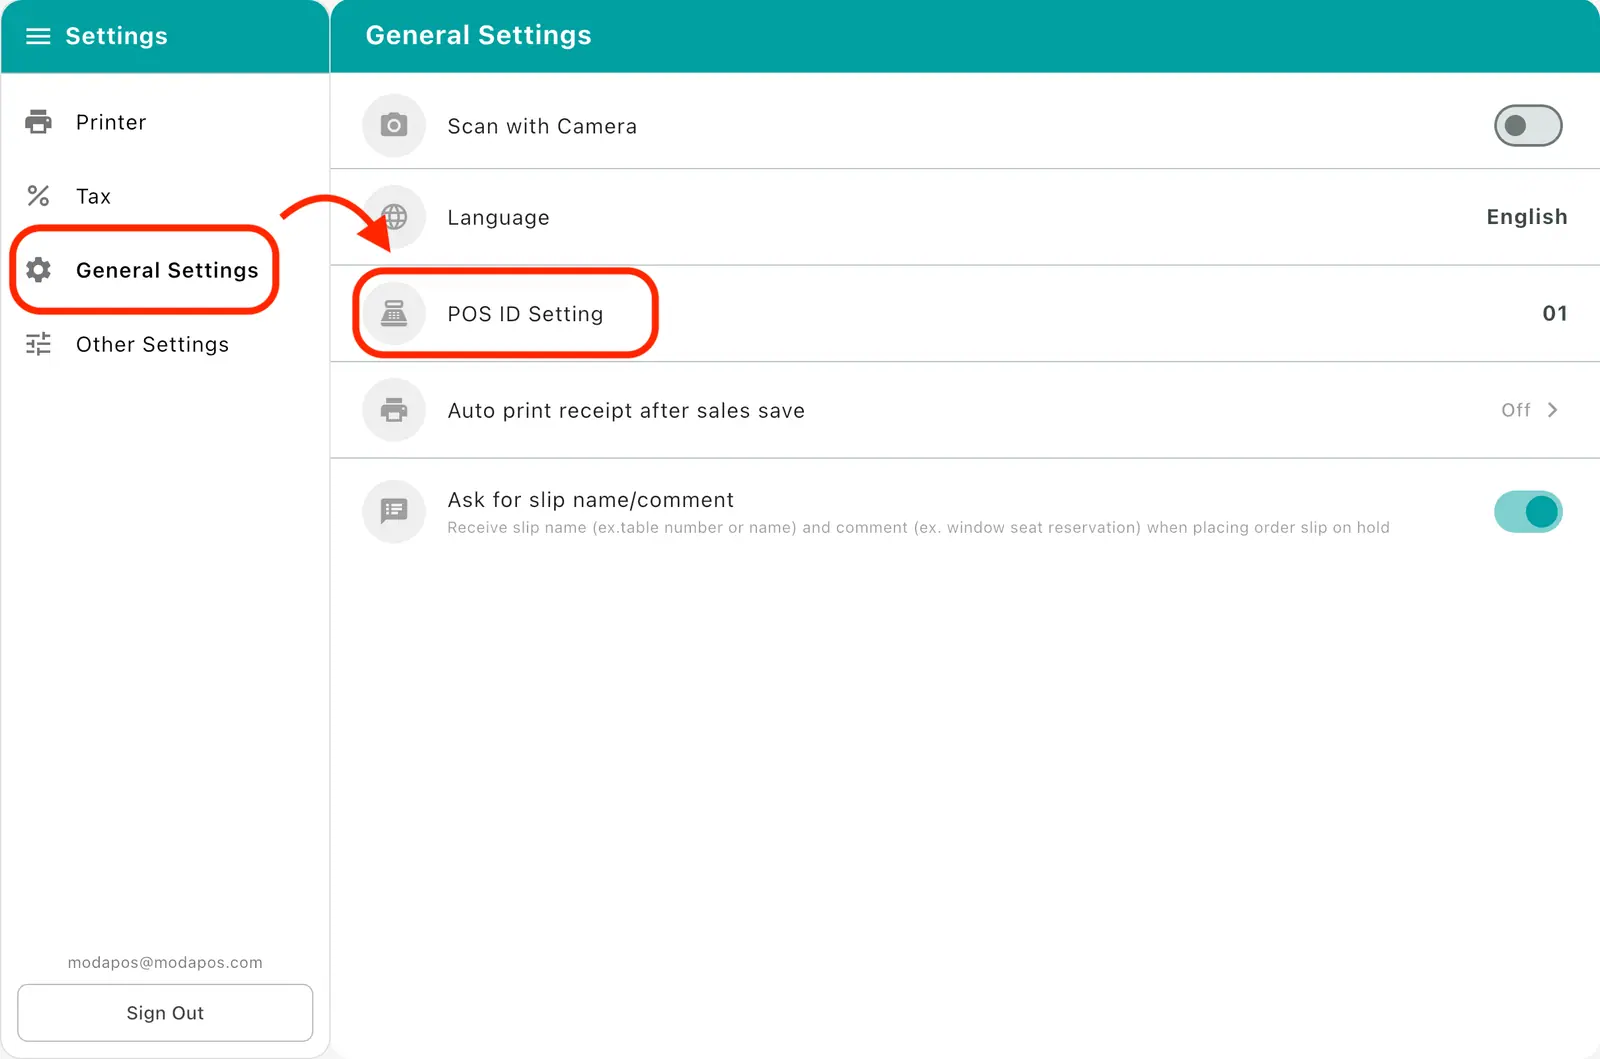
2Enter the POS ID. Only two alphanumeric characters are allowed. (e.g.
01,A1)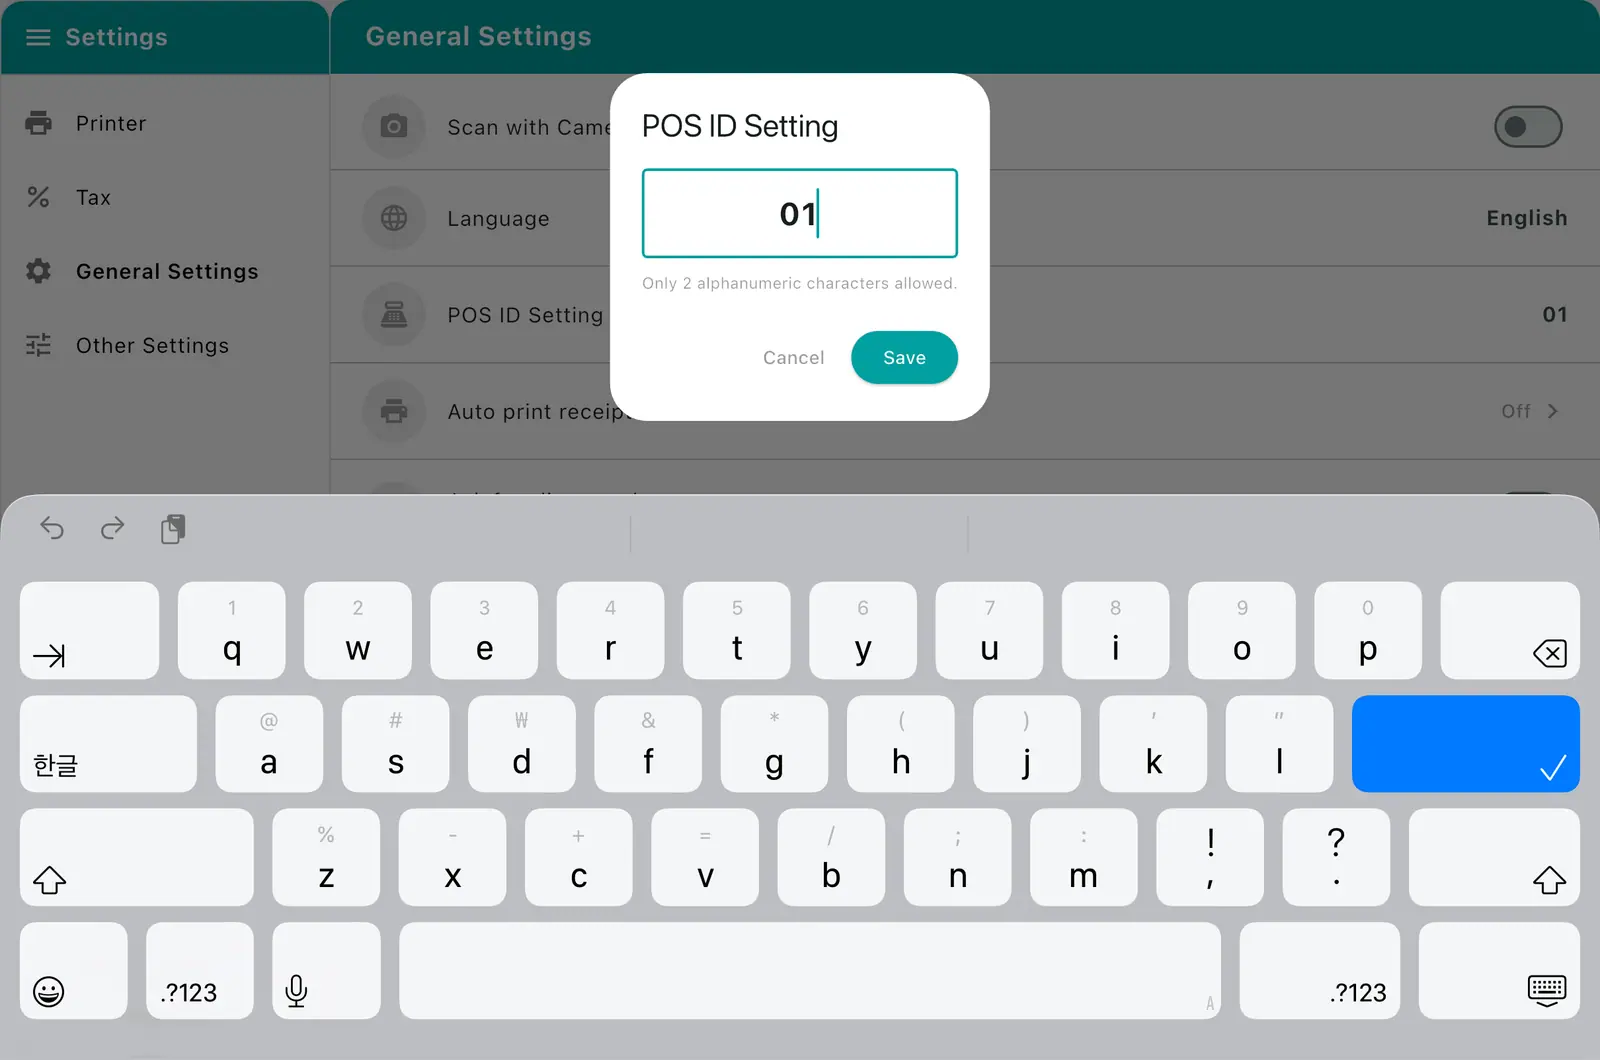
- With several tablets, give each device a different value. Reusing one can cause duplicate receipt numbers.
- With a single tablet, leave it at
01and forget about it.
4. Receipt settings
1Tap Other → Receipt settings.
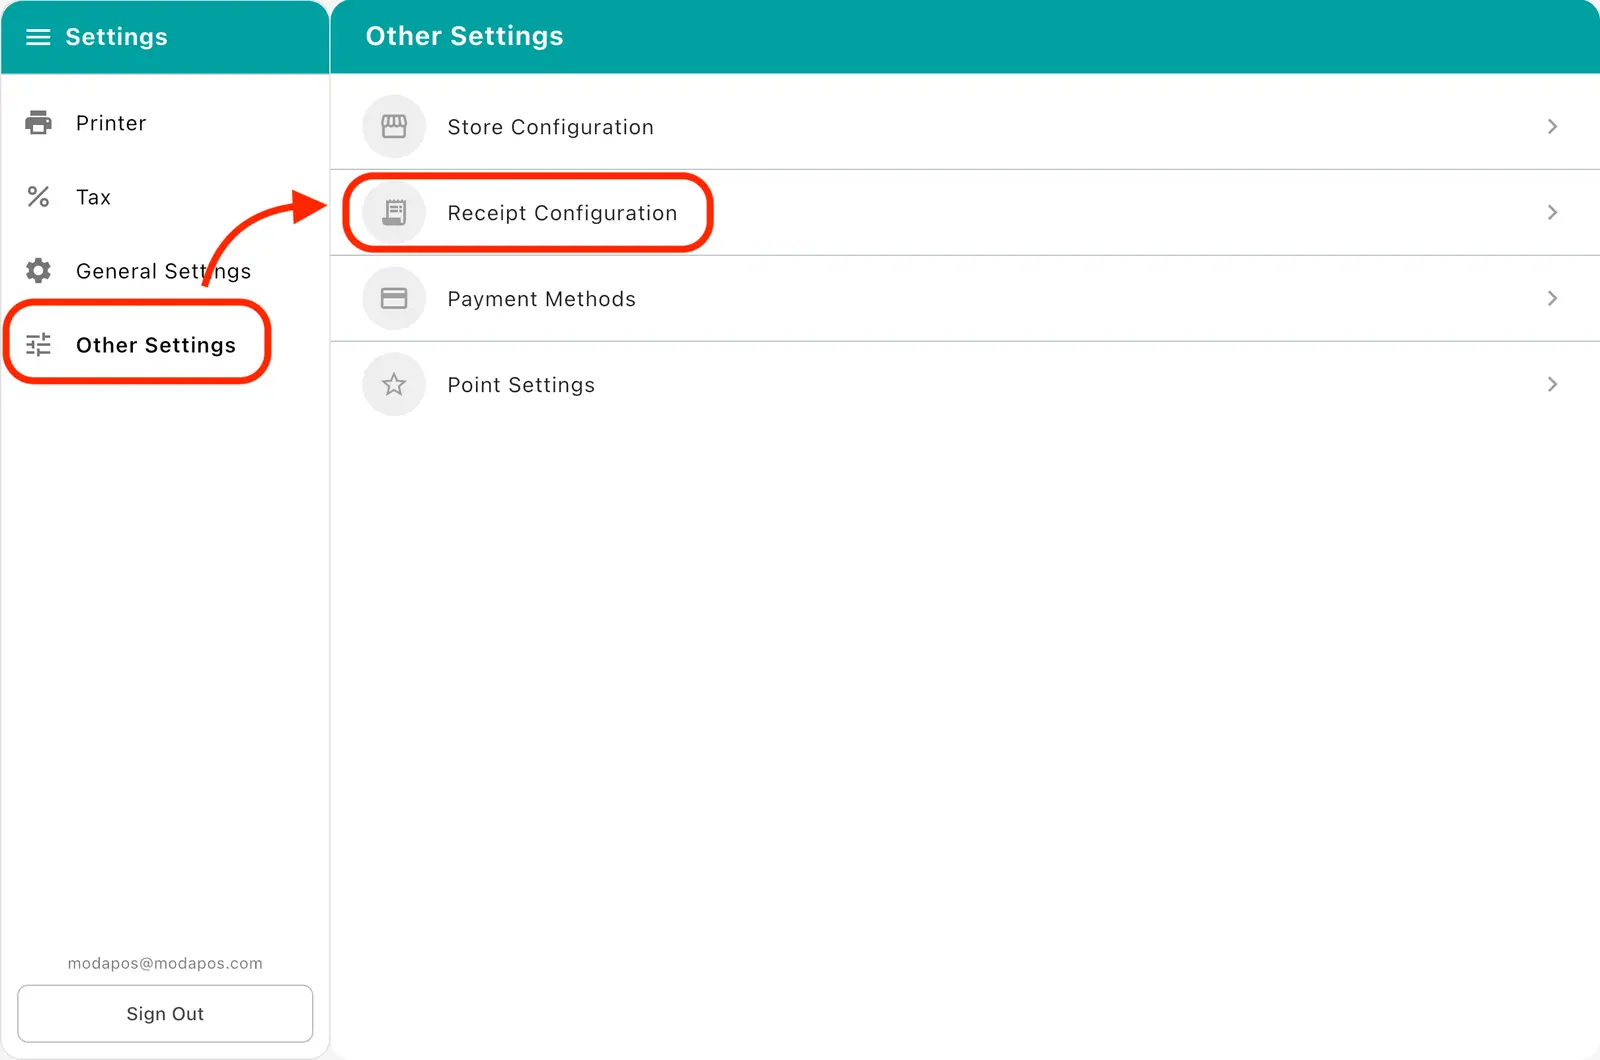
2Set the logo (image at the top), header (text under the logo), and footer (text at the bottom), then save.
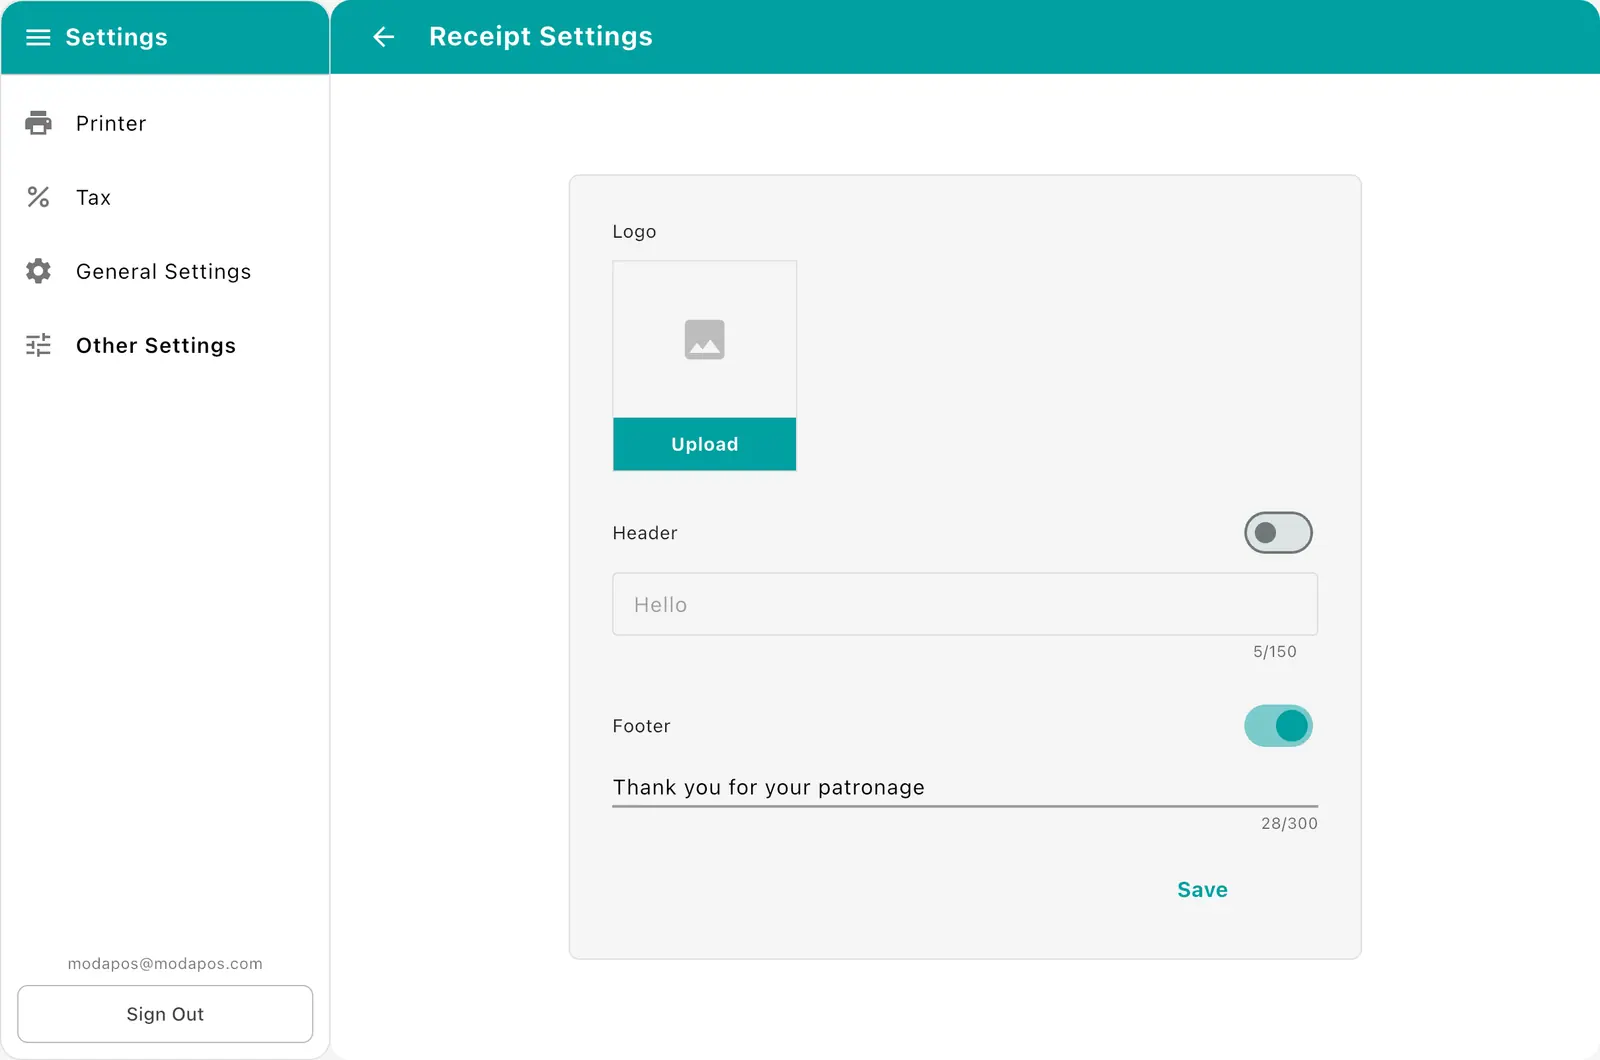
Logos print on a black-and-white receipt printer. Busy or faint images come out badly. Use a simple, high-contrast black-and-white image with thick lines.
5. Tax
Overseas stores only. In Korea VAT is included in the price, so this menu does not appear.
1Open the Tax menu and tap the + button at the top right.
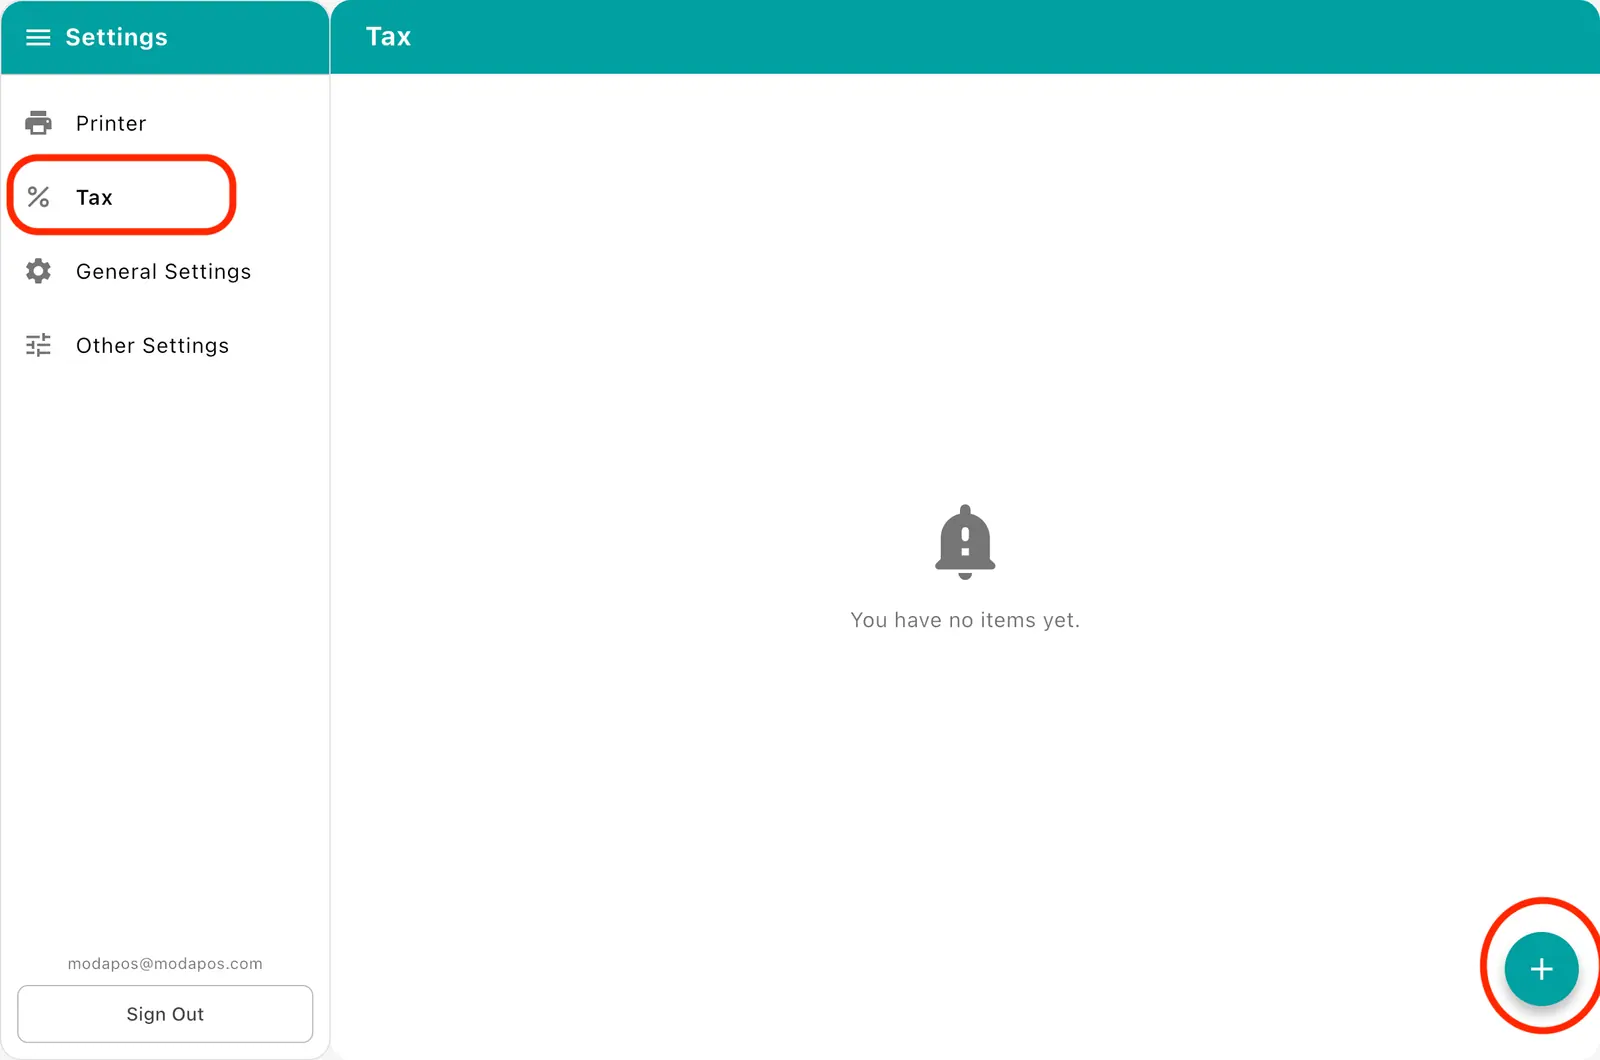
2Enter a tax name and rate to create a tax, then save.

6. Payment methods
Manage what shows up on the payment screen.
1Tap Other → Payment methods.
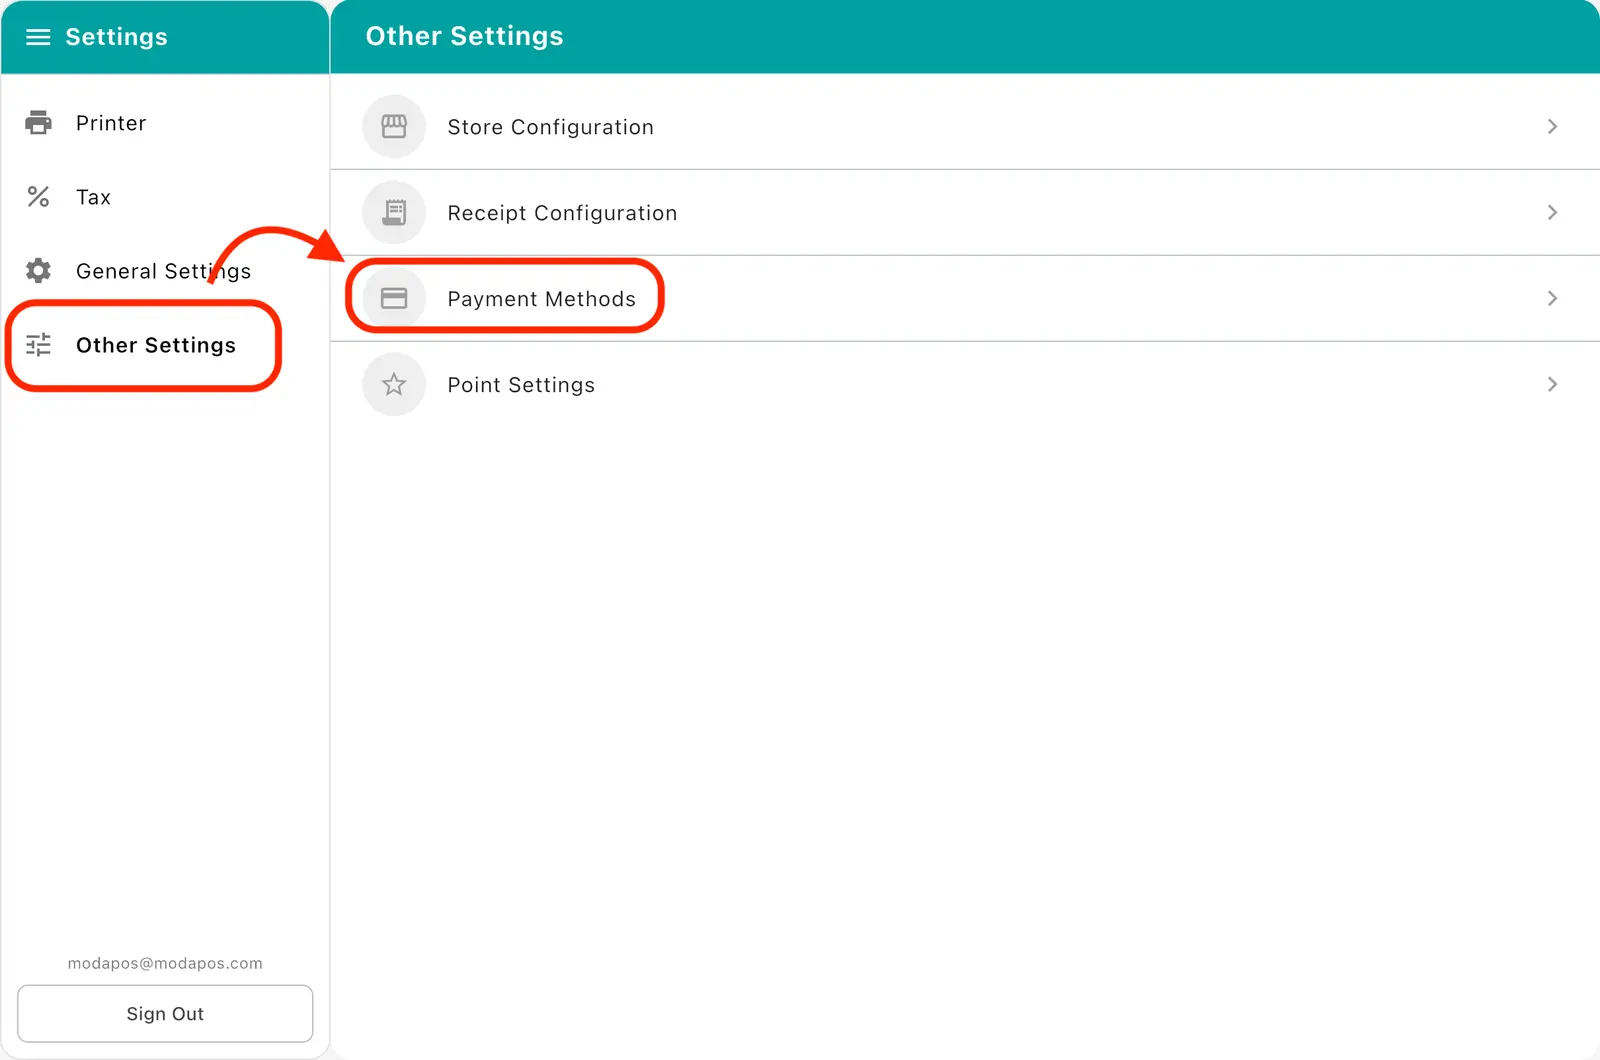
2Tap the + button at the bottom right and enter a name (e.g. Gift card, Other) to add one.
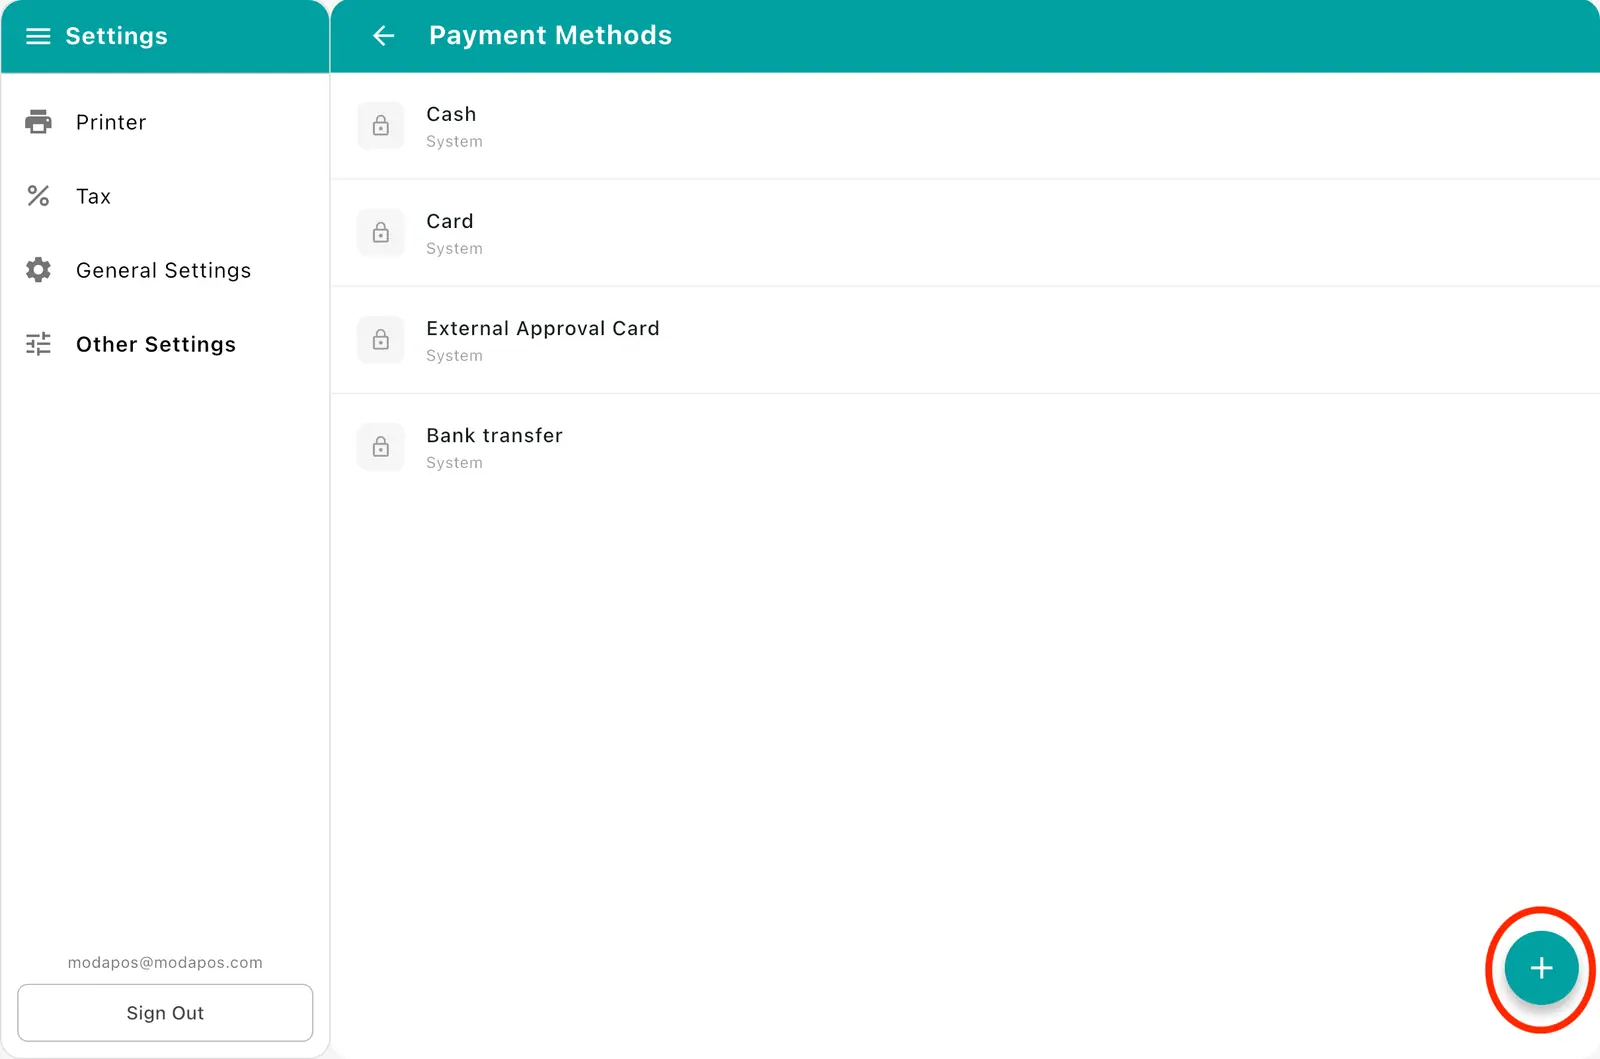
| Type | Description |
|---|---|
| System | Built into the app (cash, card, and so on). Cannot be deleted |
| Custom | Added by your store. Can be deleted |
7. Points
1Tap Other → Points.
2Set Use points (the whole feature on/off), Earn rate (what % of the total), and Eligible products (what earns points).
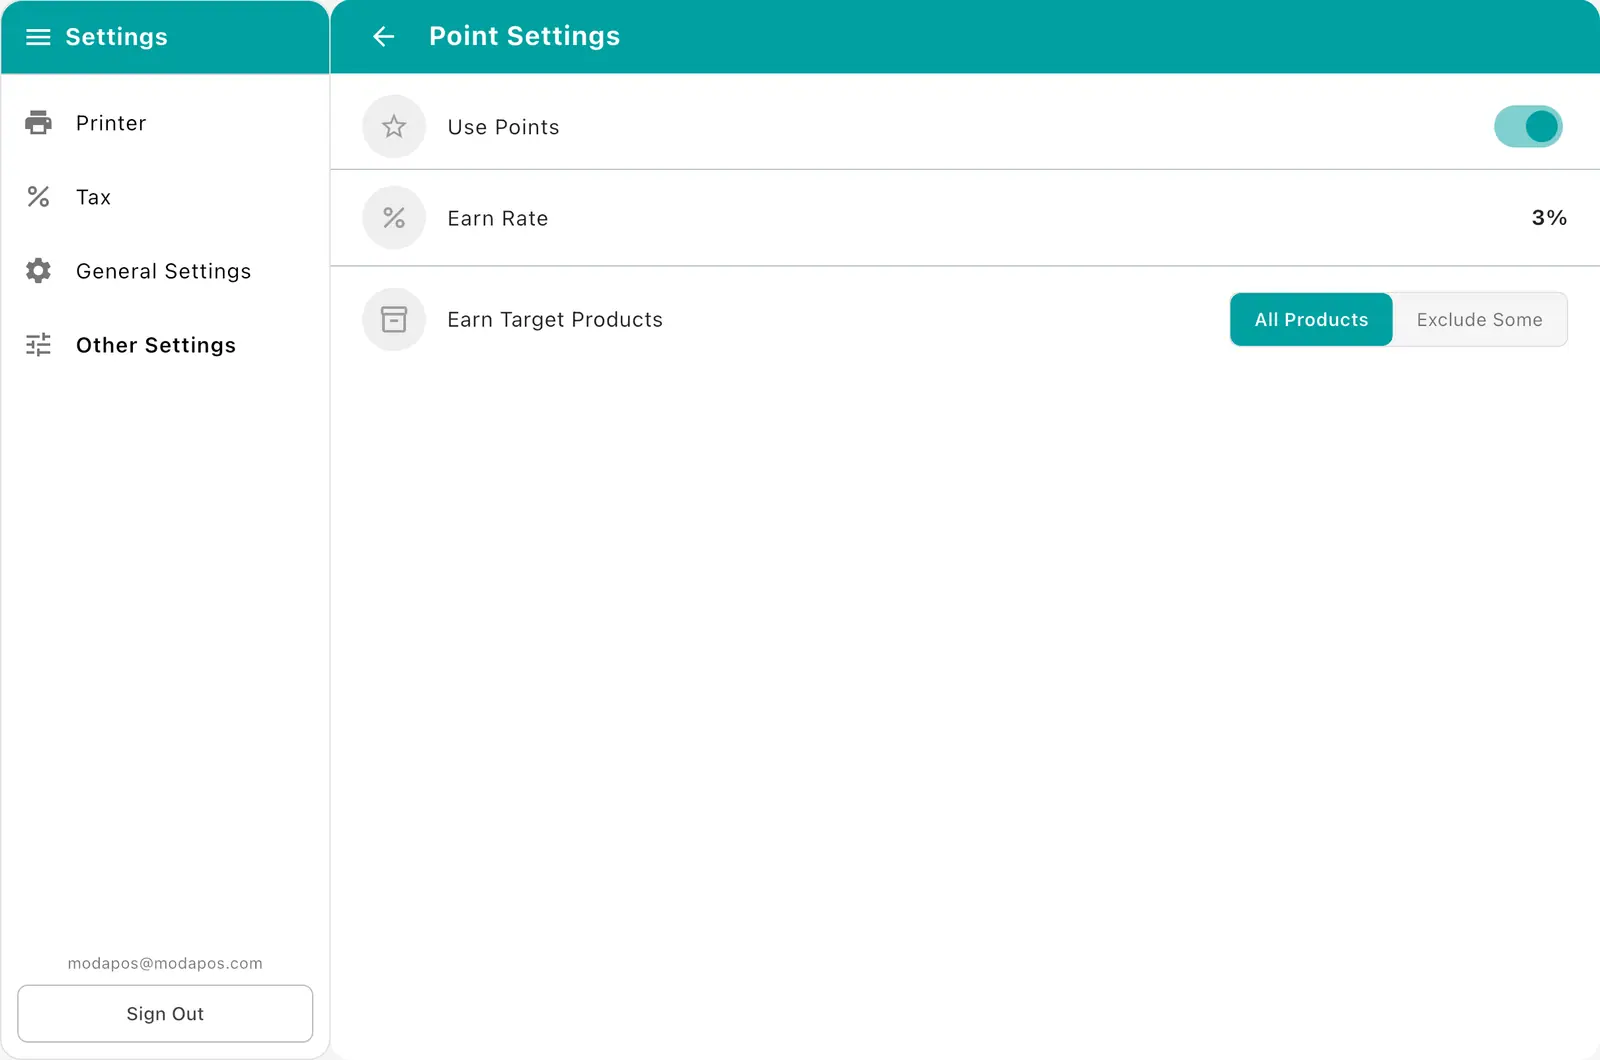
| Eligible products | Behaviour |
|---|---|
| All products | Every product earns points |
| Exclude some | Only the products you pick are excluded. The rest earn points |
Choosing Exclude some opens the product list. Pick the products that should not earn points — things with no margin, like cigarettes or gift cards. Earning and spending points in practice is covered in 04. Selling.
8. Camera scanning
Add products by scanning barcodes with the tablet or phone camera — no barcode scanner needed.
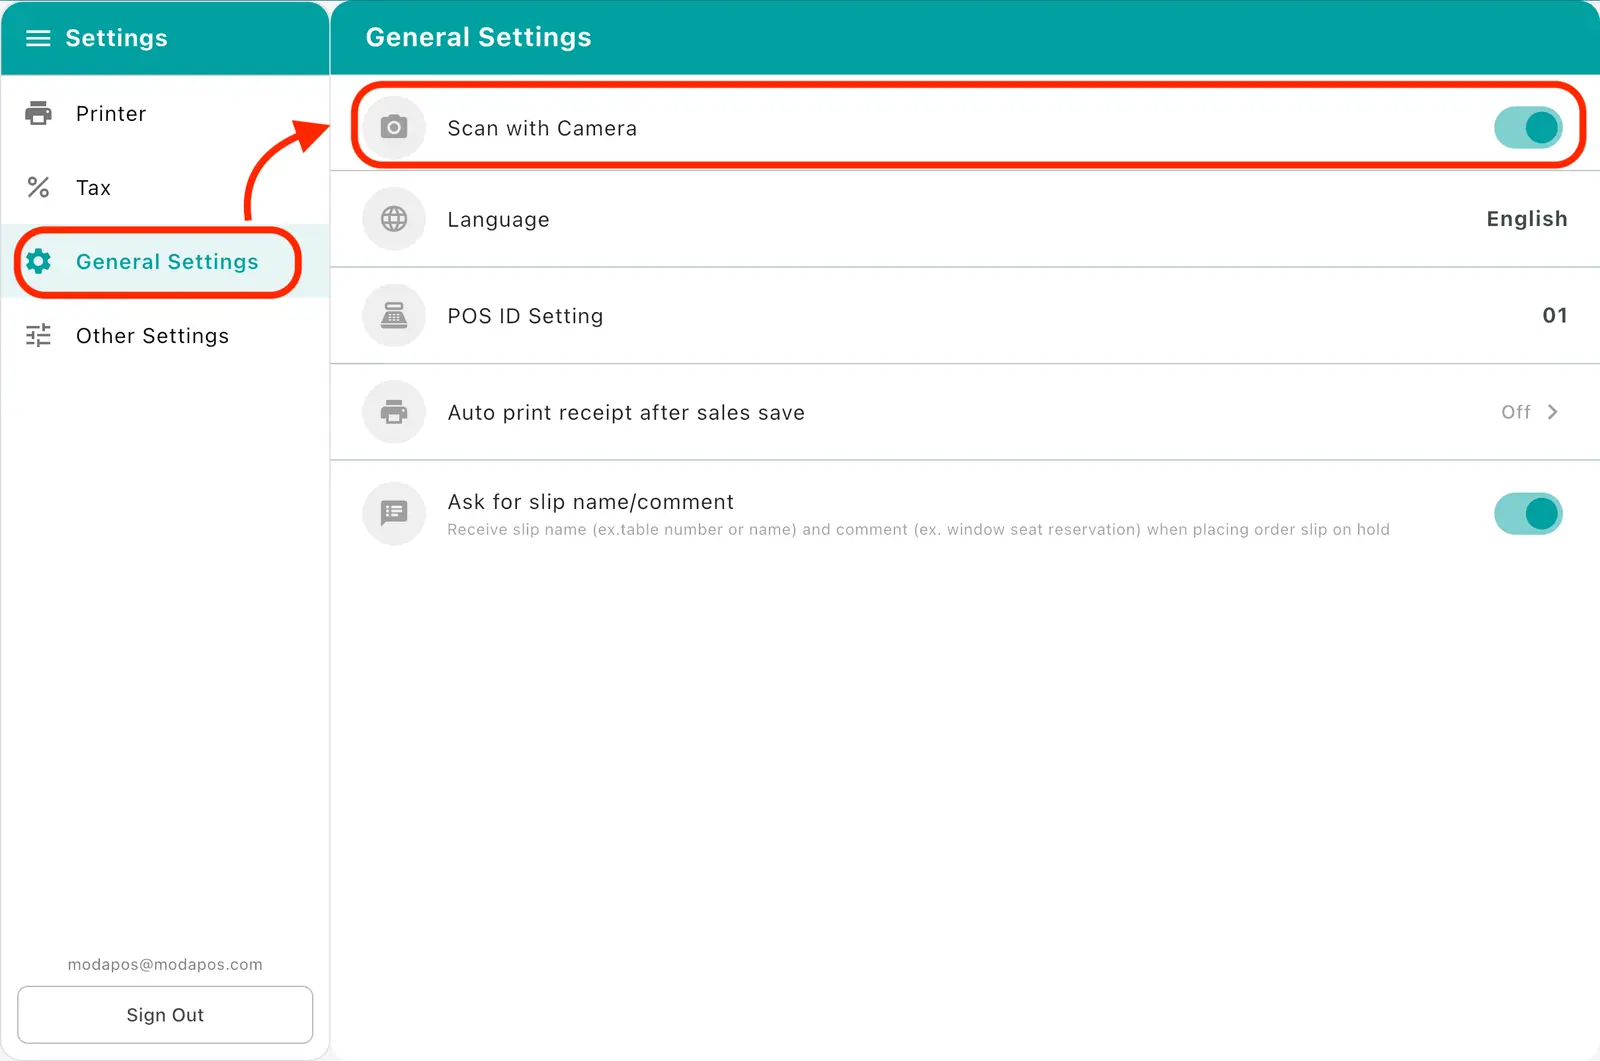
Settings → General → Scan with camera (switch)
1Tap General in the left side menu, then turn on the Scan with camera switch.
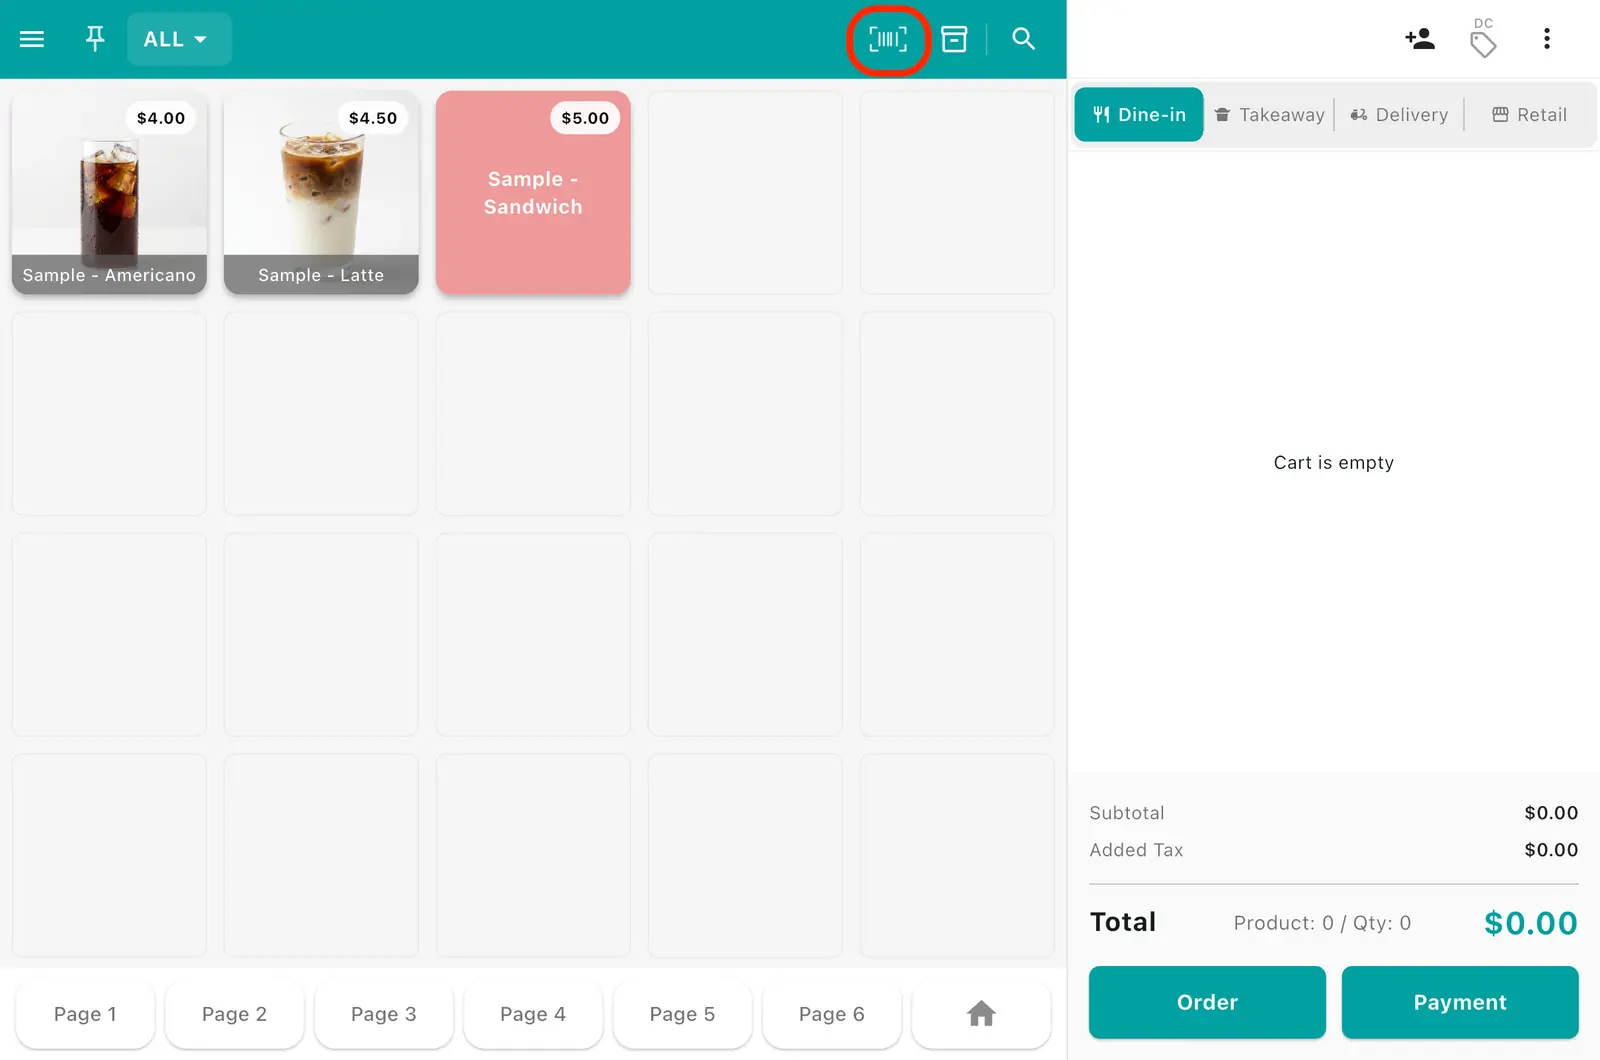
2Tap the barcode (scan) button that now appears at the top of the sales screen.
3The screen switches to the camera. Point it at a product barcode and it is added to the cart automatically; you can also switch between the front and rear camera.
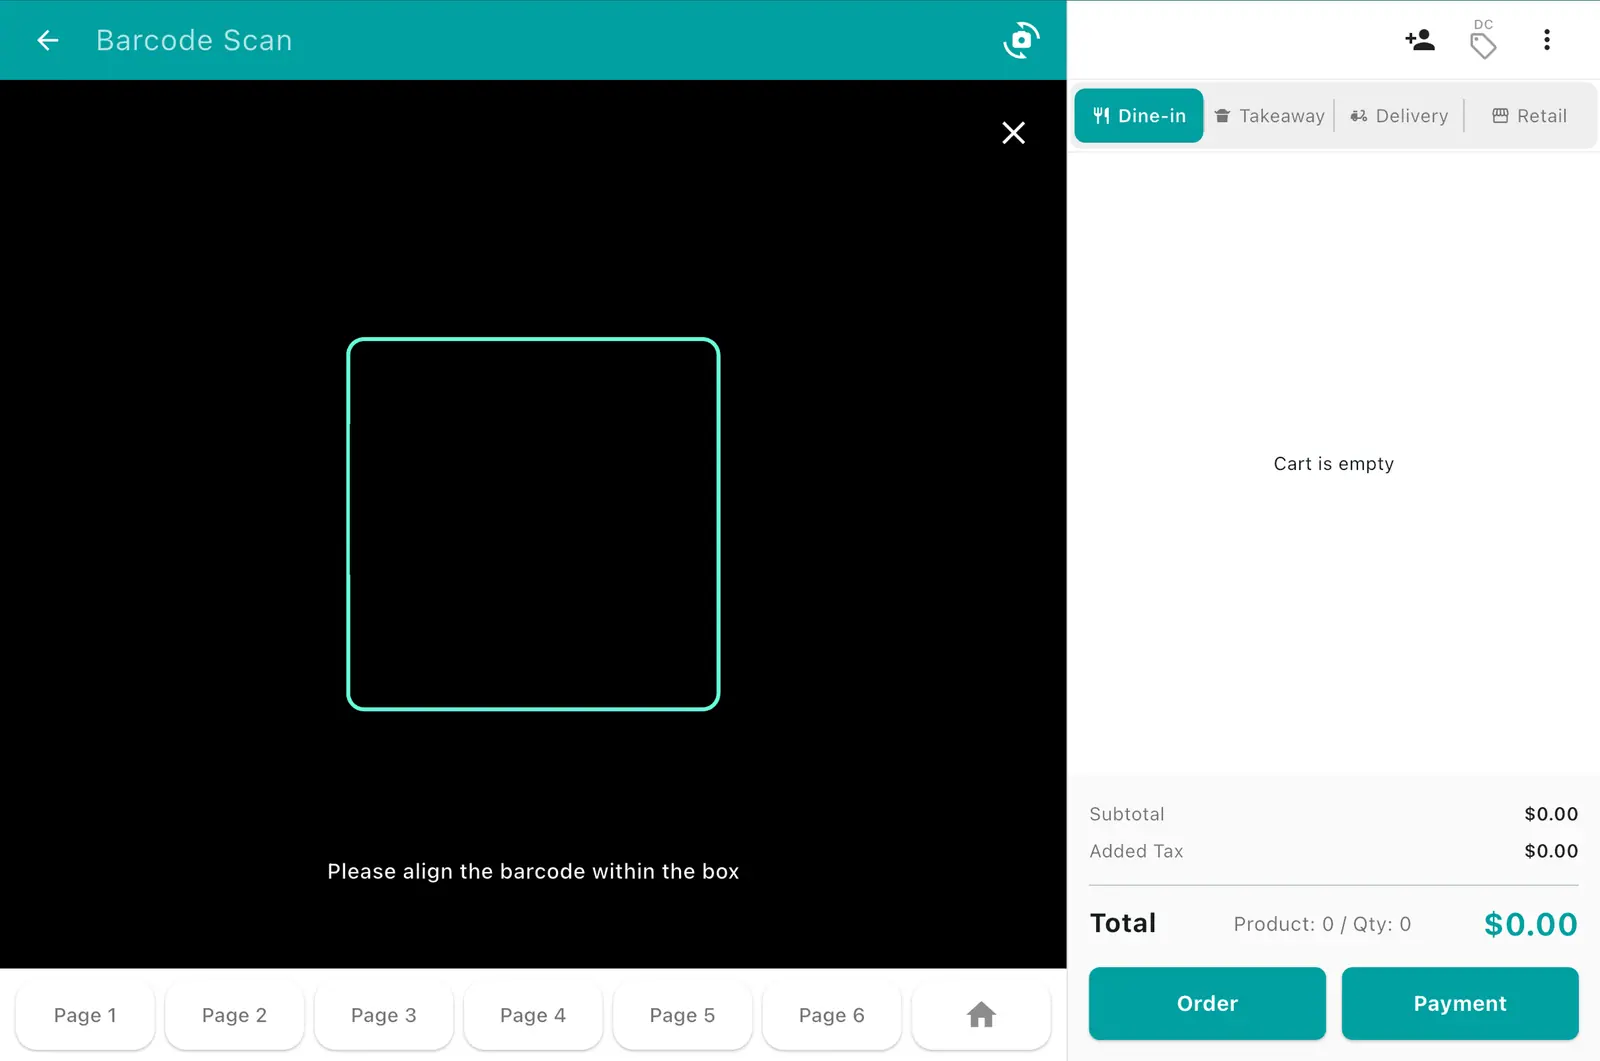
- When on, a camera (scan) button appears on the sales screen and the product search screen.
- When off, the scan button disappears. Stores that only use a dedicated barcode scanner can leave it off.
9. Deferring payment (Order / Hold)
Choose how a deferred cart is saved. A single switch toggles between Order mode and Hold mode.
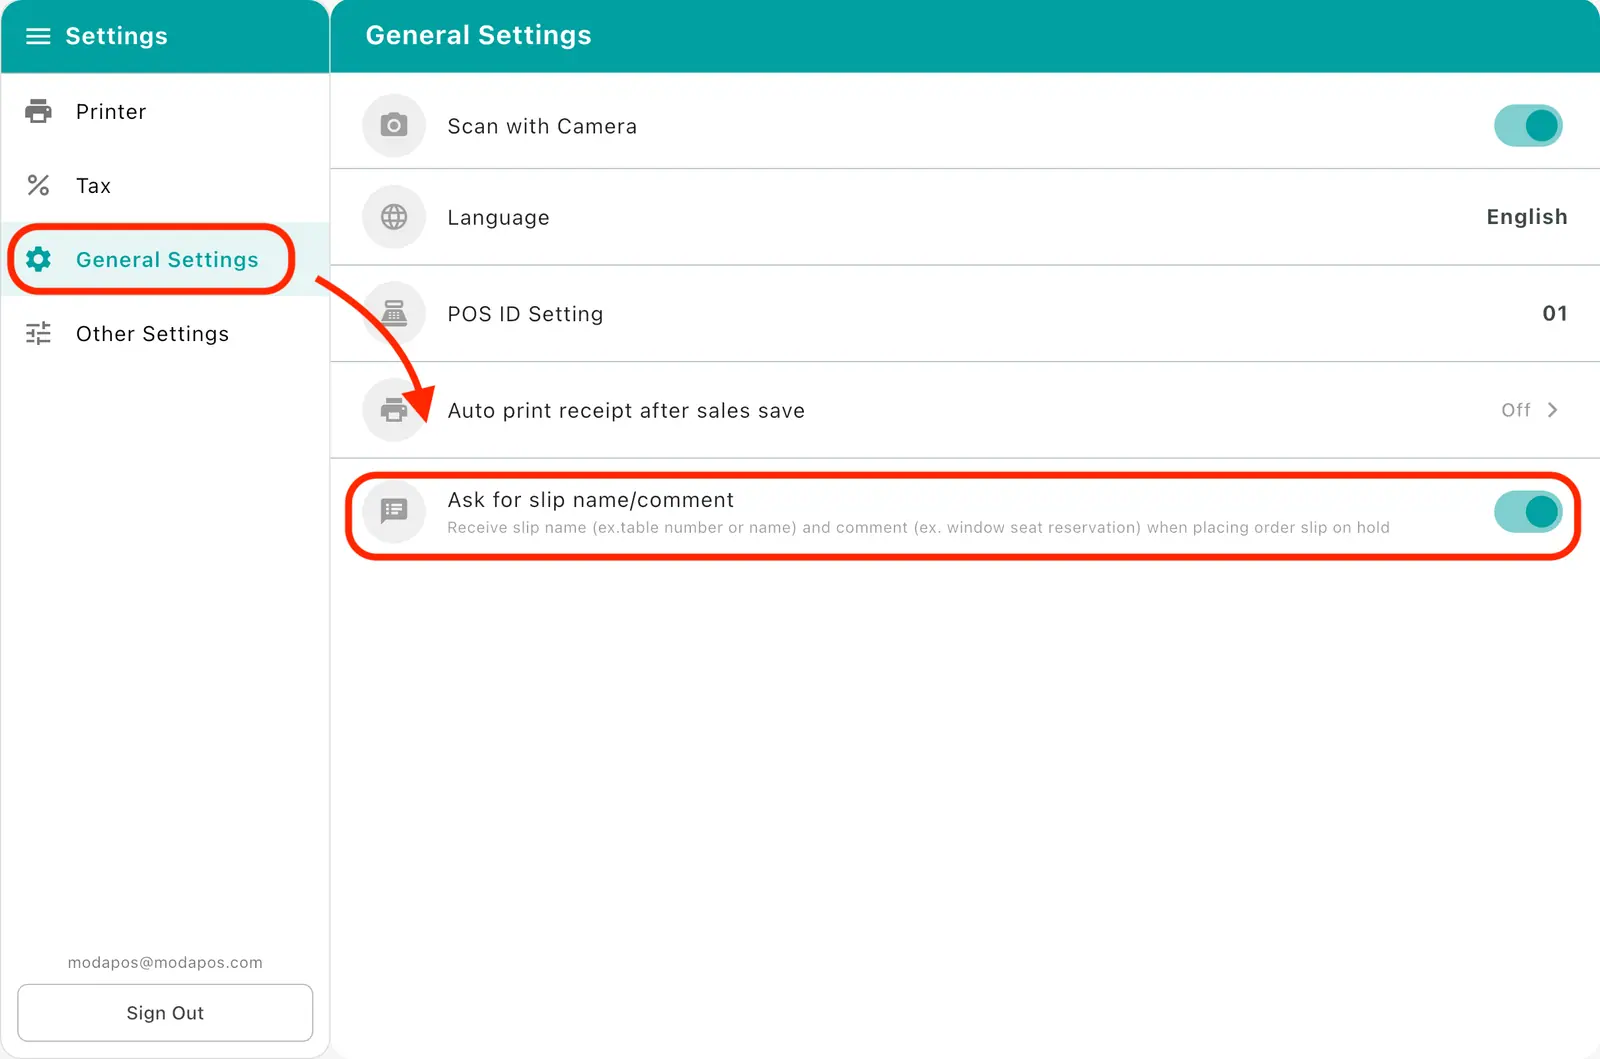
Settings → General → Ask for ticket name/comment (switch)
| Switch | Mode | Behaviour |
|---|---|---|
| On | Order | On saving a ticket it asks for a ticket name and comment (e.g. table number/name, "window seat reserved"). Saving prints an order ticket |
| Off | Hold | Saves immediately with no name or comment. No order ticket is printed |
- If you manage orders by table or customer like a restaurant or café, turn it on (Order mode).
- If you just defer a sale briefly like a retail store, leaving it off is easier (Hold mode).
Hold mode — switch off
1Tap General in the left side menu, then turn off the Ask for ticket name/comment switch.
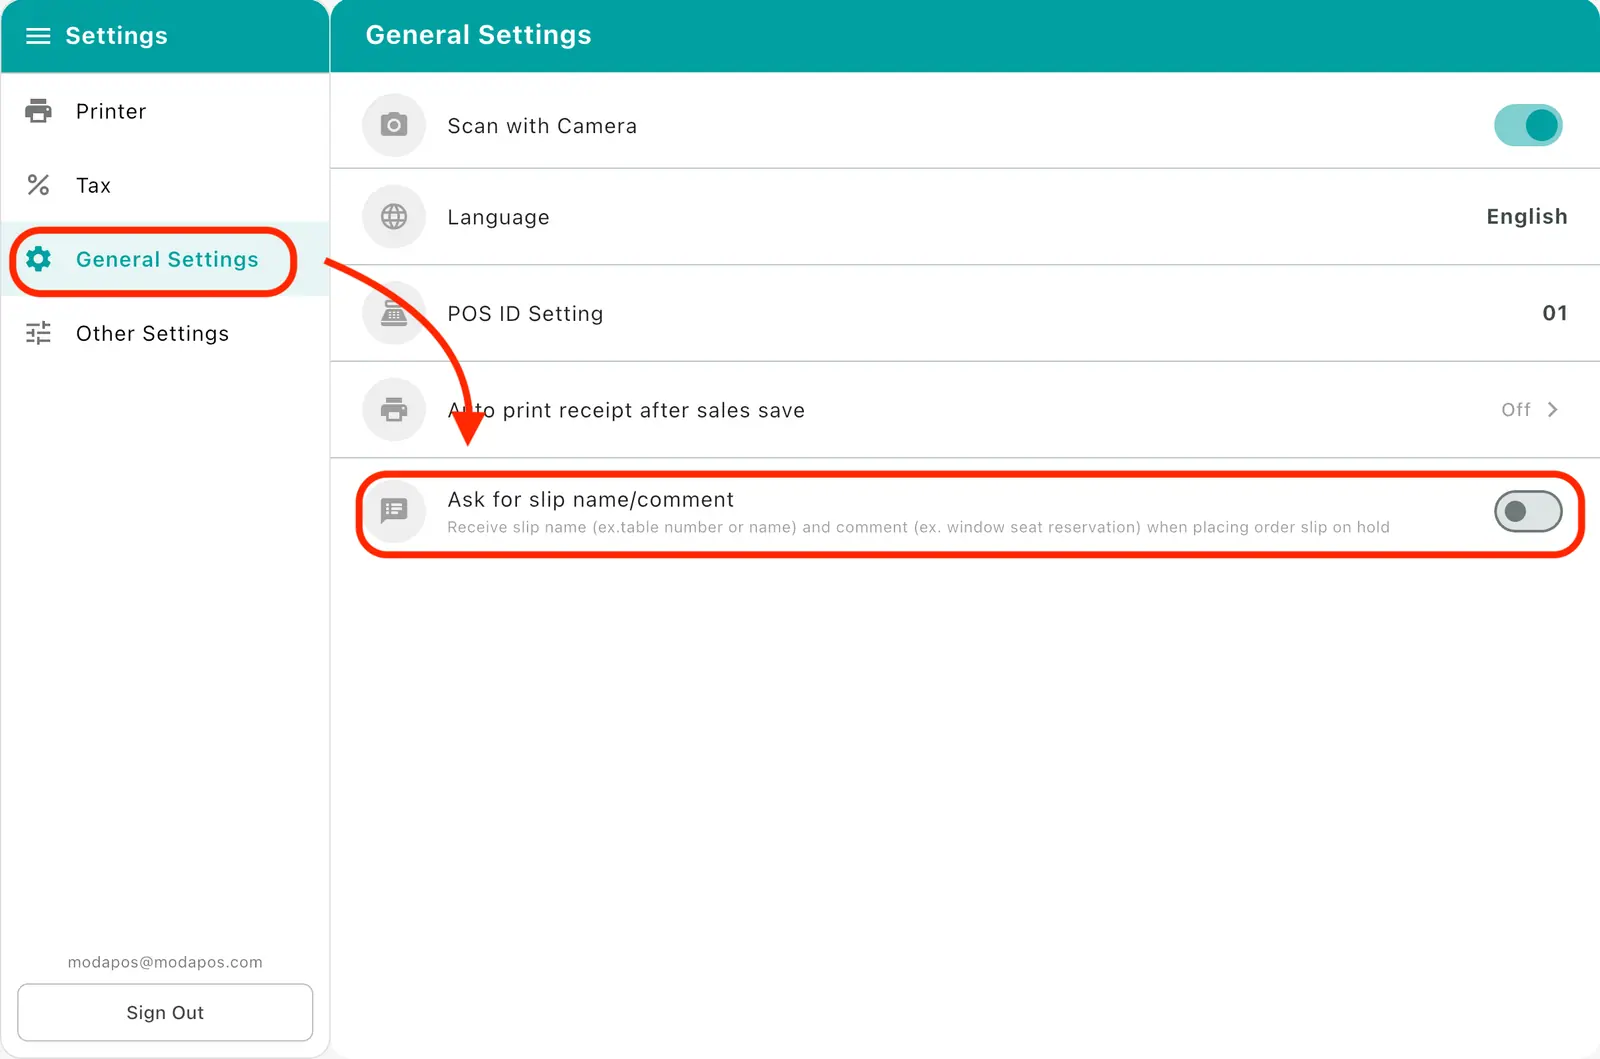
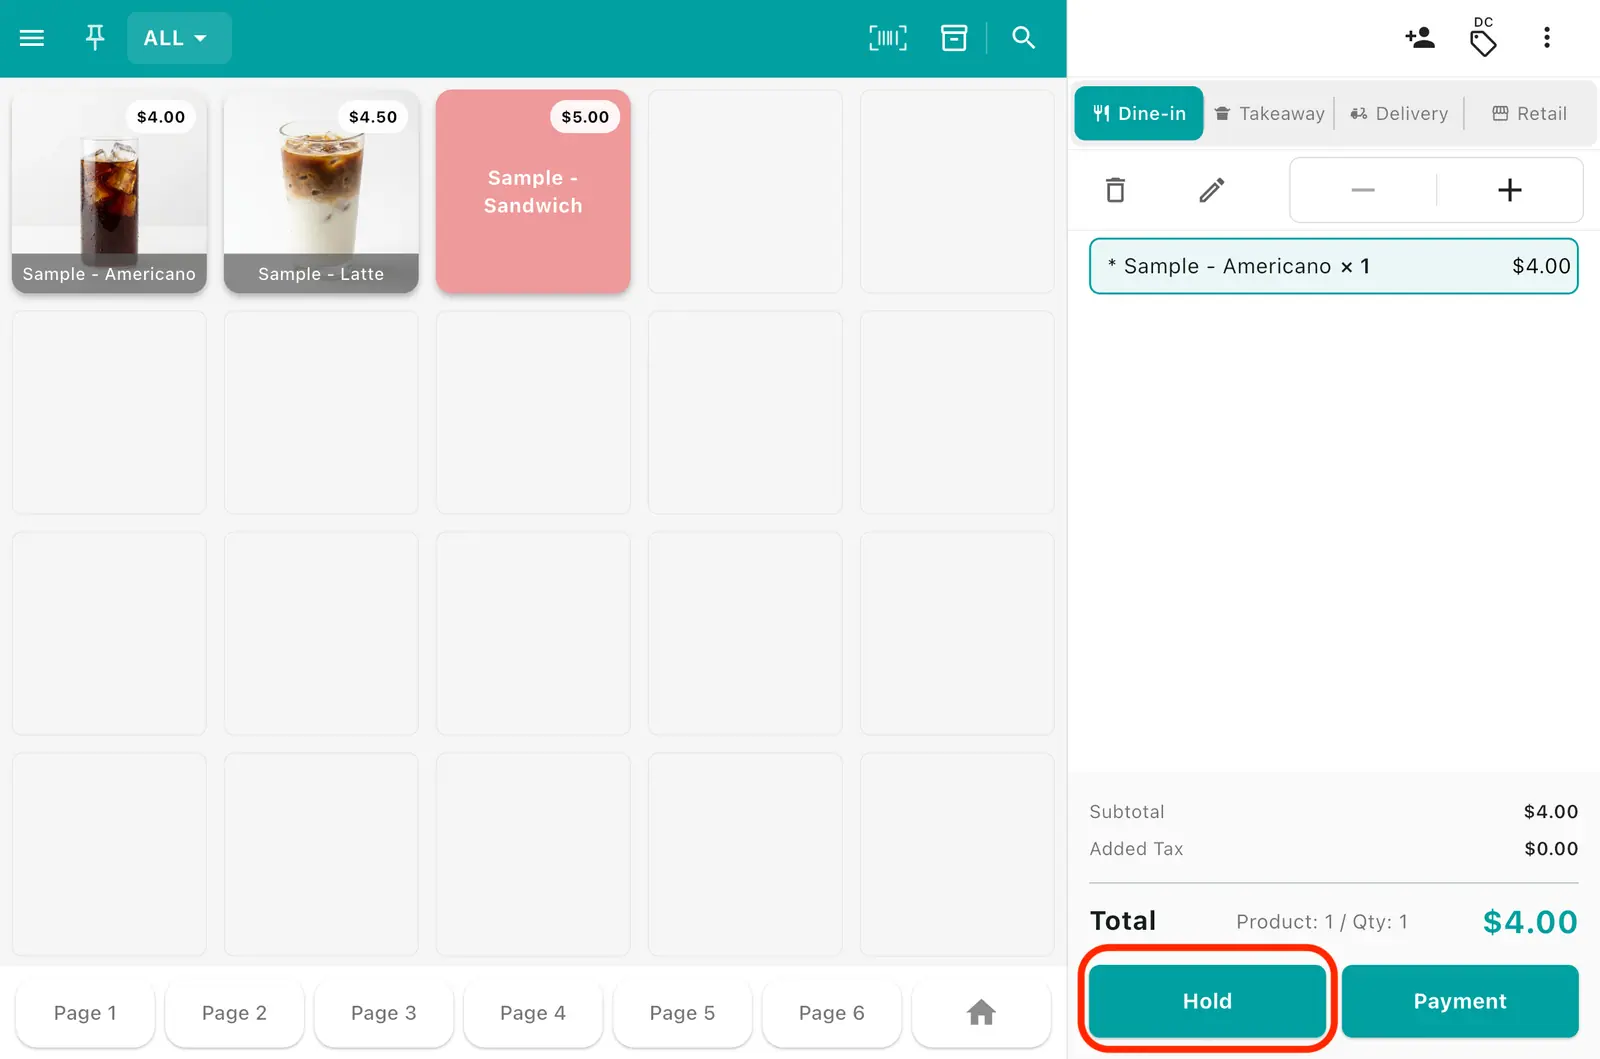
2Tap the Hold button at the bottom right of the sales screen. It saves immediately with no name or comment.
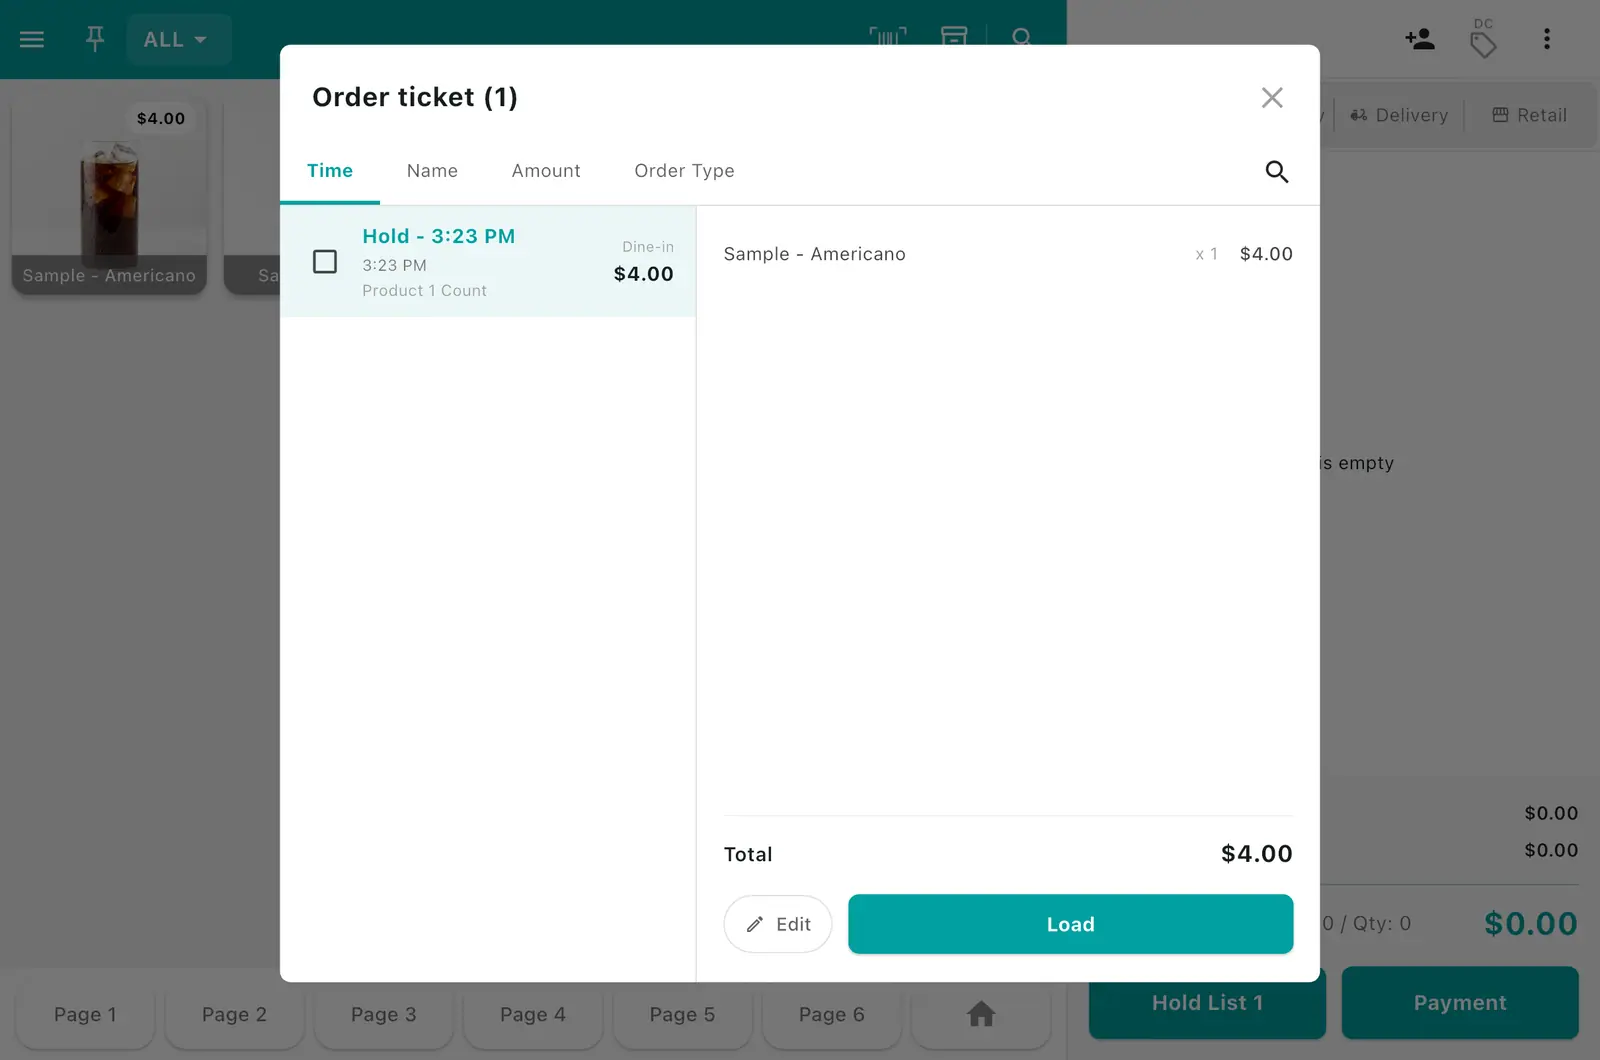
3The held ticket appears in the order list popup.
Order mode — switch on
1Tap General in the left side menu, then turn on the Ask for ticket name/comment switch.
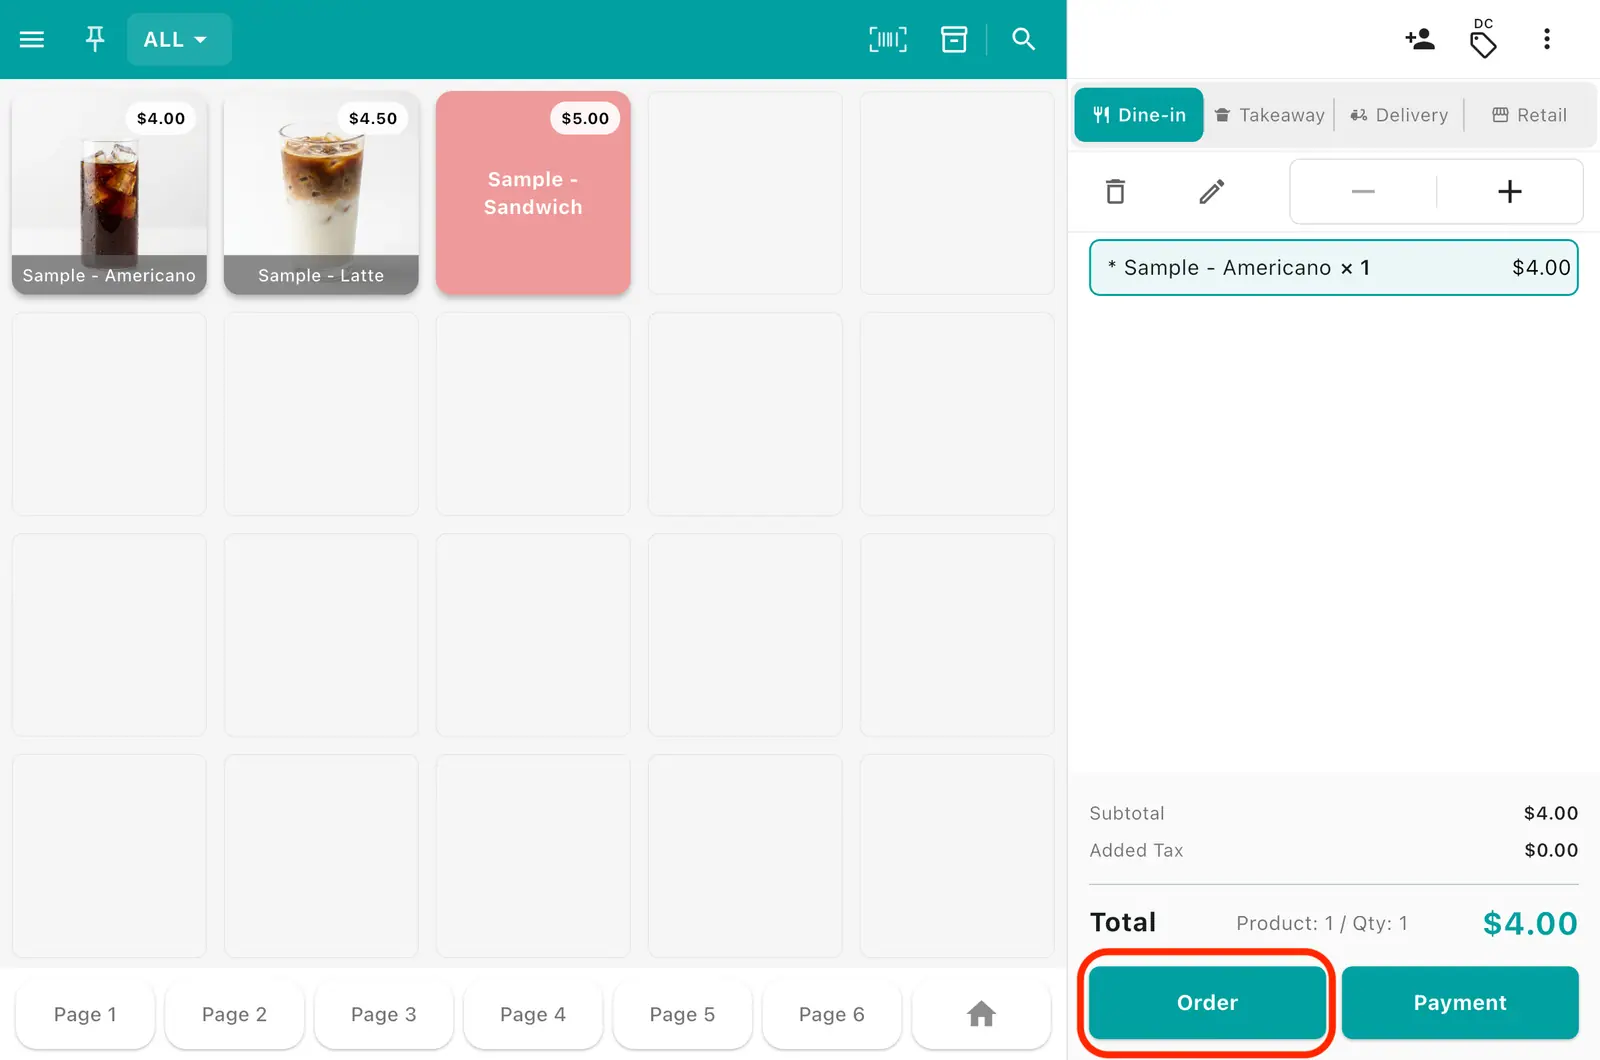
2Tap the Order button at the bottom right of the sales screen.
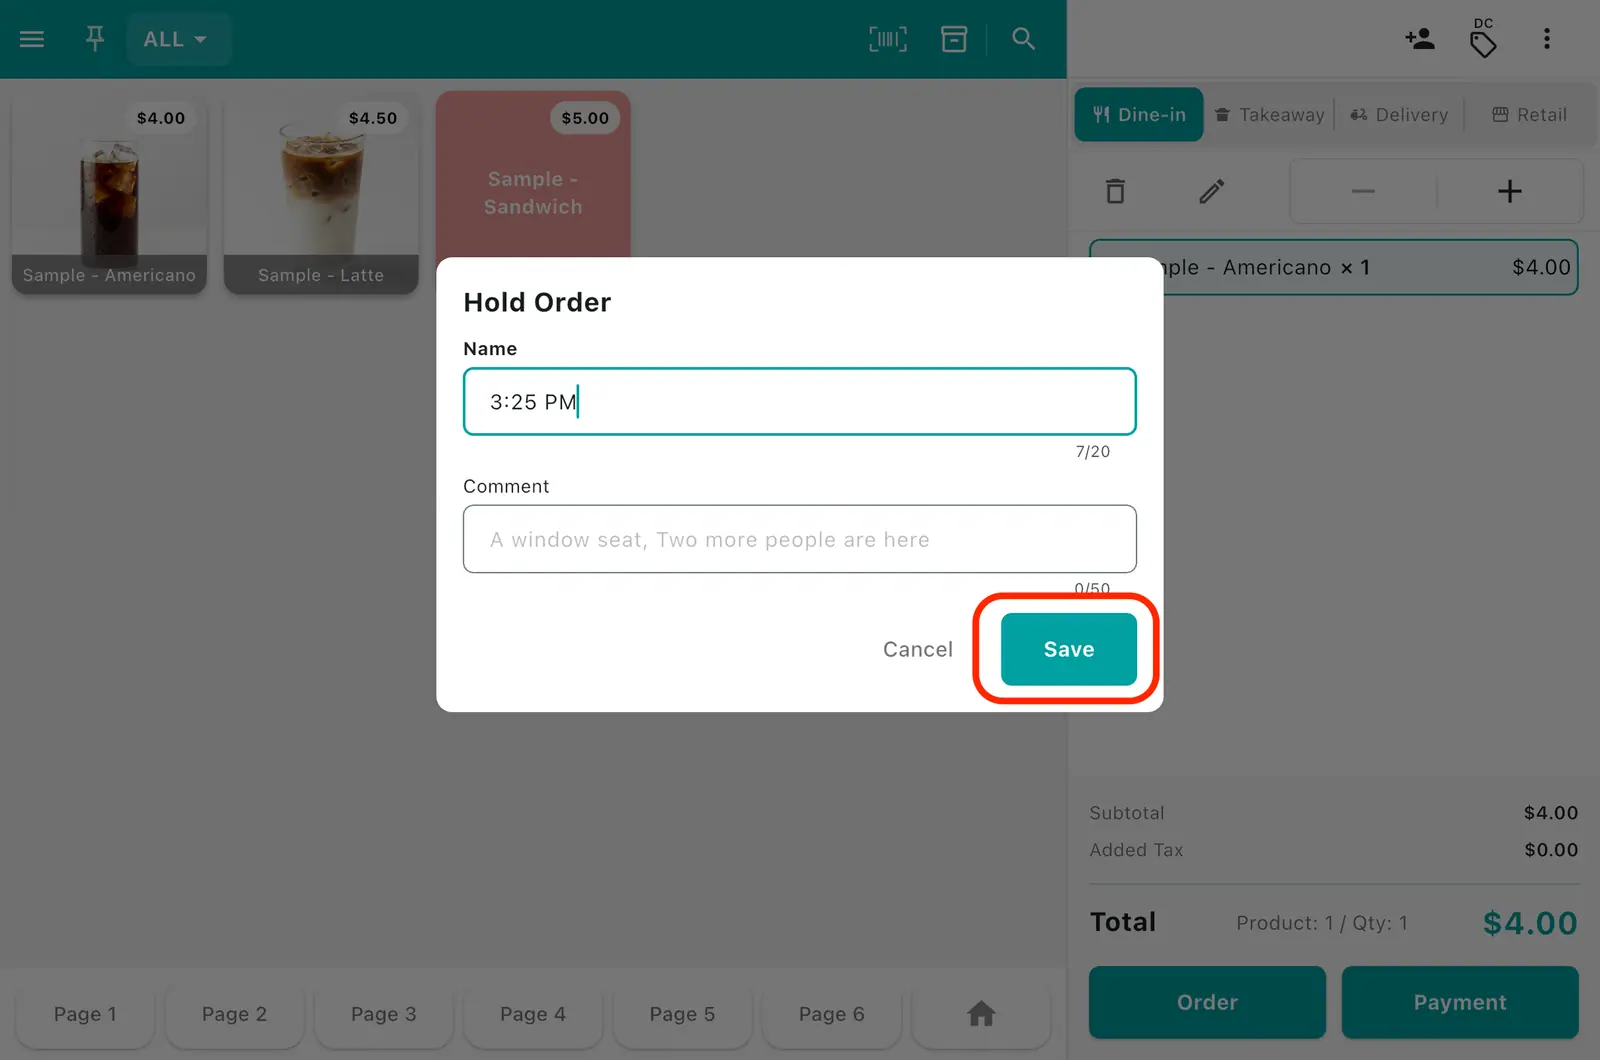
3A popup asks for the ticket name and comment. After you enter them and save, an order ticket prints.
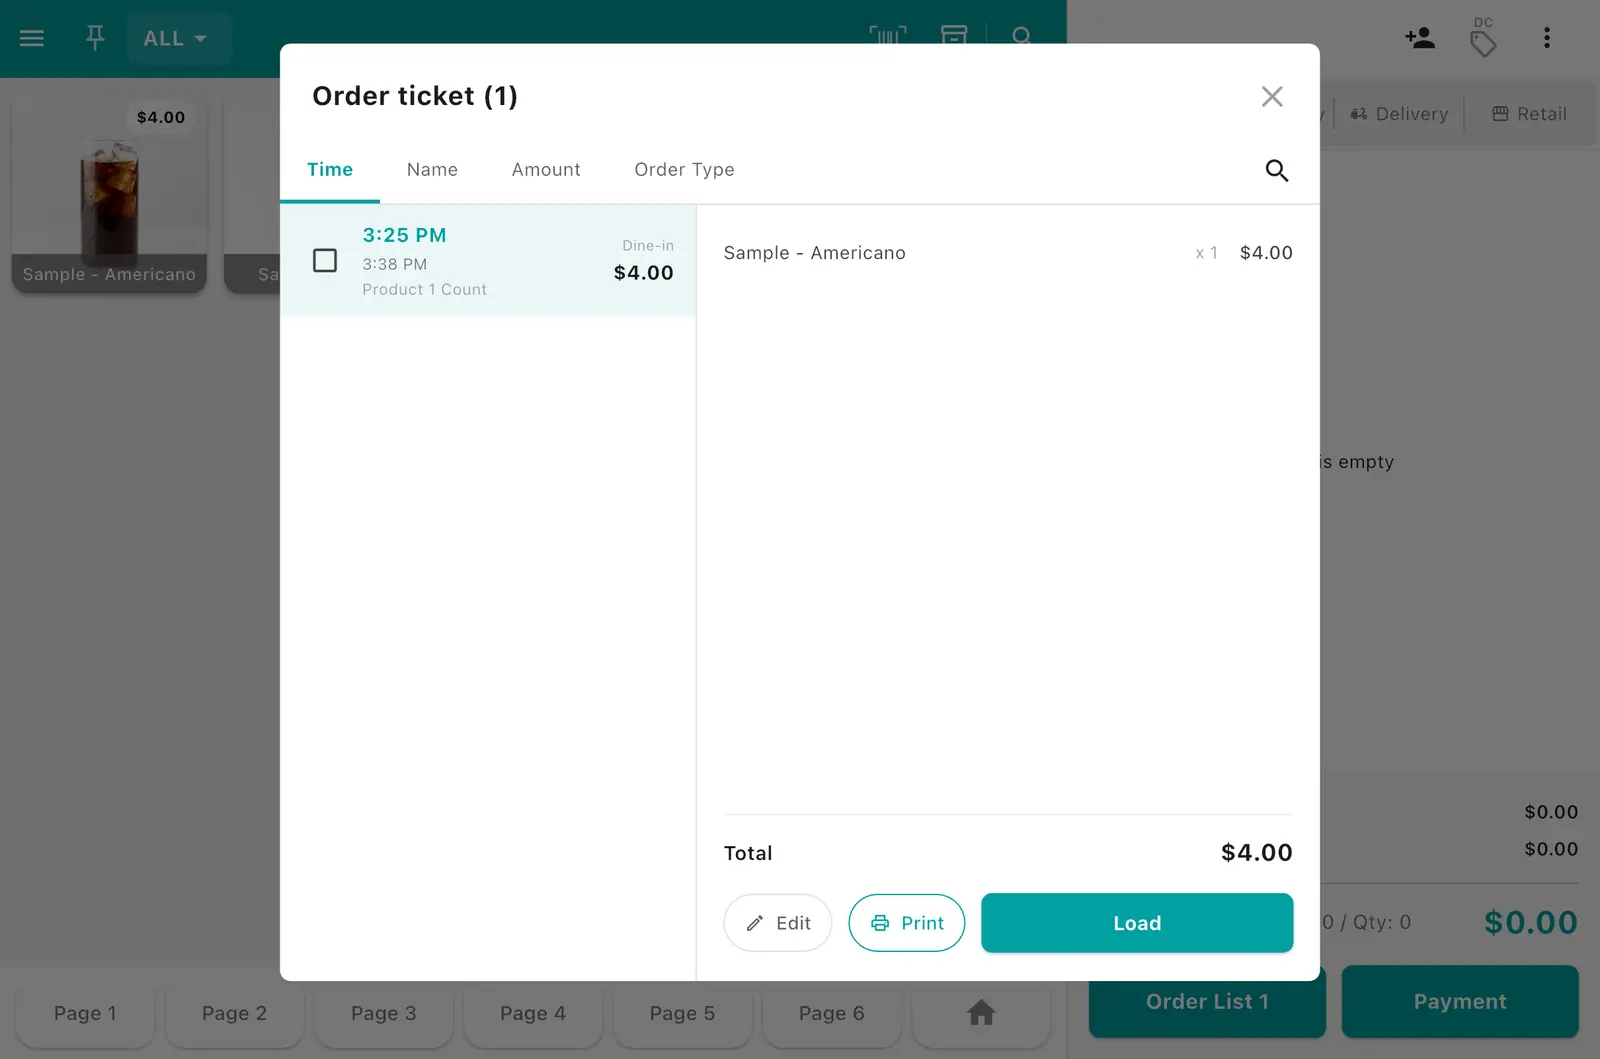
4The order appears in the order list popup.
Already-saved tickets keep the mode they were saved with. Changing the setting later does not change the type (Order/Hold) of past tickets.