
Selling
1. The sales screen
1≡ (menu) → Sell. The screen has five main parts.
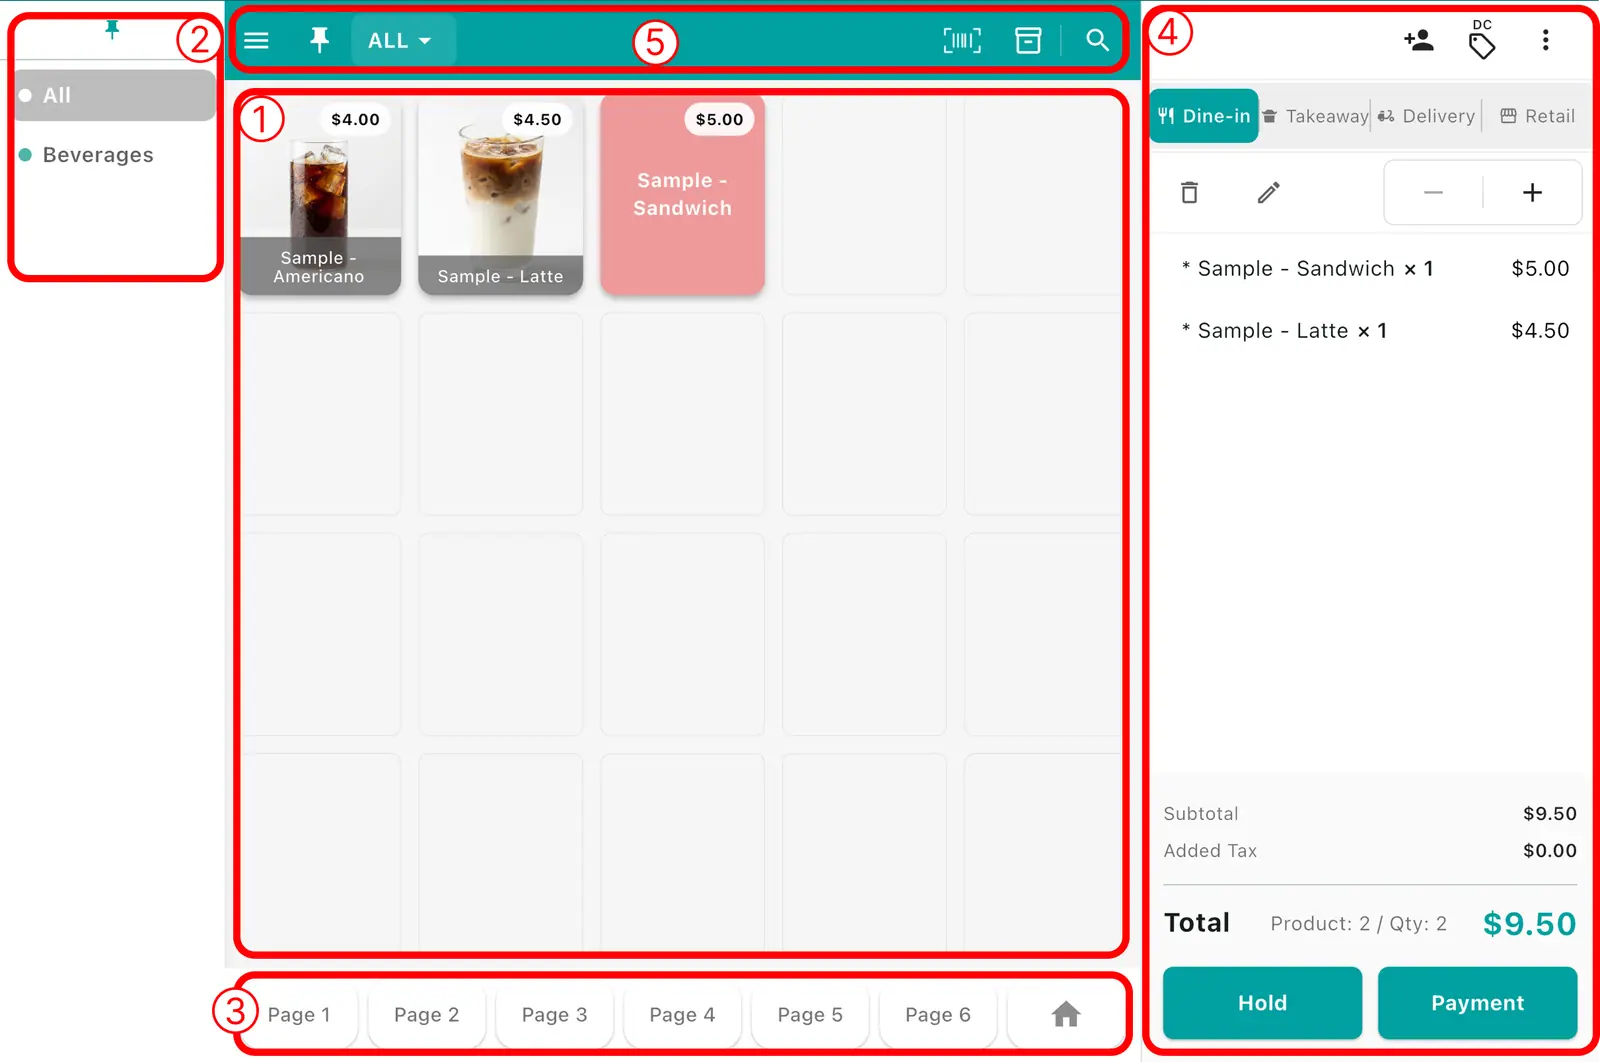
| Area | Contents |
|---|---|
| 1 | Product buttons (switch between the Favourites / Products tabs) |
| 2 | Category list; tap one to show only that category’s products |
| 3 | Tabs to switch between favourite pages and all products |
| 4 | Cart (items added, amount, pay button) |
| 5 | A bar of common buttons: menu, category, scan barcode, search, and more |
2. Adding items
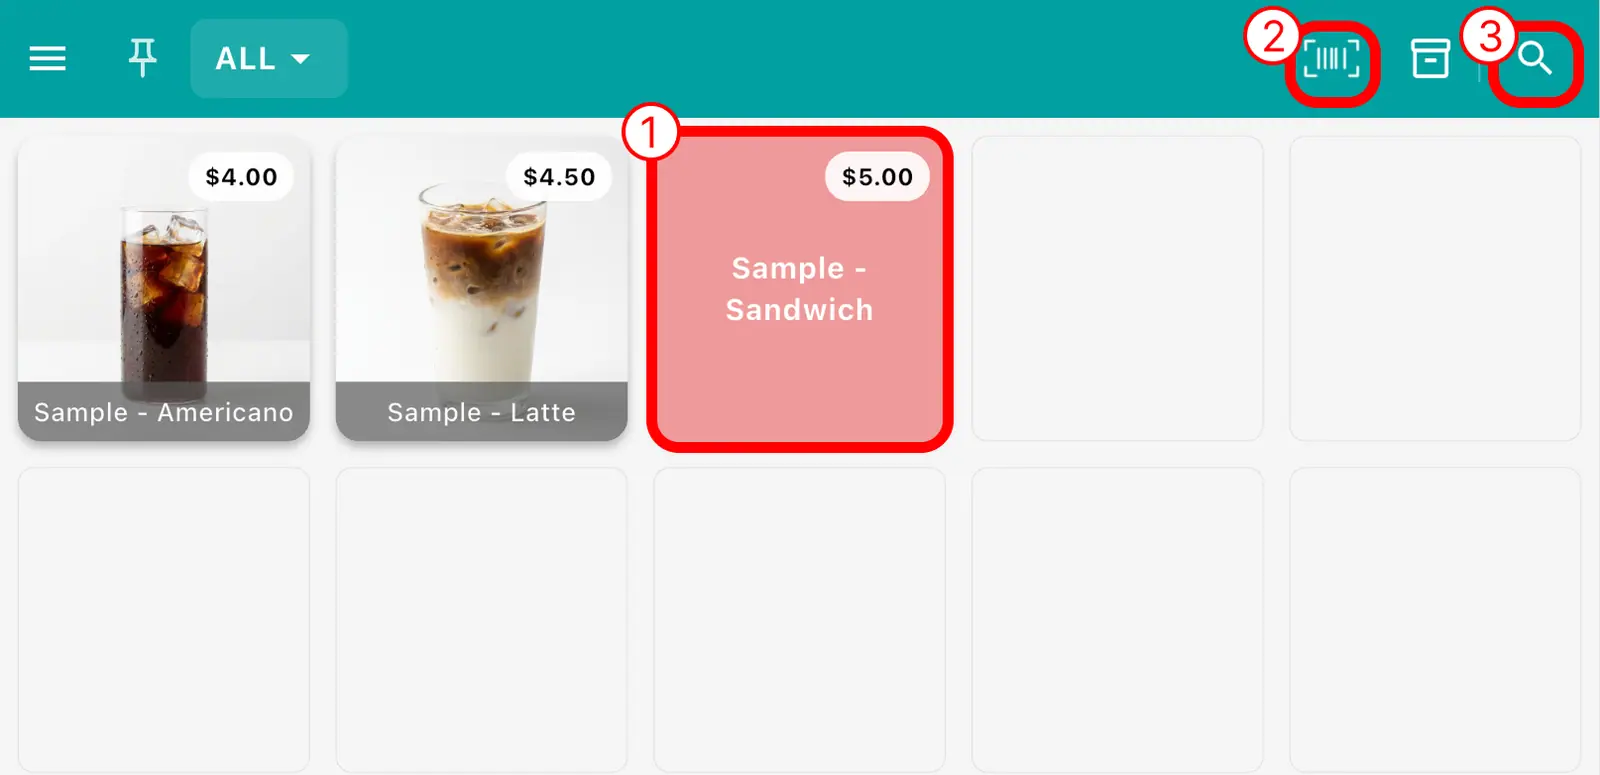
1Methods 1 · 2 · 3 in the table below are each at this spot on the screen.
| Method | Description |
|---|---|
| 1. Tap to add | Tap a product button in the middle to add it to the cart. Tap a category on the left to show only that category |
| 2. Scan a barcode | Scanning with a barcode scanner adds it straight to the cart. With no scanner, use the Scan barcode button at the top for the tablet camera |
| 3. Search | Tap Search at the top and type a product name. Handy in stores with many products |
Connecting a scanner — Printer & hardware setup
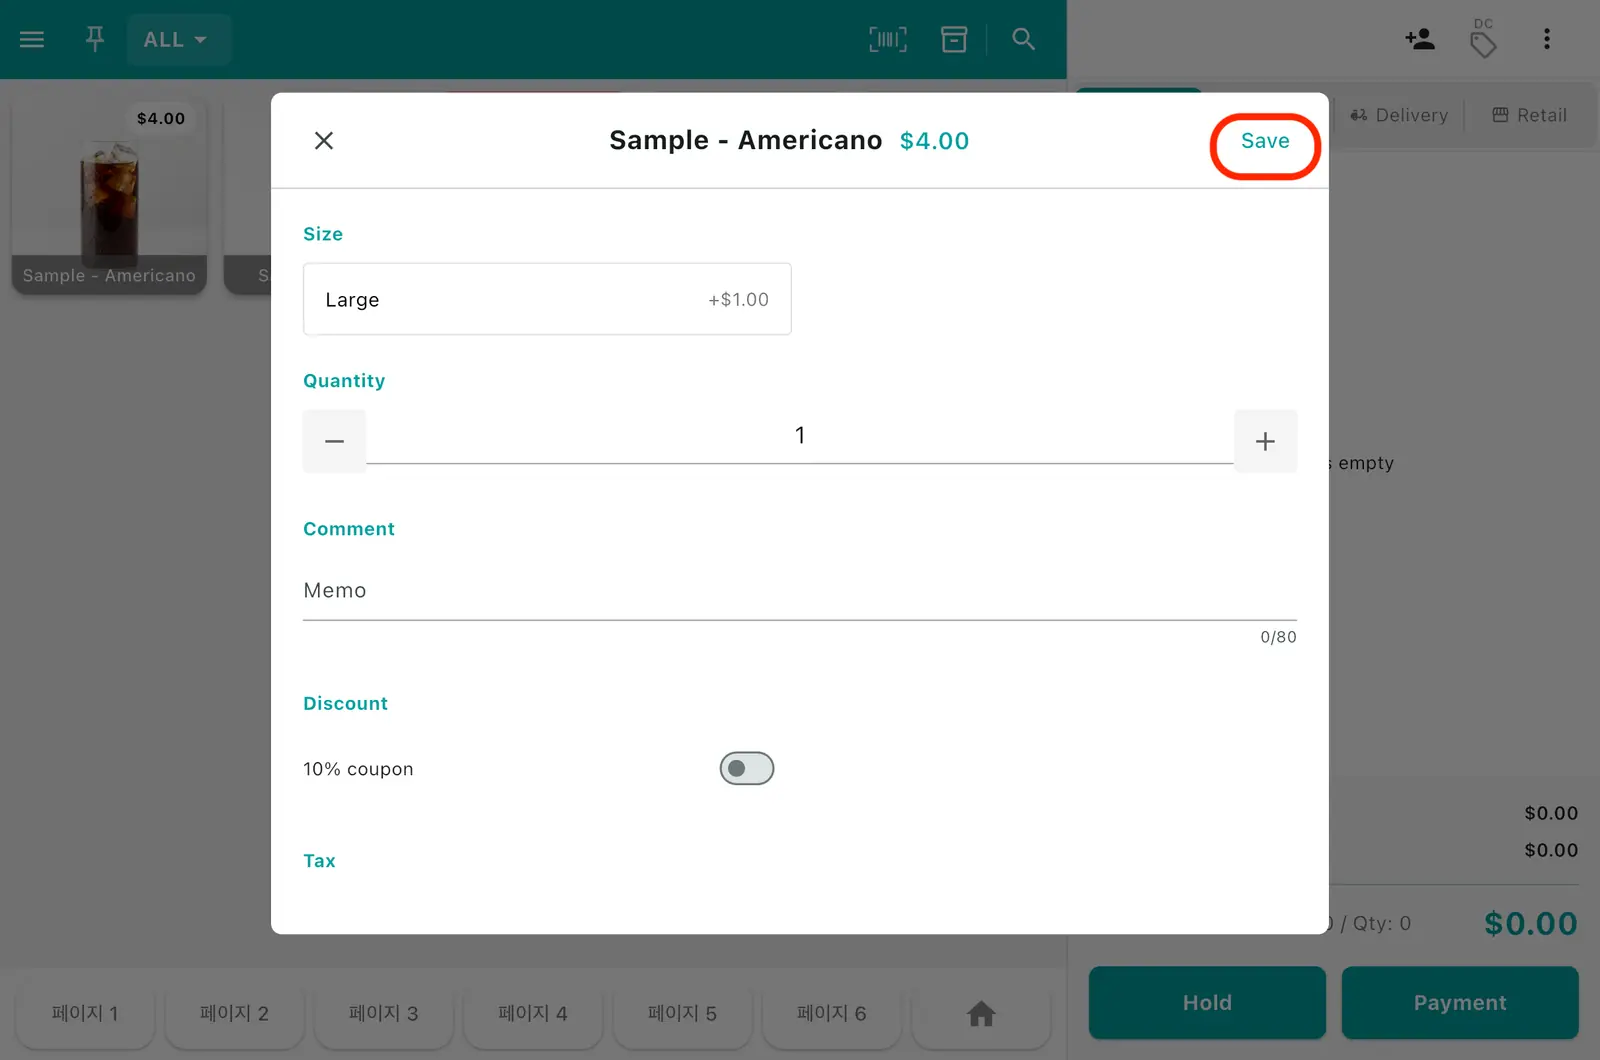
Products with add-ons open an option picker when tapped; the option price is added on. Products registered without a price open a price entry dialog — type the amount and confirm.
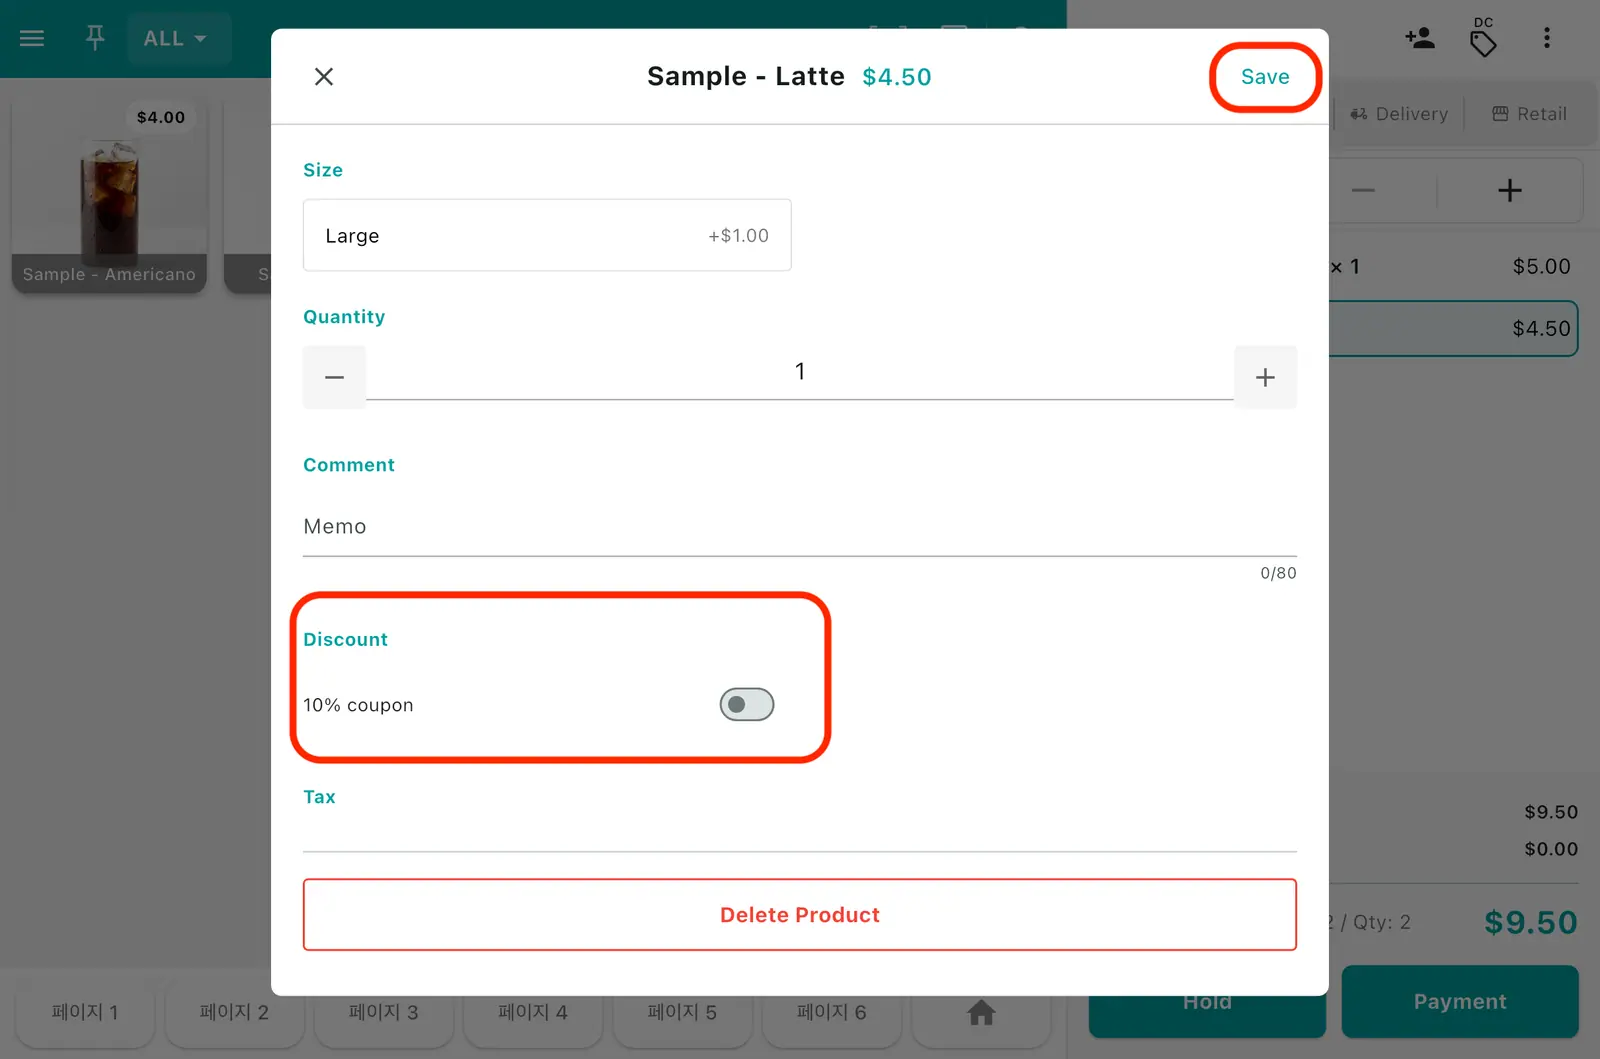
1In the option picker, set the add-ons · quantity · discount · tax, then tap Save at the top right.
3. Working with the cart
First, pick the order type: Dine-in · Takeaway · Delivery · Retail.
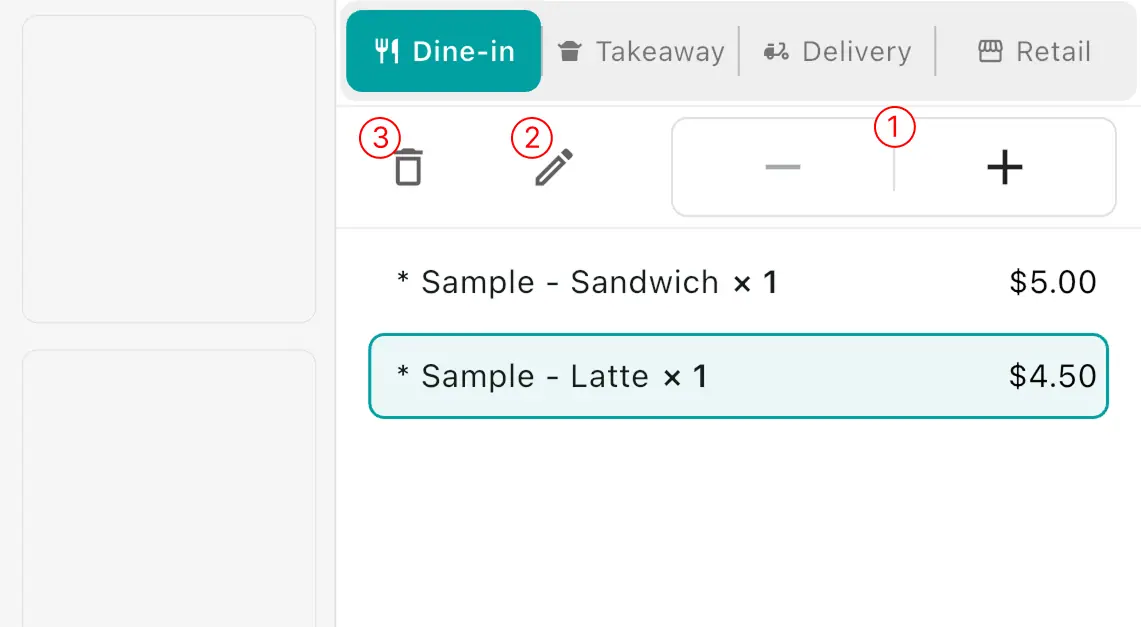
1At the top of the cart you can use the ① change quantity, ② edit item, and ③ remove item buttons.
| Action | How |
|---|---|
| 1. Change quantity | Increase or decrease the quantity |
| 2. Edit item | Change the item’s options and more |
| 3. Remove item | Delete the item from the cart |
To switch which item you are editing, tap that item in the cart.
4. Clearing the ticket
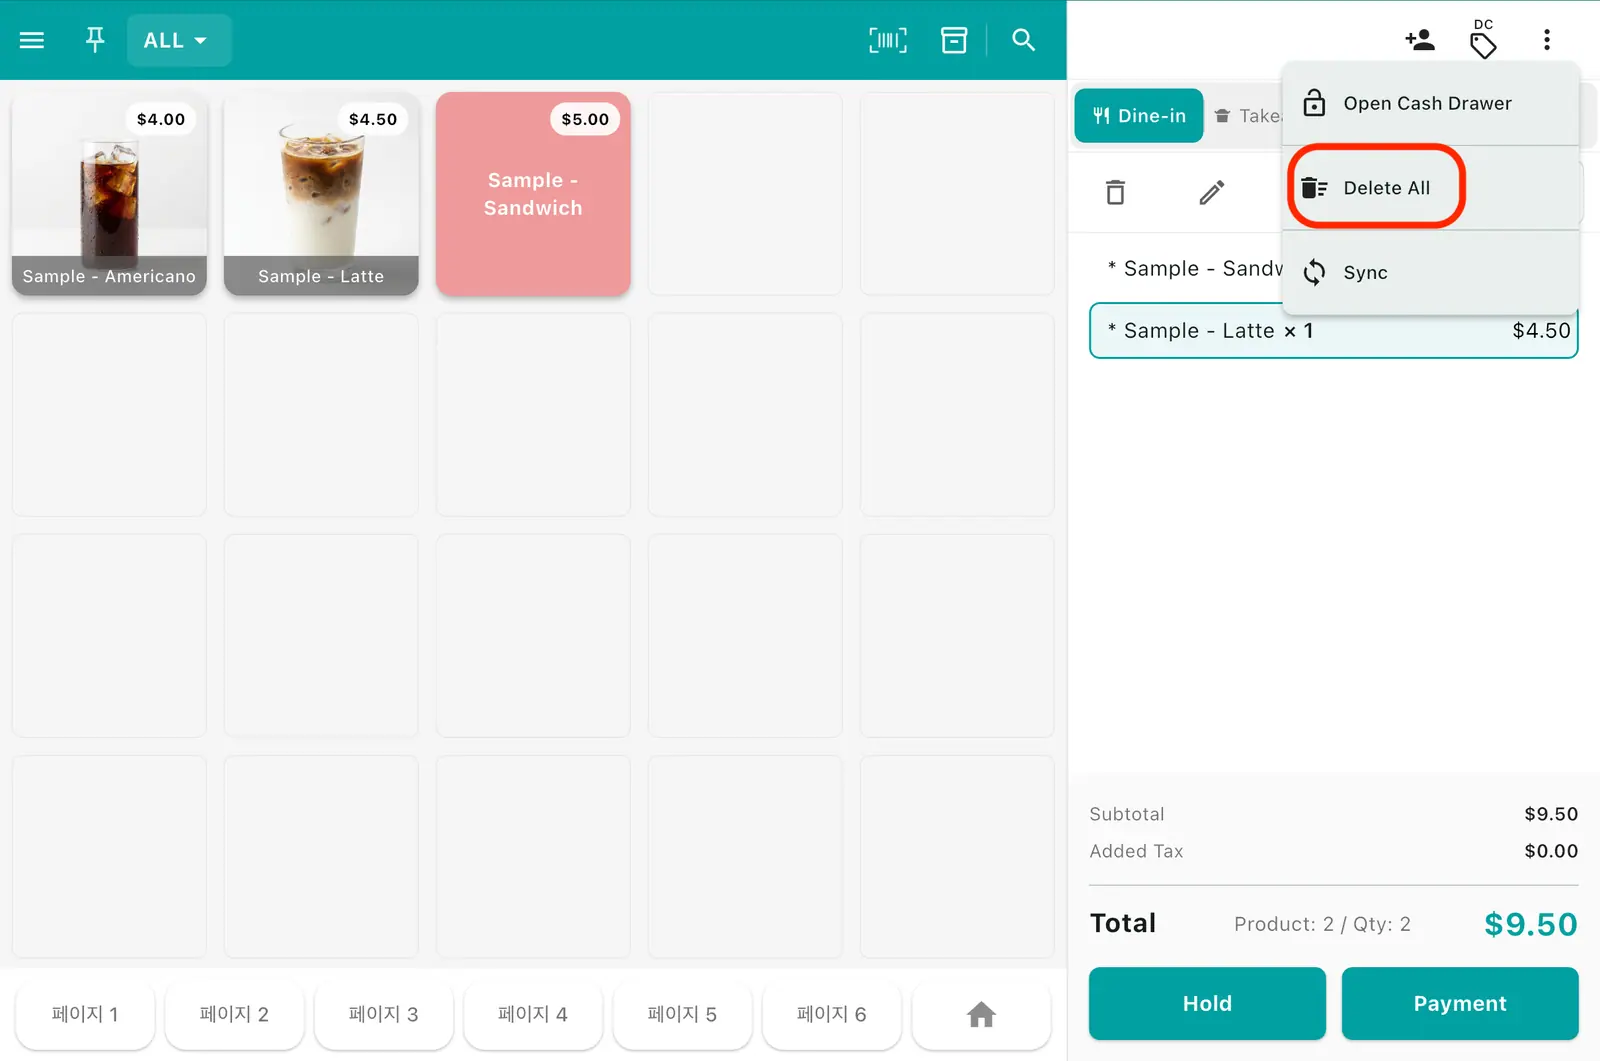
To empty everything you have added at once, use Delete All.
1Tap
⋮at the top right.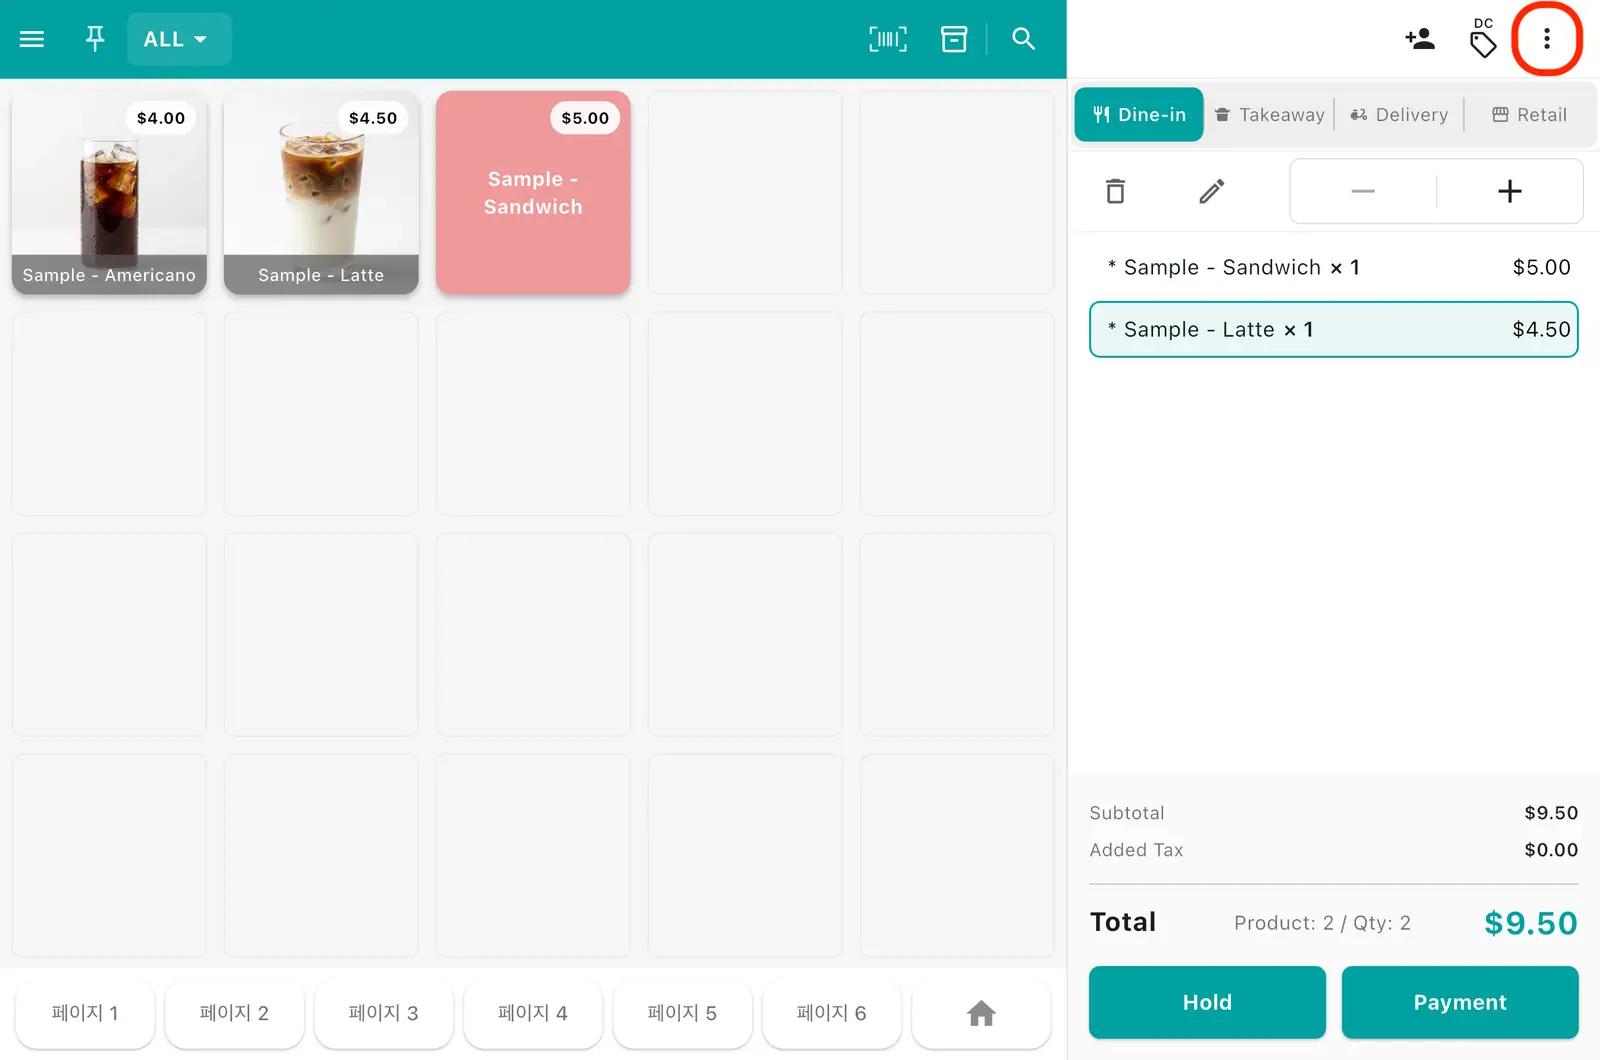
2Choose Delete All from the dropdown to empty the cart.
5. Discounts
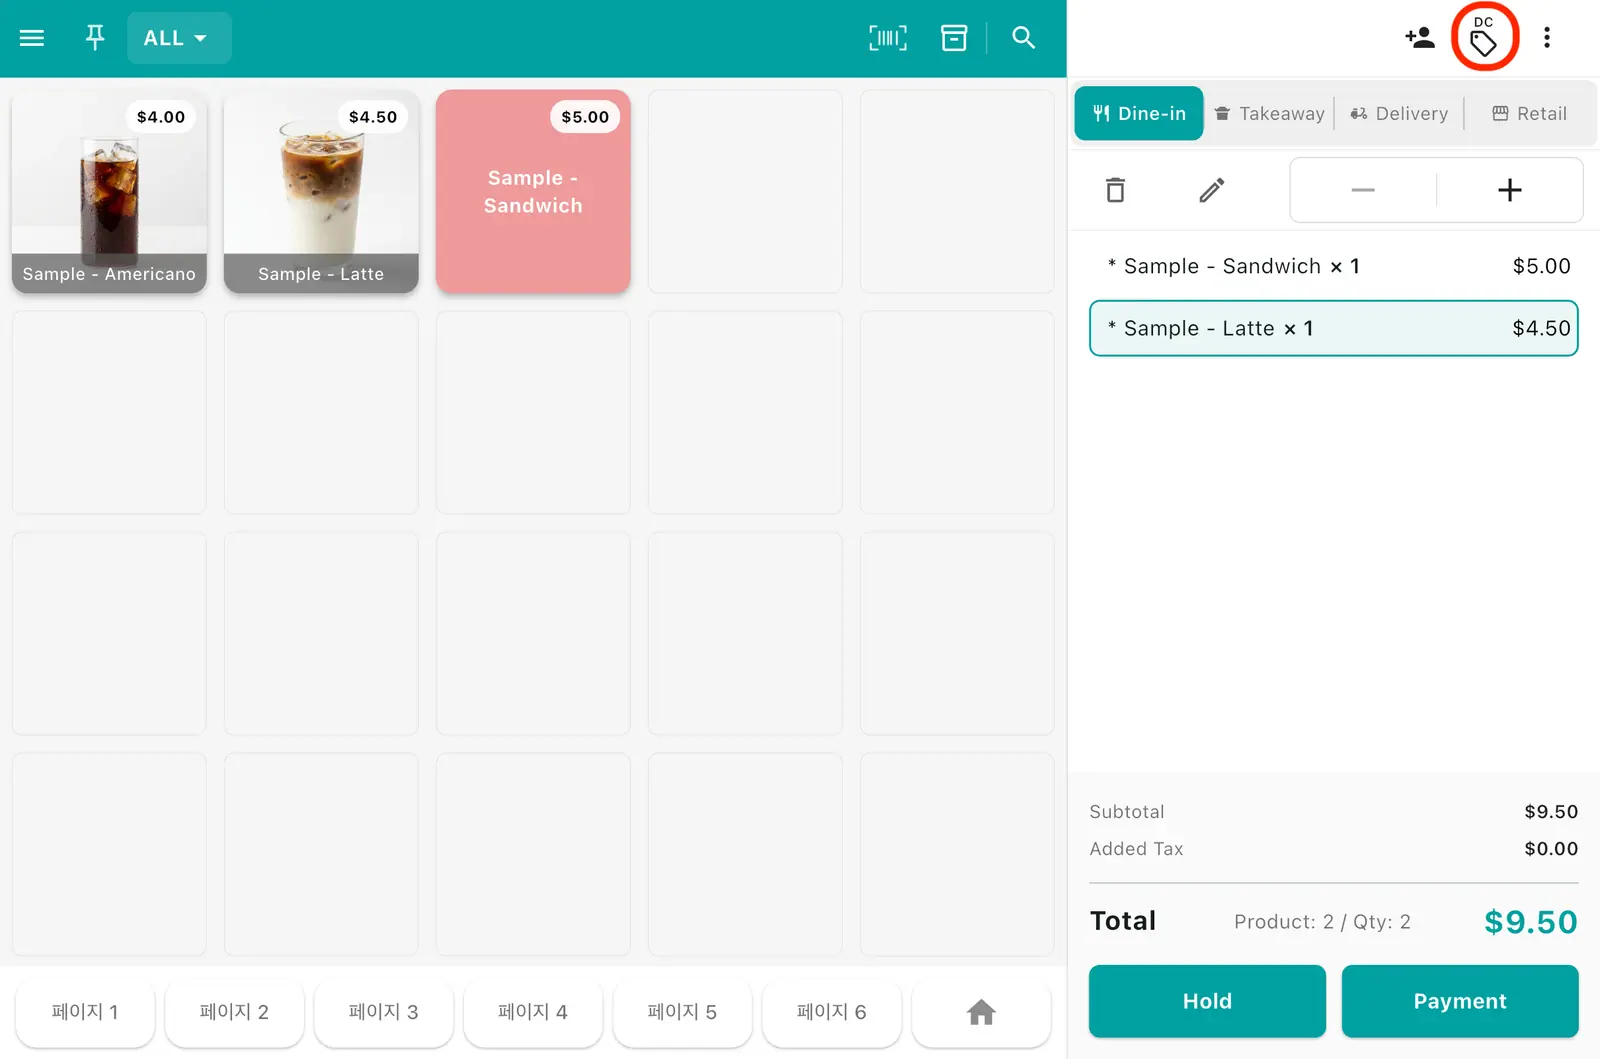
Discount the whole order — tap the Discount button at the top right of the cart and pick a type.
1Tap the Discount button at the top right of the cart.
2In the Discount all popup, set a percentage or amount, or pick a discount you set up in advance.
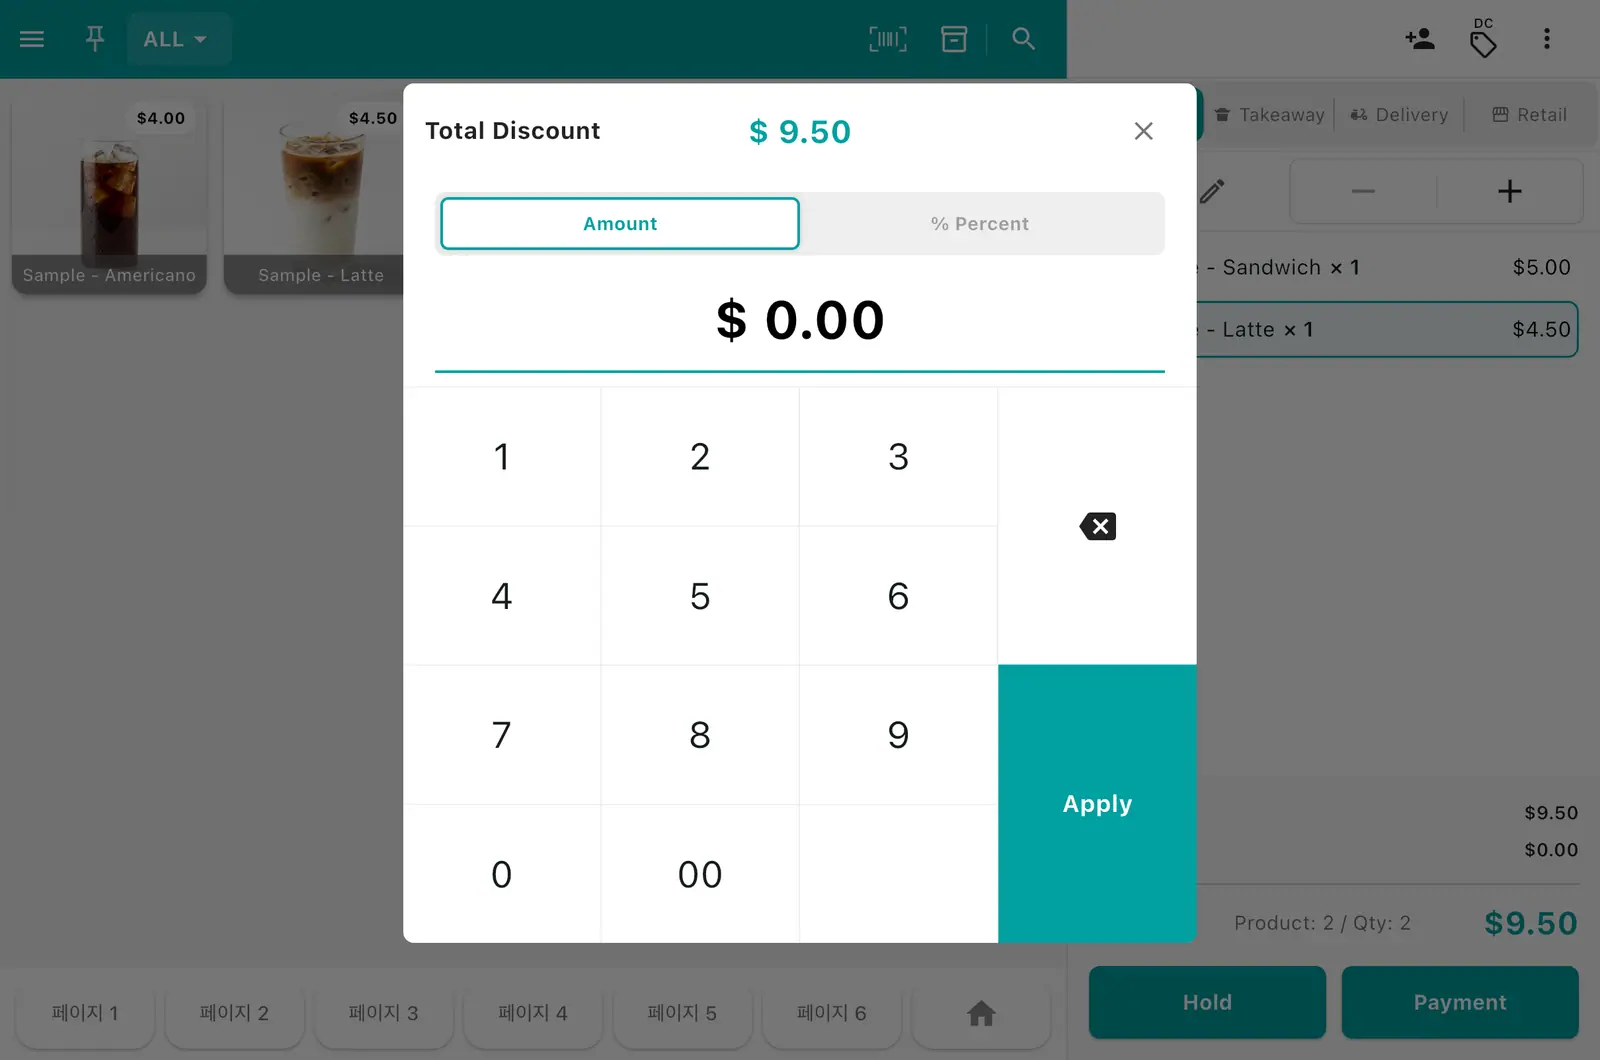
| Type | Example |
|---|---|
| Percentage | 10 → 10% off the total |
| Amount | 1000 → 1,000 off |
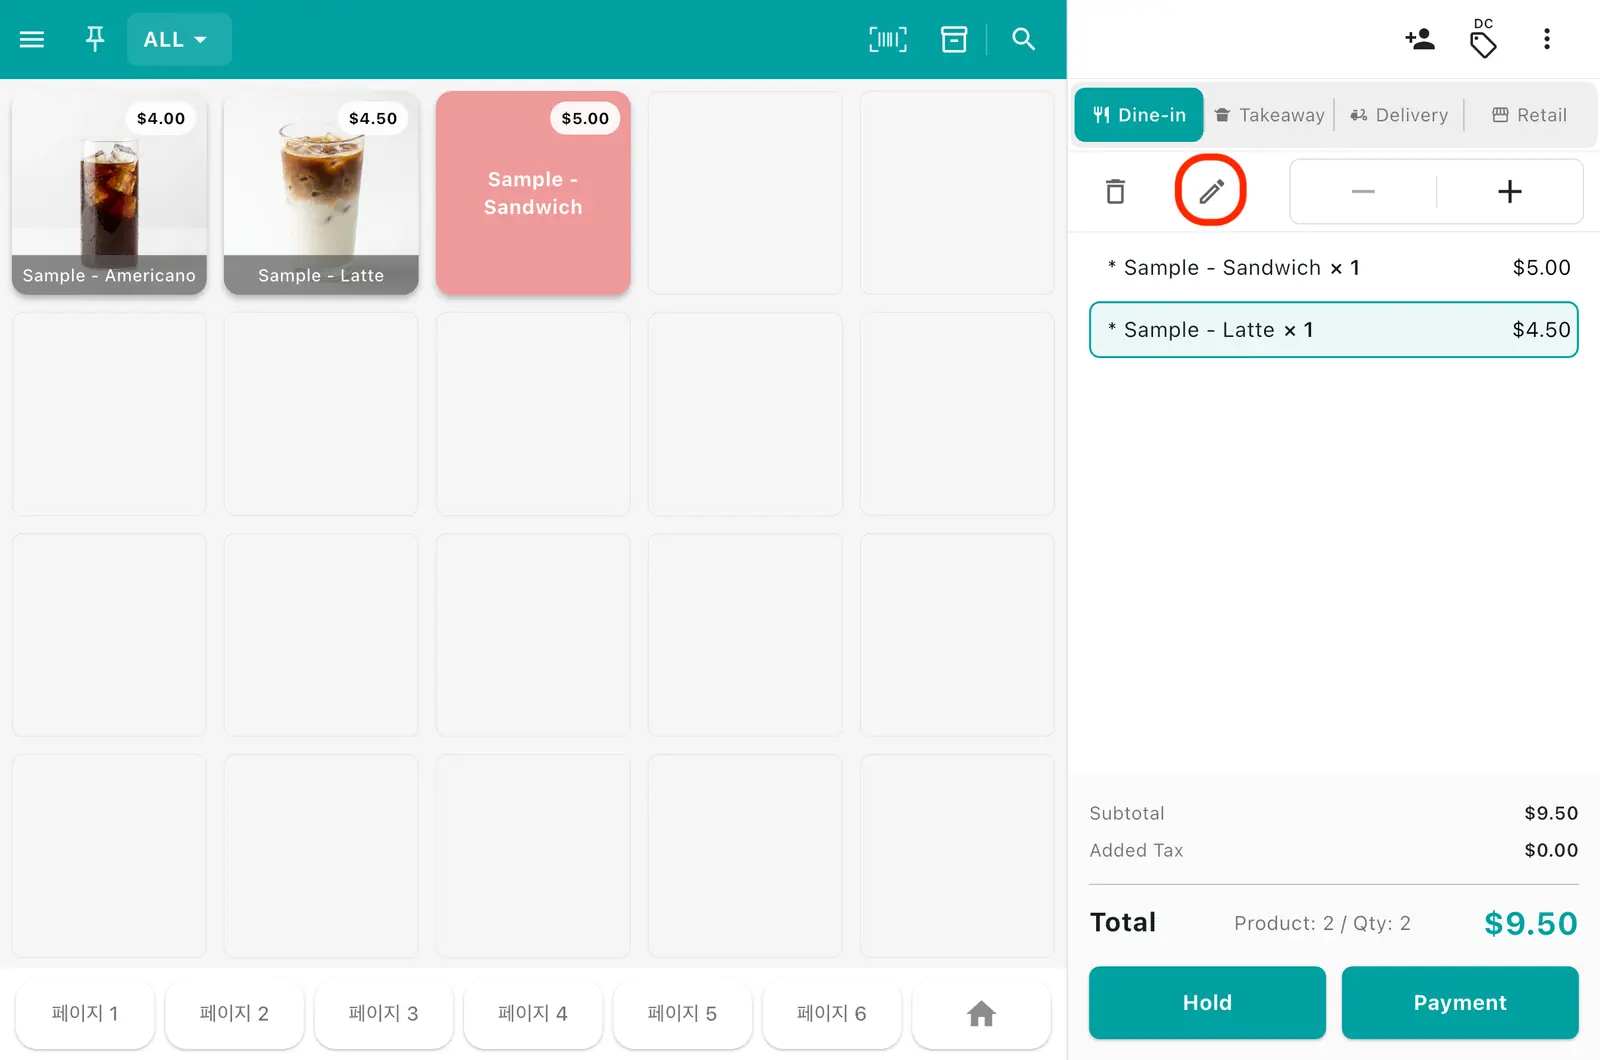
Discount a single item — tap that item’s Edit button in the cart, turn on a discount you set up in advance, and save.
1Tap the item’s Edit button in the cart.
2In the option picker, turn on a preset discount and tap Save at the top right.
Creating discount items — Registering products
6. Take payment
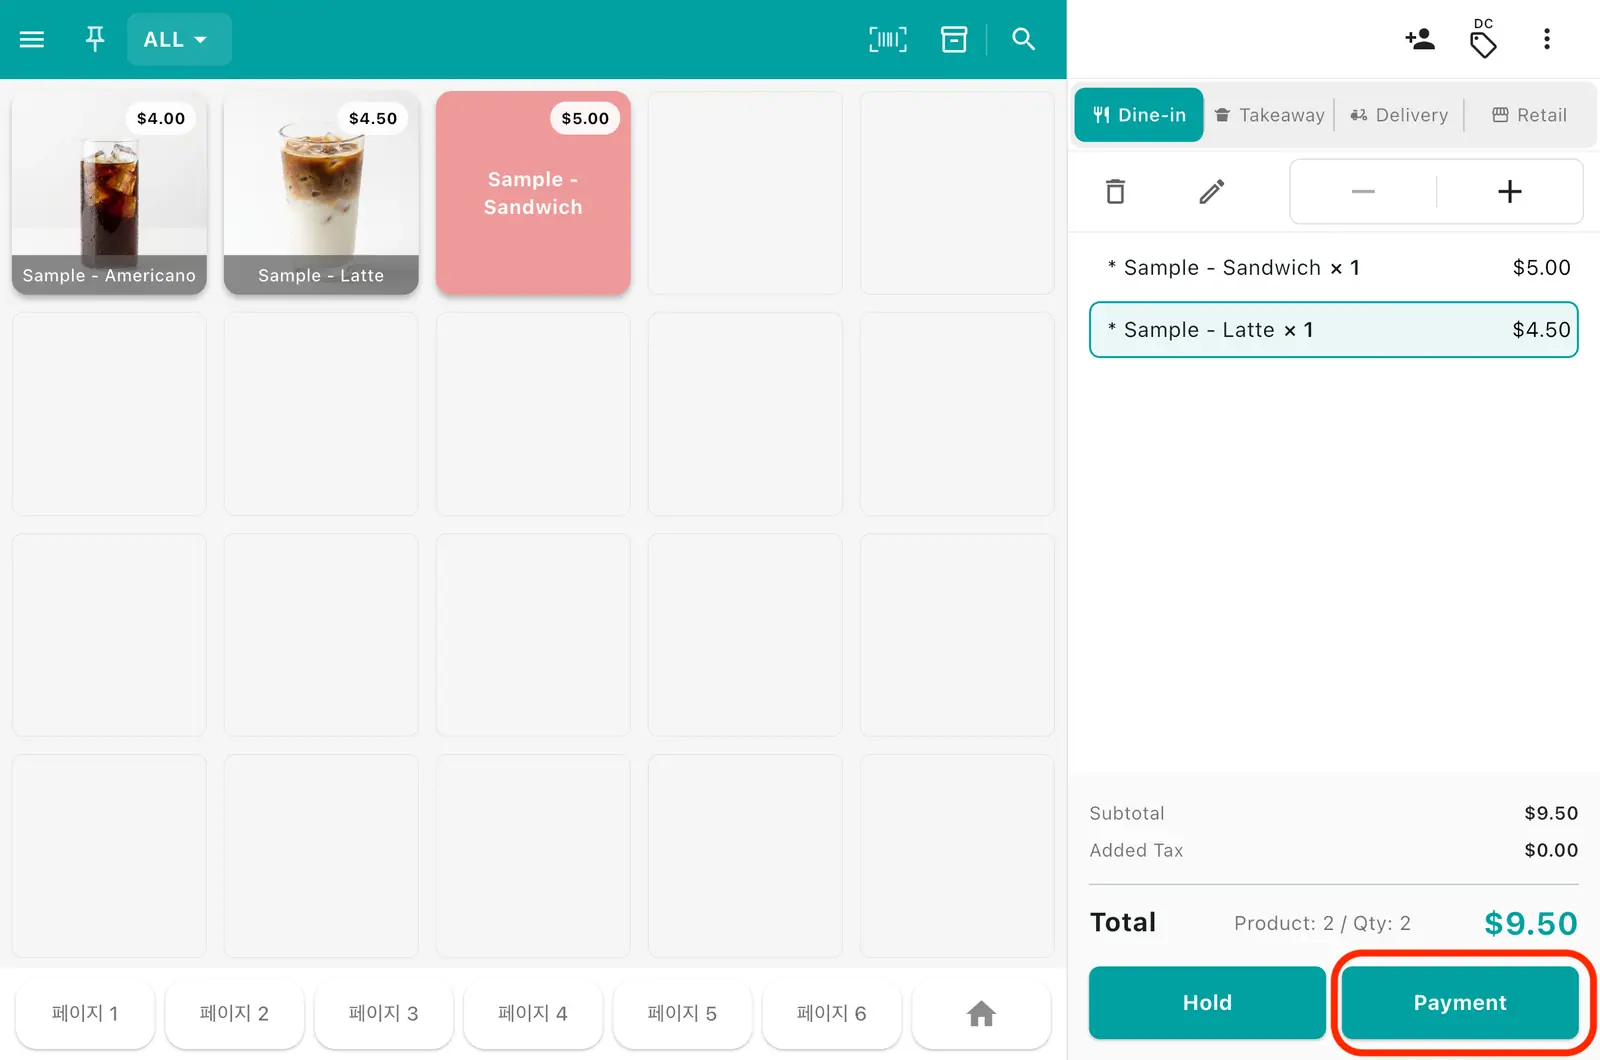
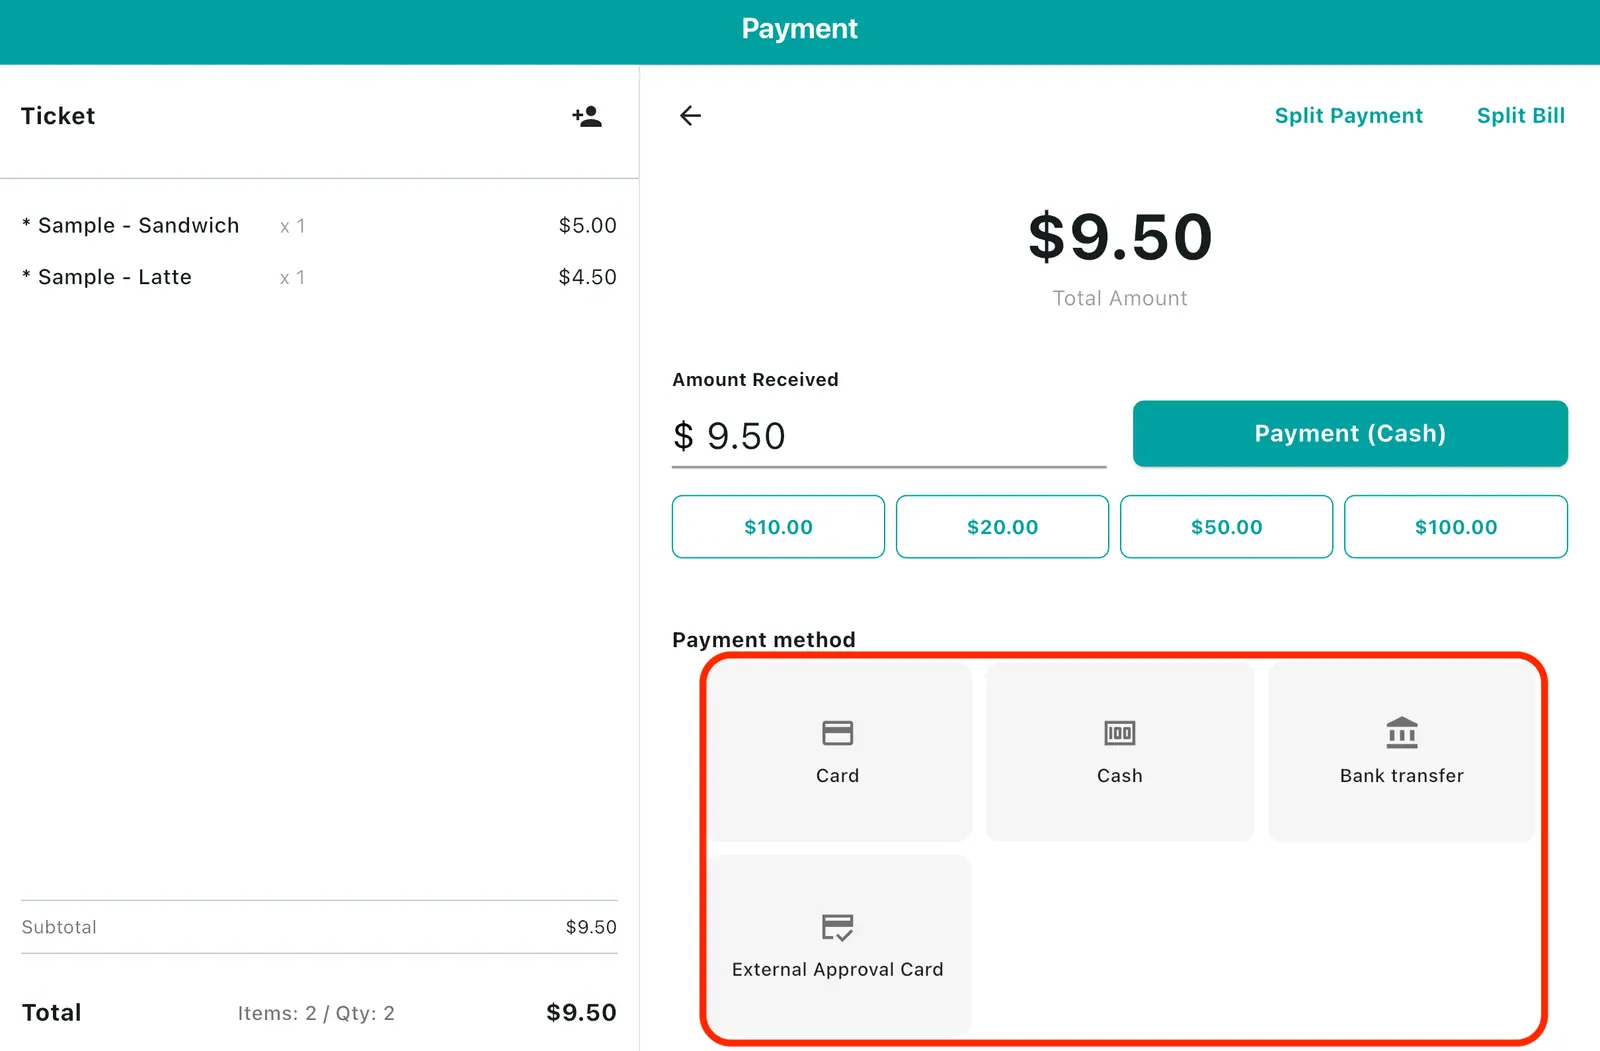
Once the cart looks right, tap the Pay button at the bottom right. On the payment screen, tap the payment method you are taking (cash, card, and so on); payment runs, and when it completes the sale is done. A receipt prints and the cart clears, so you can serve the next customer right away.
1Tap the Pay button at the bottom right of the cart.
2On the payment screen, tap the payment method (cash, card, etc.); payment runs and the sale completes.
7. Completing the sale
1When payment finishes, the sale-complete screen opens.
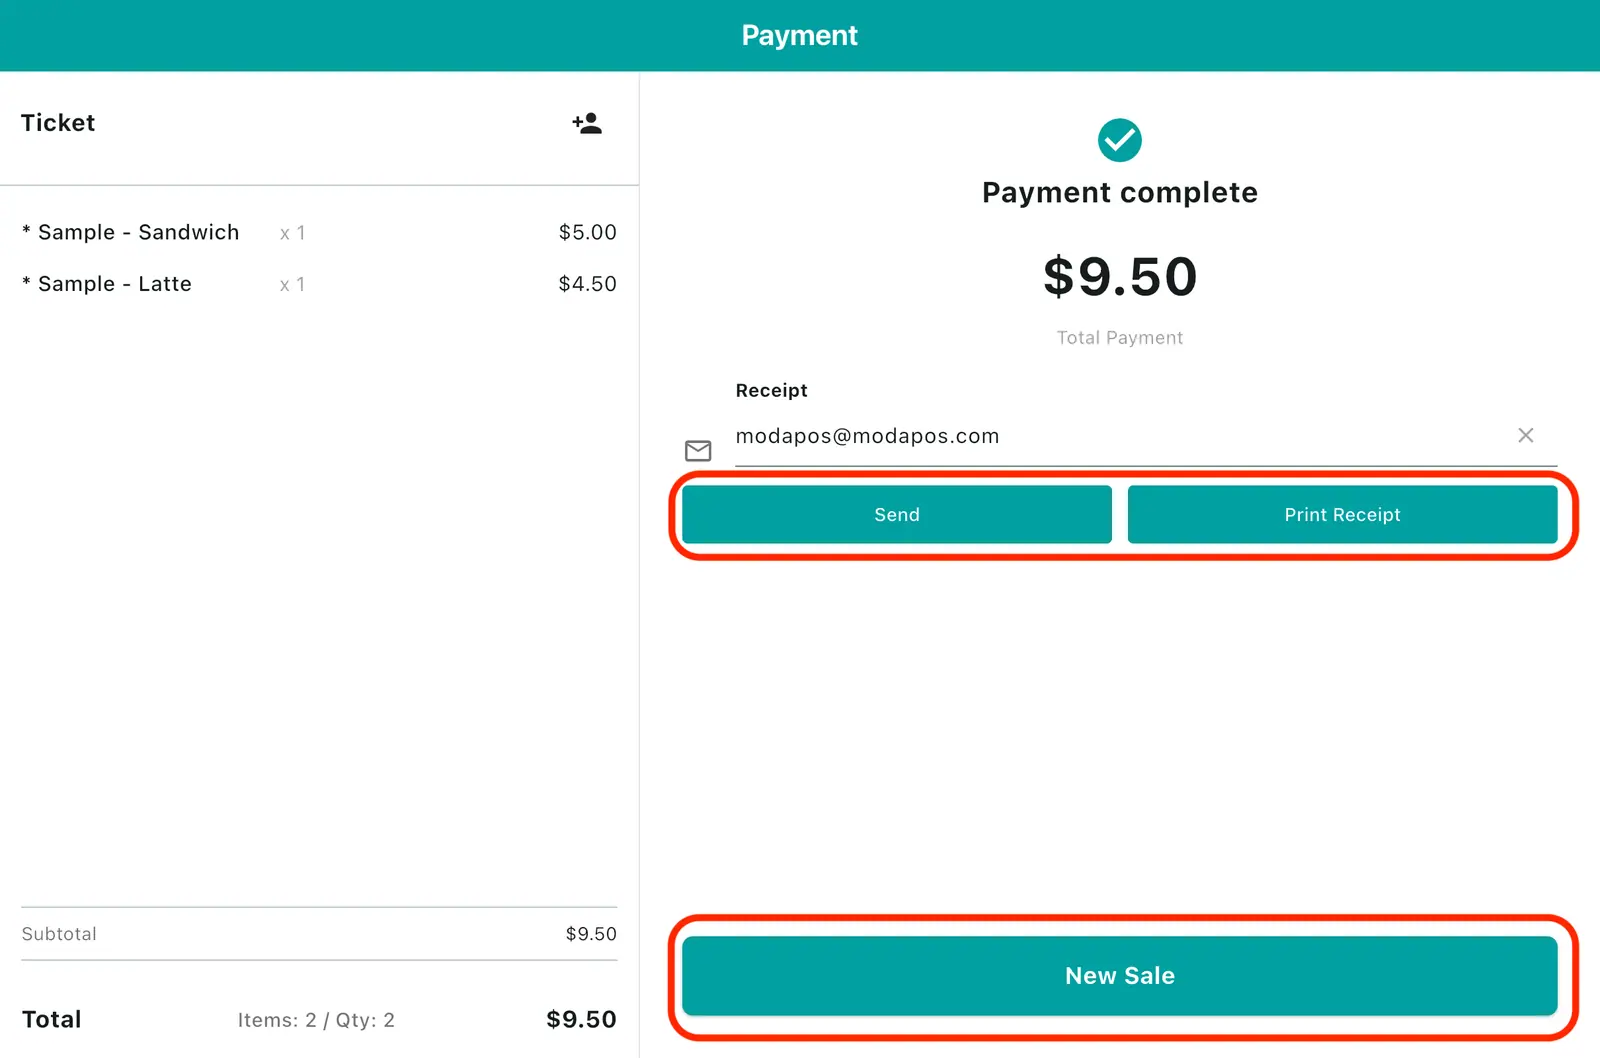
- Send: Send the receipt to the email in the email field.
- Print receipt: Print the receipt for that transaction on the printer.
- New sale: Start a new sale.