
Taking payment
1. Cash
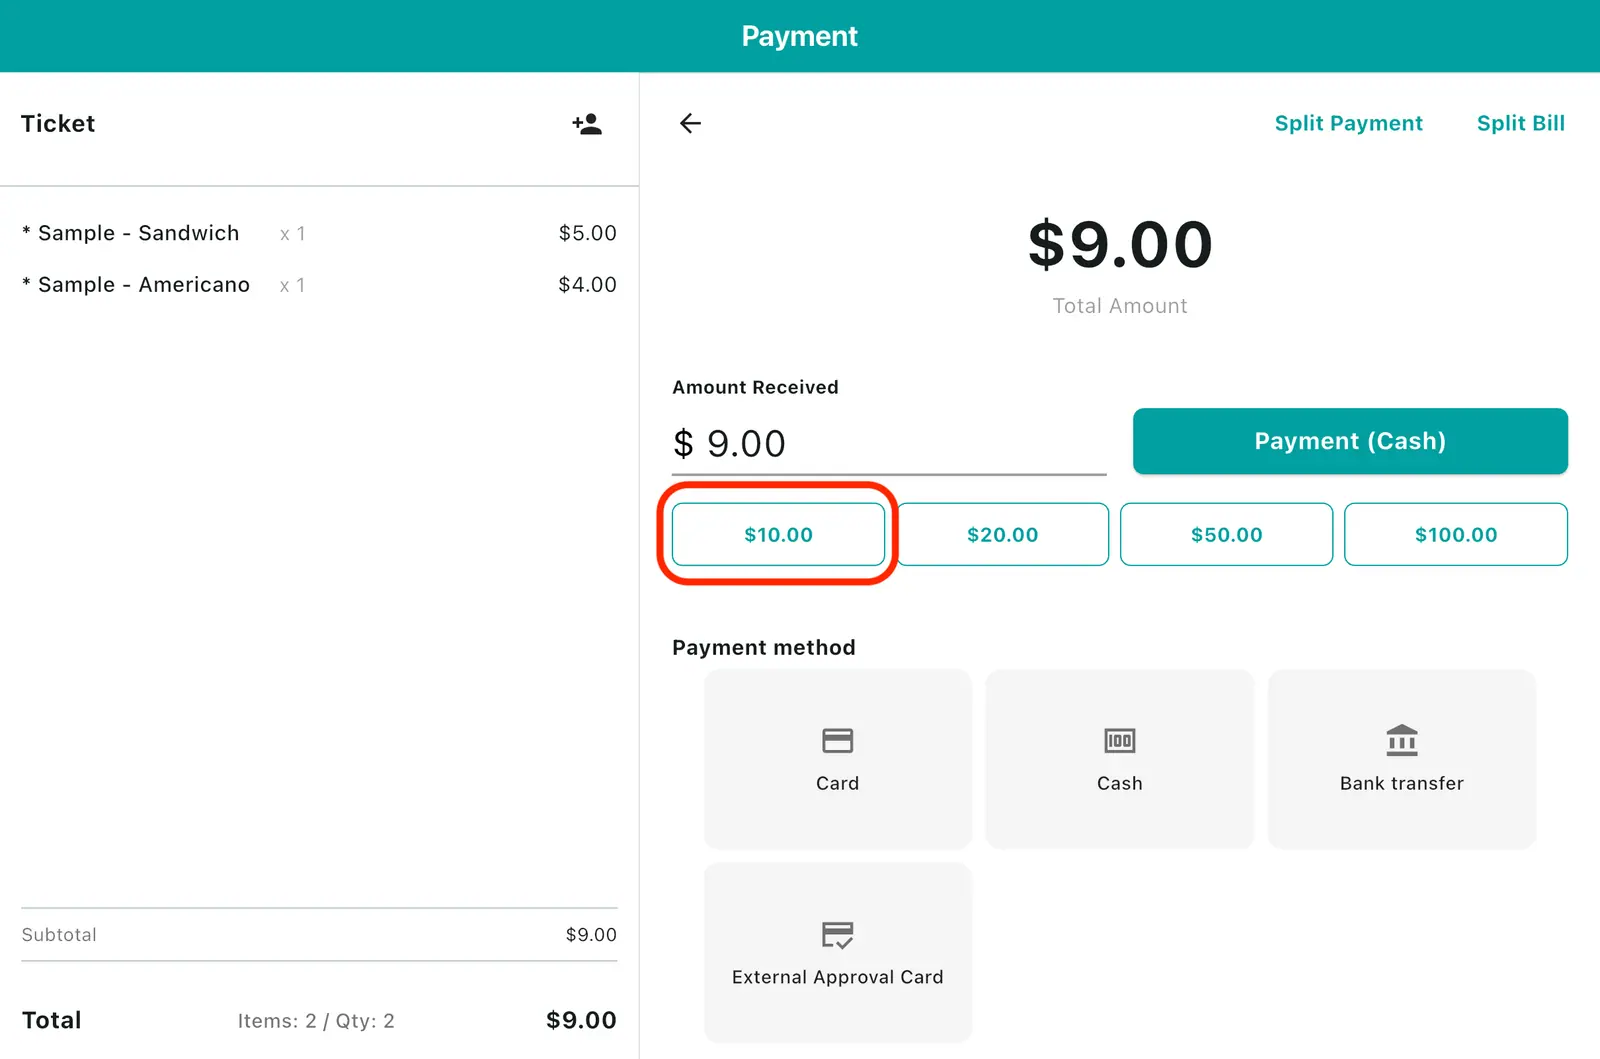
Option 1 — Quick payment
1On the payment screen, tapping a quick button (common amount) charges that amount immediately.
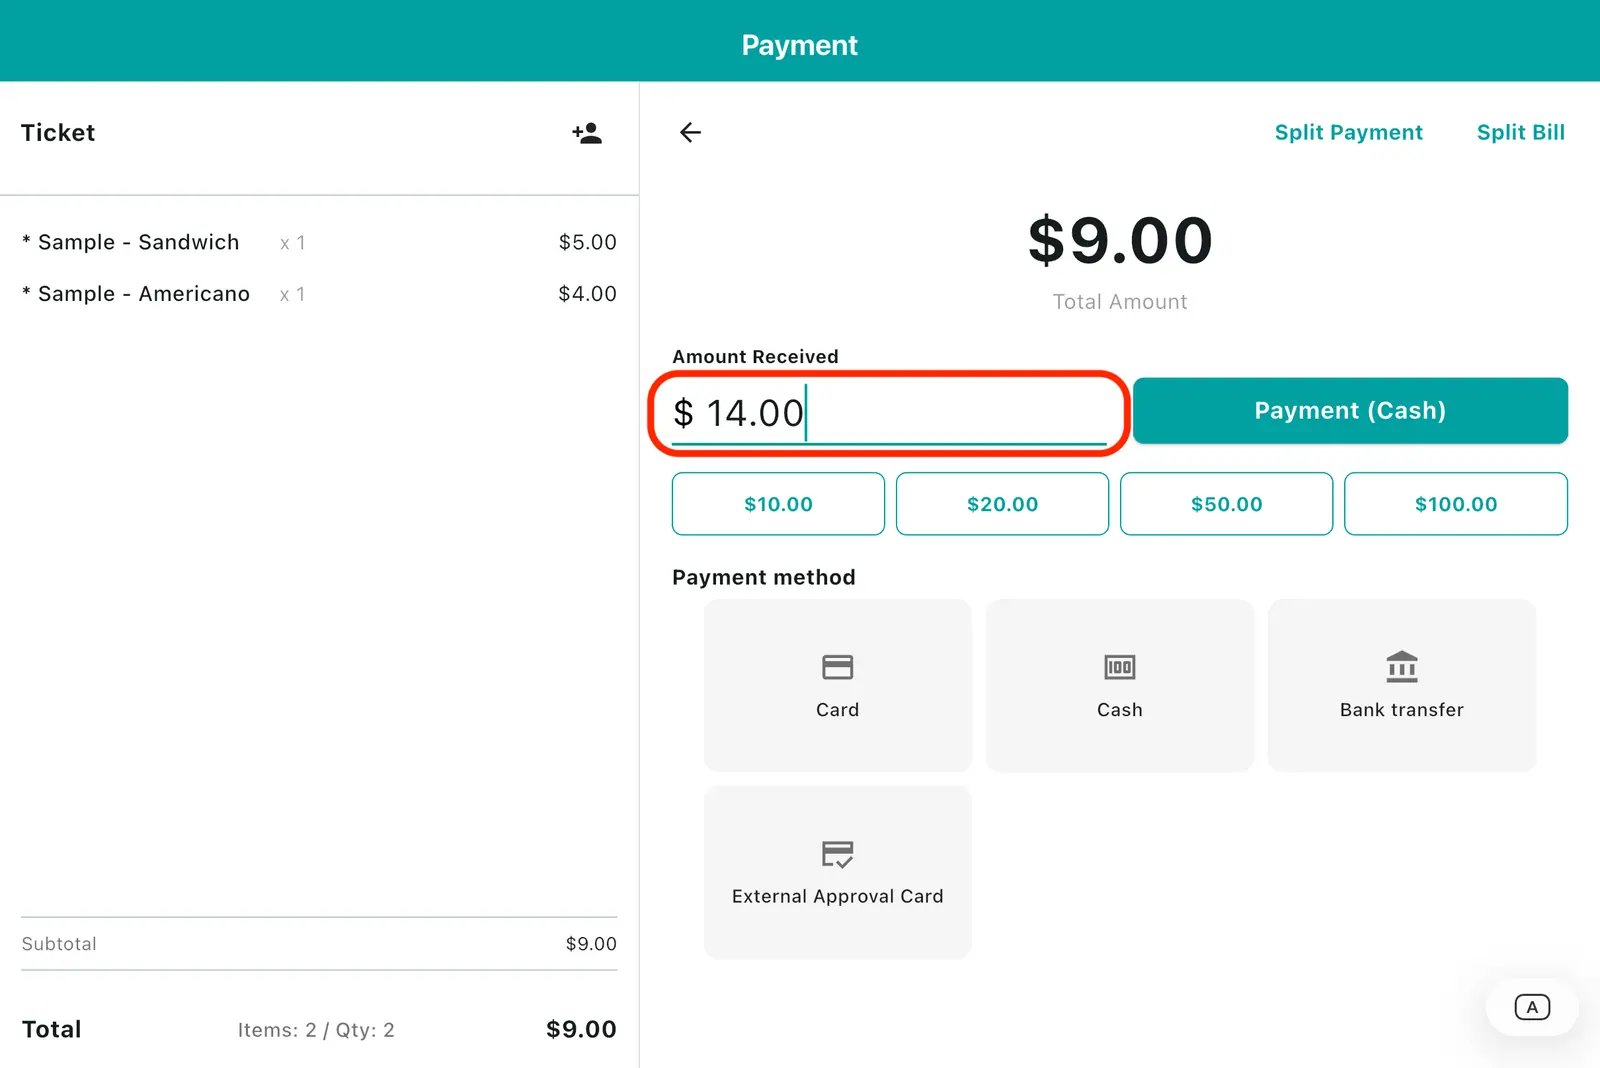
Option 2 — Enter manually
1Tap the Amount received field to place the cursor and type or edit the amount directly.
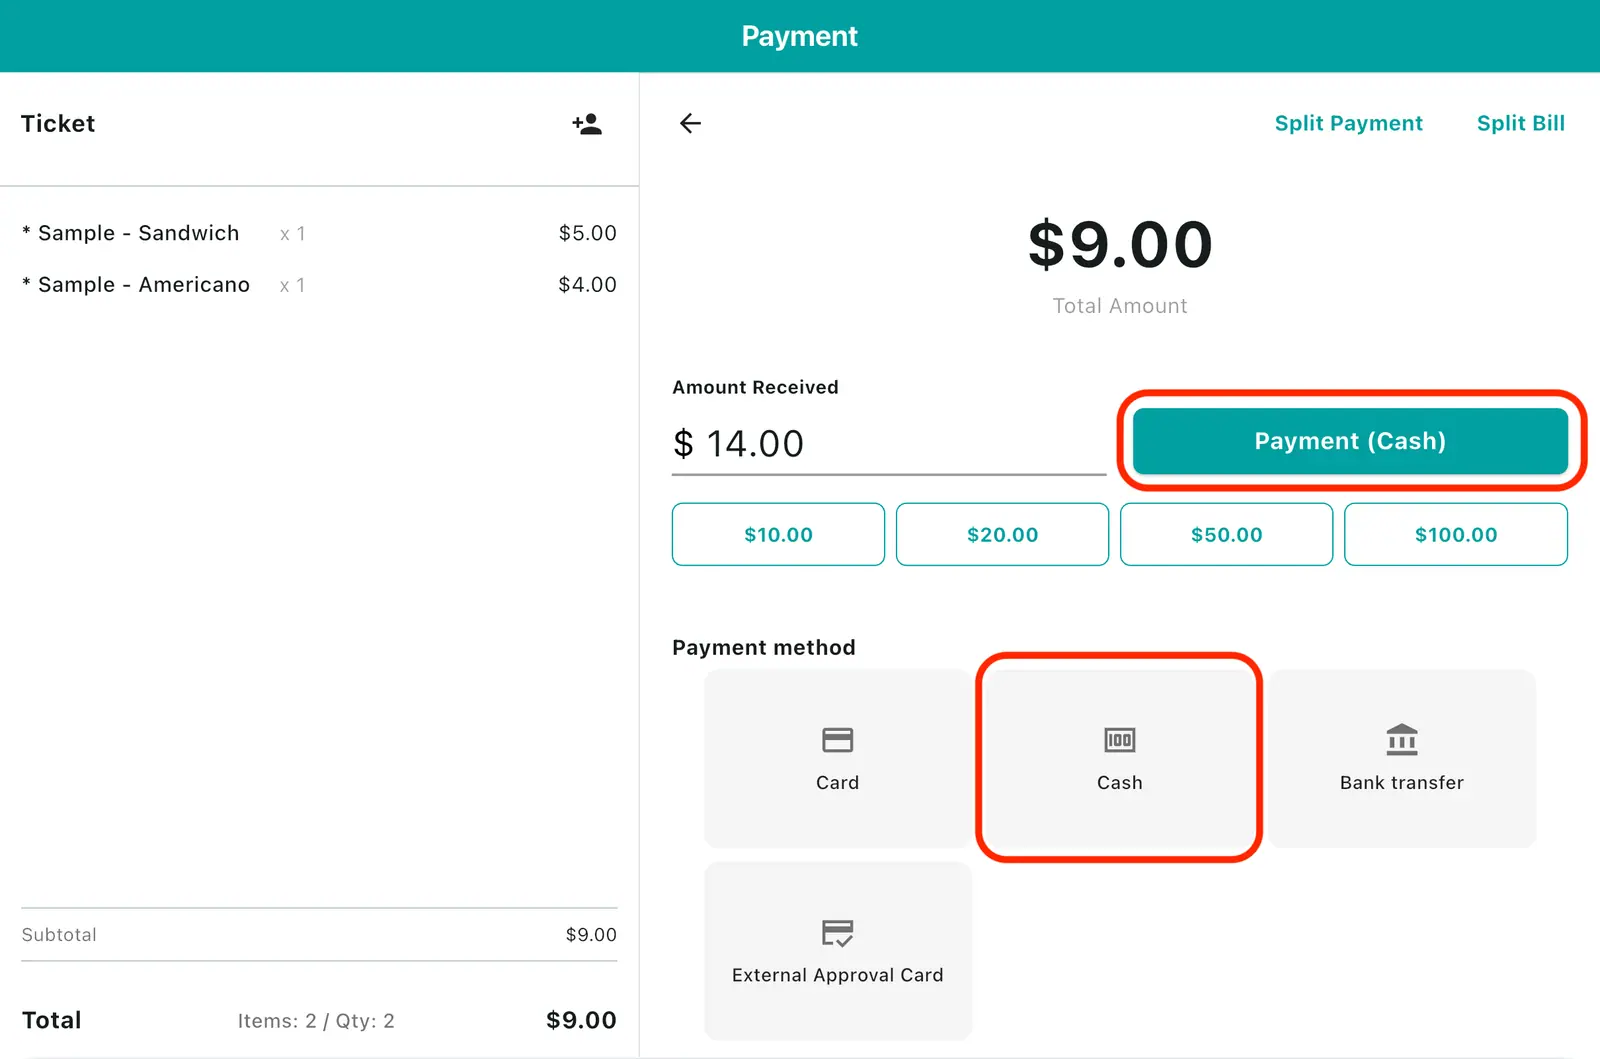
2After entering the amount, tap the Cash button (or Pay) at the bottom to run the cash payment.
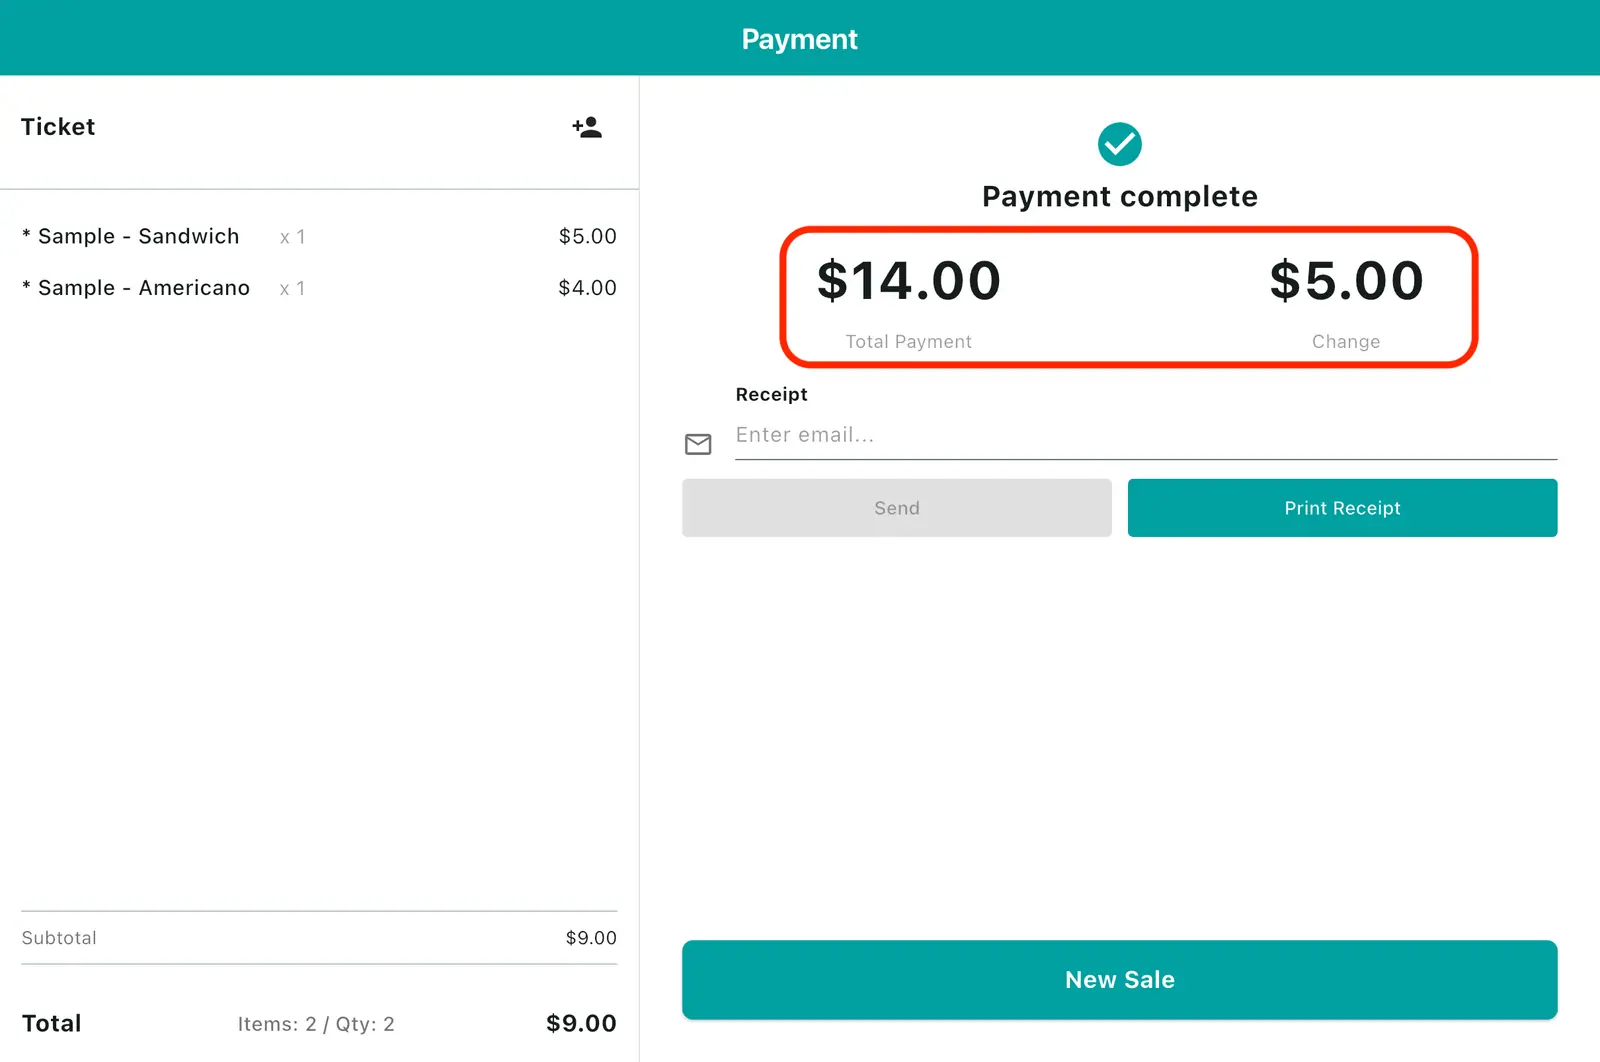
3The payment-complete screen shows the total paid and the change.
Less than the total will not go through. You get "Amount received is insufficient." Enter the exact amount or more.
If you set up a cash drawer, it opens automatically on payment.
Cash drawer setup — Printer & hardware setup
2. Card
| Method | Who approves | When to use |
|---|---|---|
| Card | The app requests approval via the terminal | Stores with a terminal integrated into the app |
| External terminal approval | Staff approve on a separate terminal | Stores using a terminal that is not integrated |
Card (integrated) requires a card terminal integrated through a reseller.
Integrated card payment is currently supported only for Korean stores on Android devices. iOS and overseas stores will be added later.
External terminal approval — for a separate card terminal that is not connected to the app. The app plays no part in approval and only records the sale.
- Run the card on the separate terminal first and get approval.
- Confirm the approval with your own eyes.
- Then tap External terminal approval as the payment method.
- There is no instalment popup and no waiting — it completes immediately.
External terminal approval works offline — the app never talks to anyone; the terminal handles it. Either way, Back Office counts both as card revenue.
3. Other payment methods
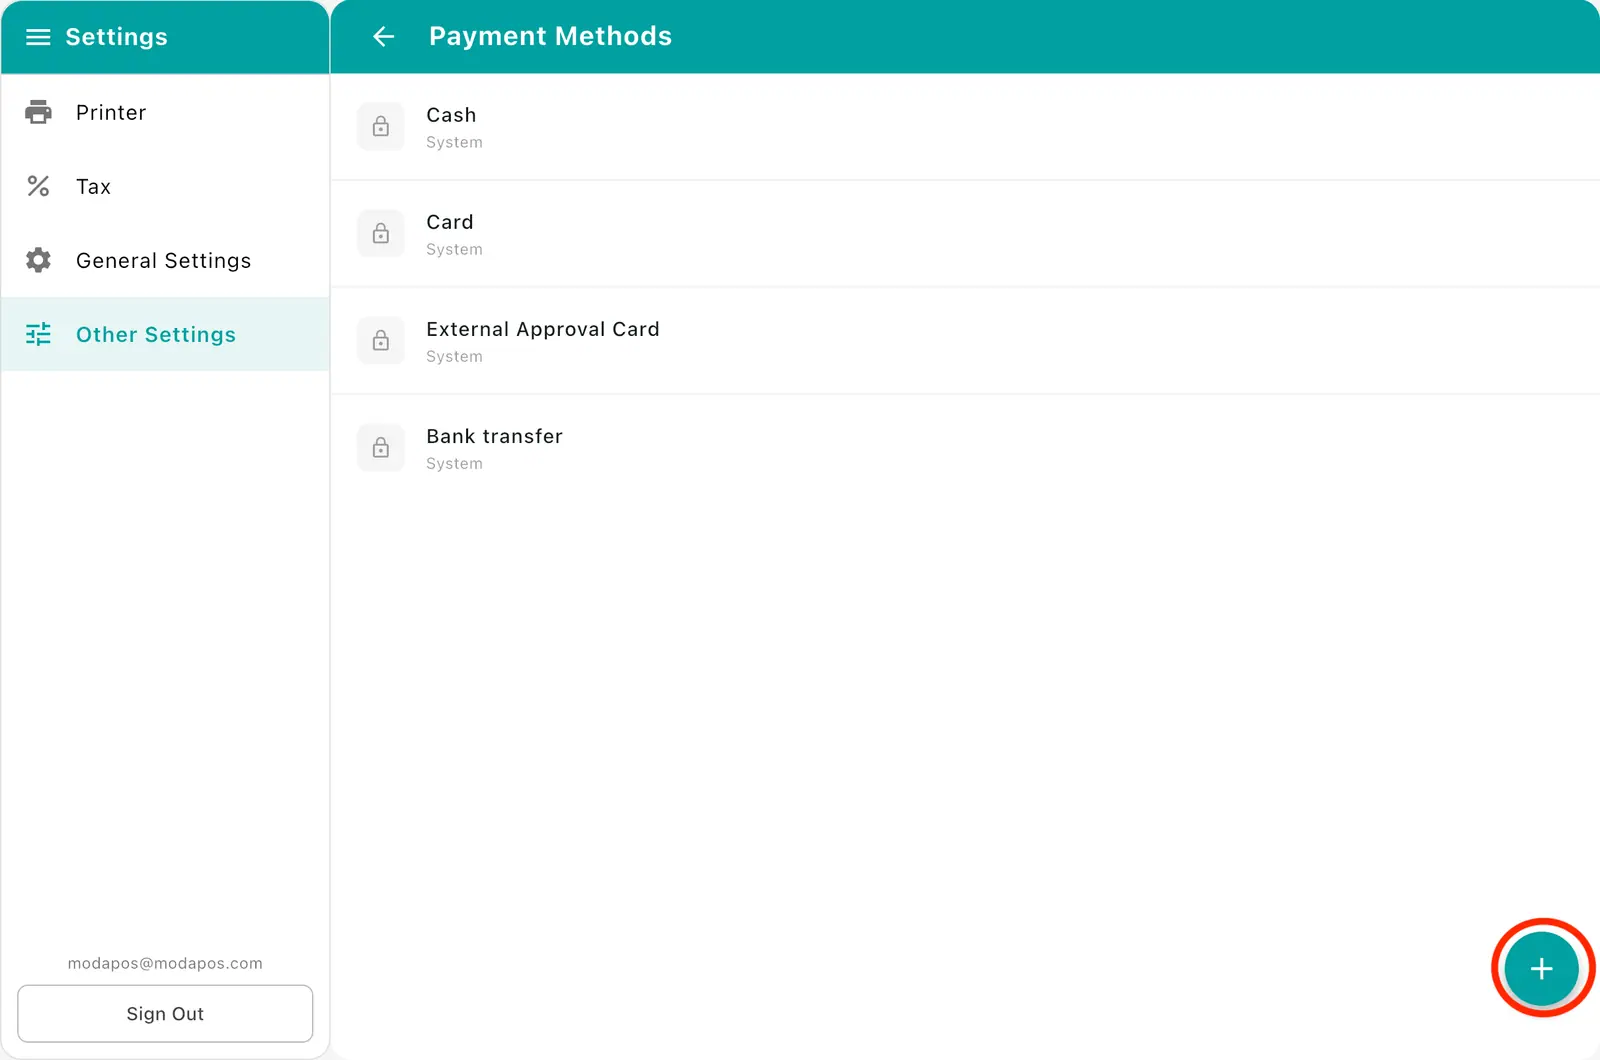
Bank transfer is there by default. Anything you added under Settings → Other → Payment methods (gift cards and so on) shows up too, and paying with one records it under that method. The order is fixed: Card → Cash → Bank transfer → External terminal approval → (your custom methods).
1On Settings → Other → Payment methods, tap the + button at the bottom right.
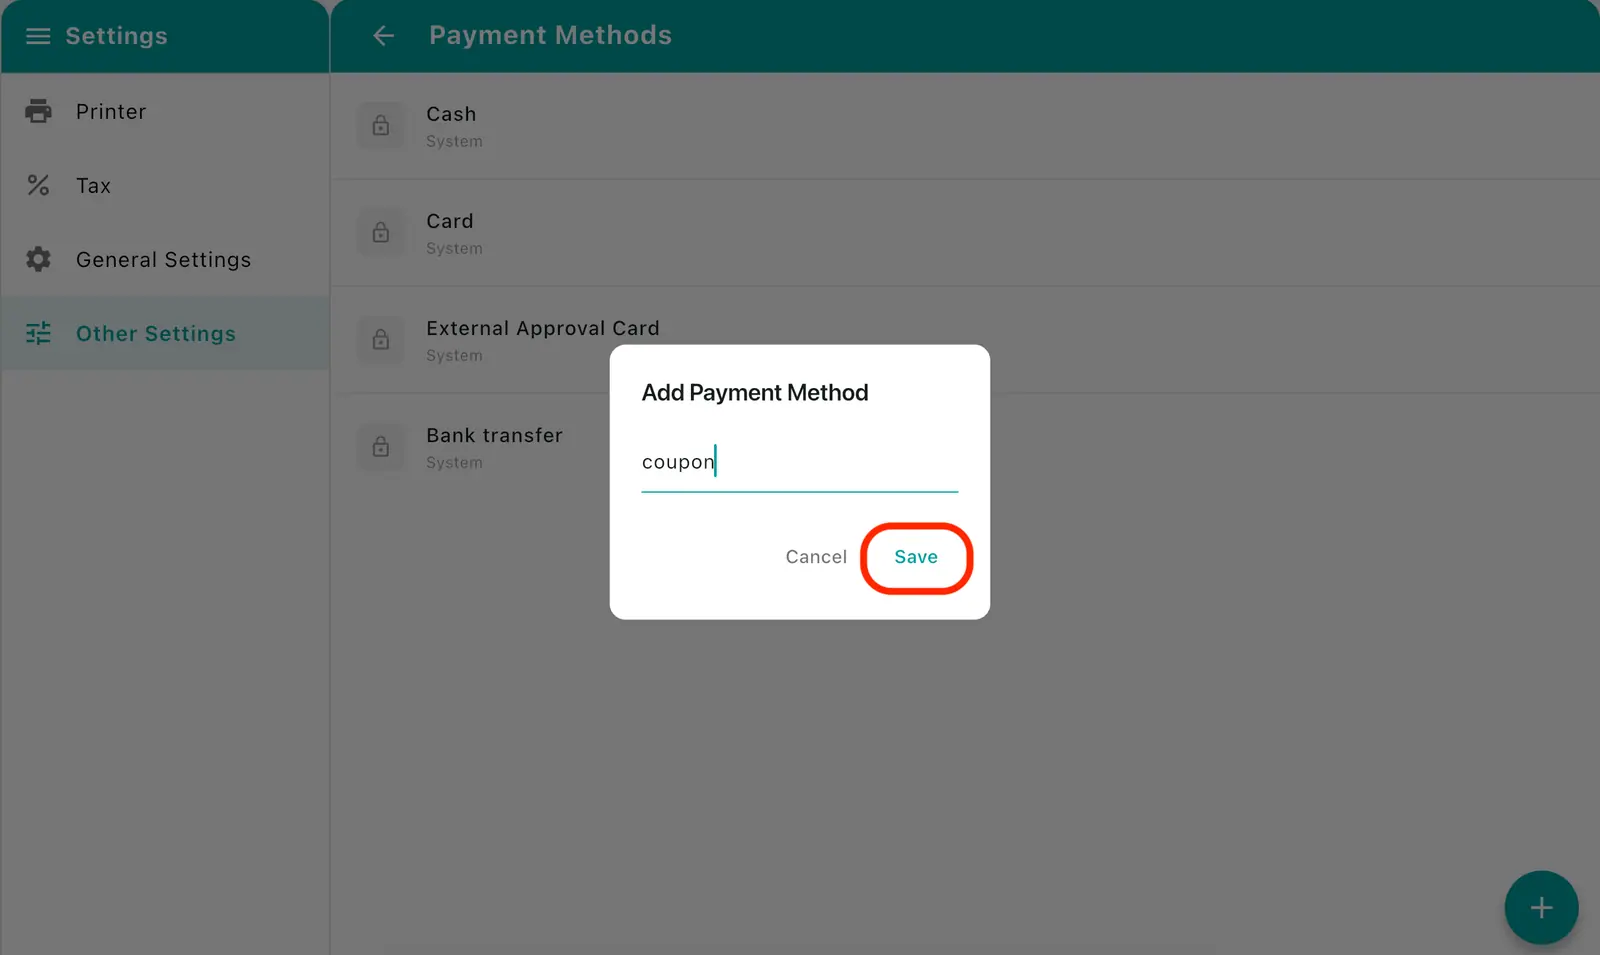
2Type the method name (e.g. coupon) in the field and tap Save.
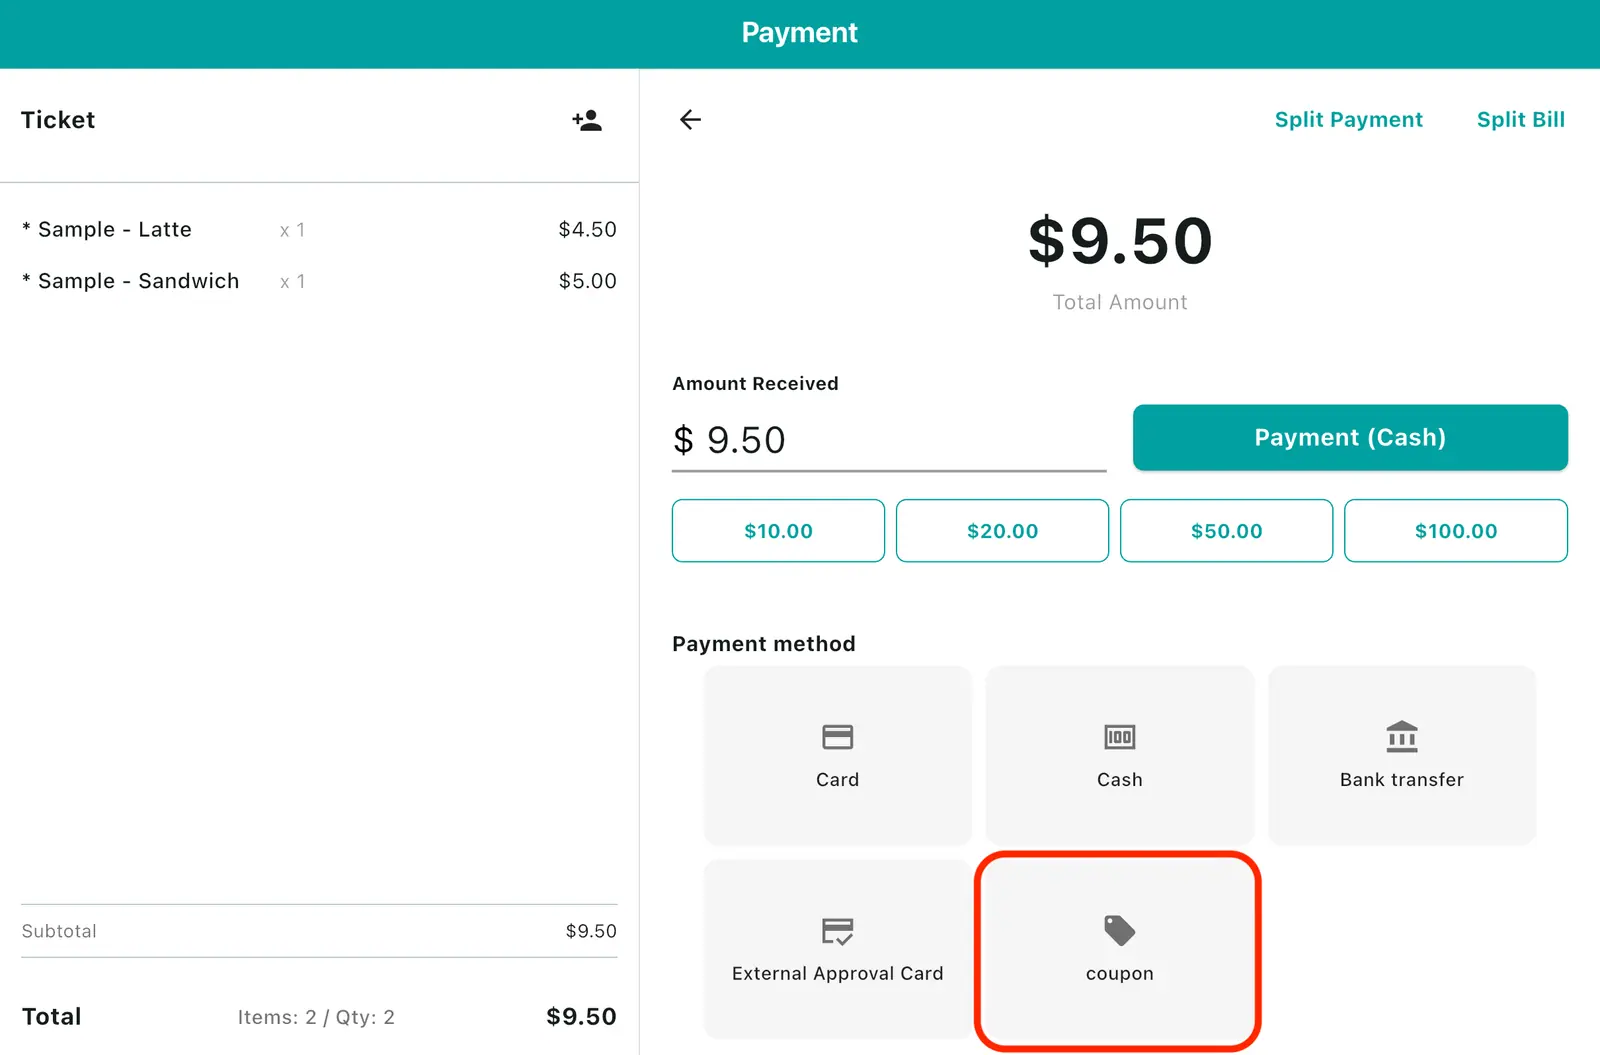
3The Gift card method now appears on the payment screen.
Adding payment methods — 01. Store setup
4. Split payment
For taking one order across several methods (e.g. 20,000 on card and 10,000 in cash out of 30,000). Pay the first method and amount, then the remainder with the second. It completes once the full amount is covered.
1On the payment screen, tap the Split payment button.
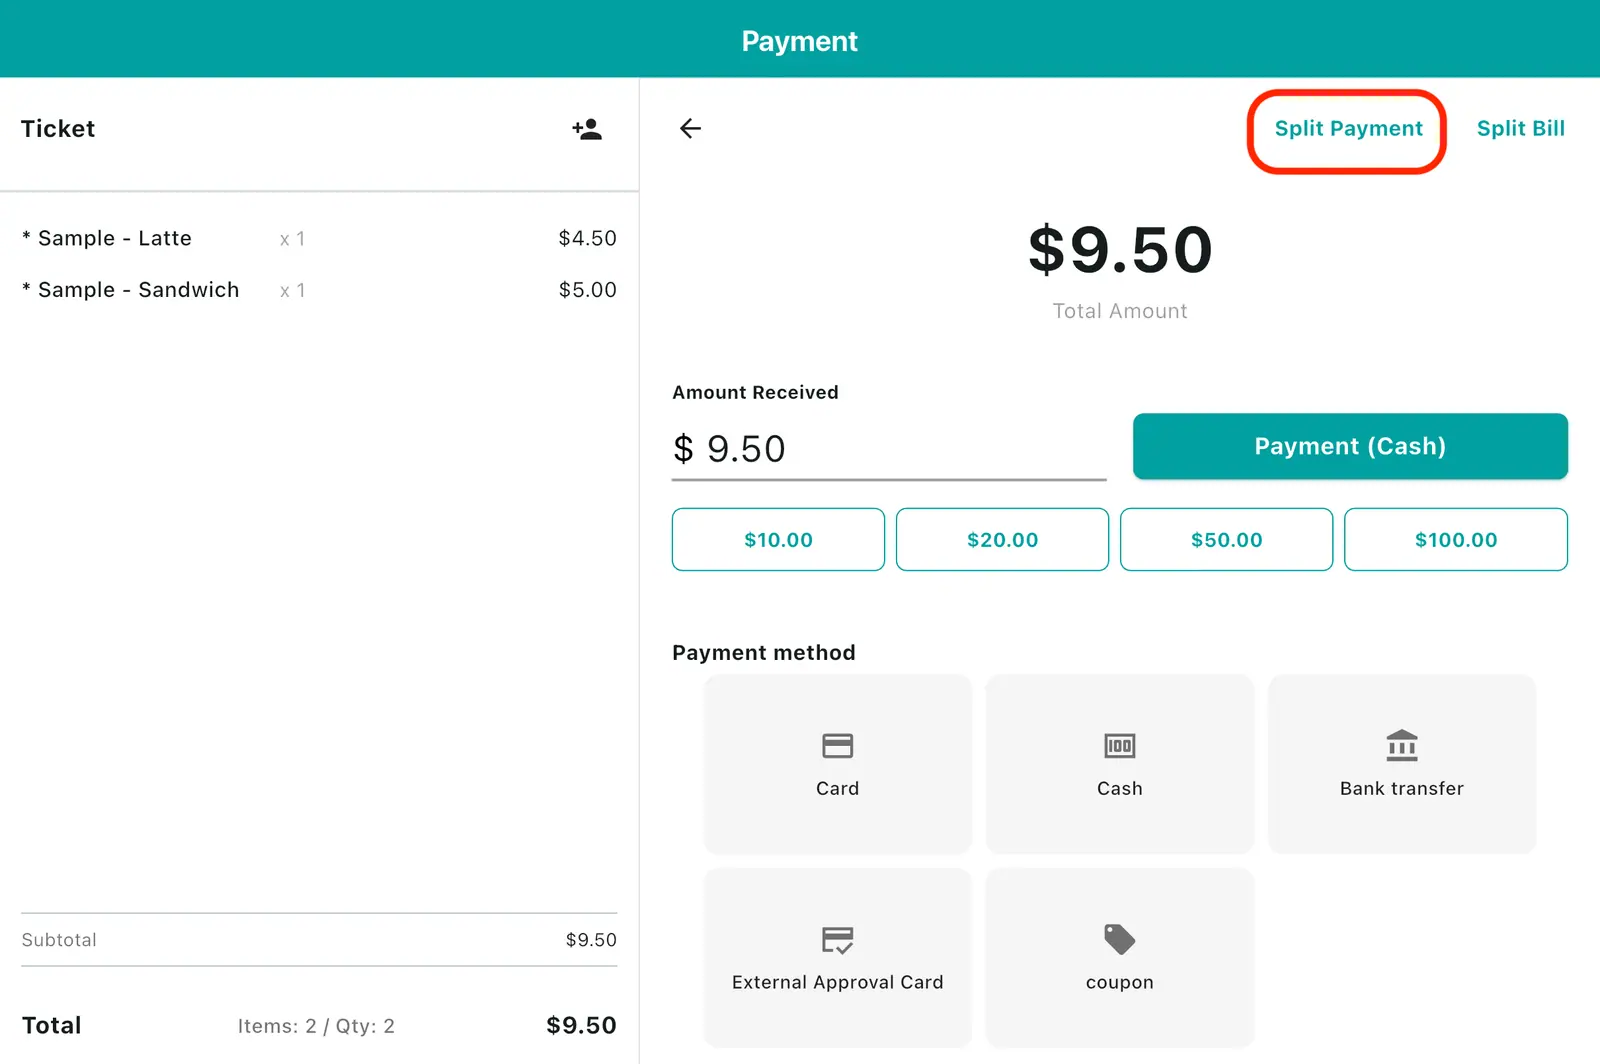
2On the split-payment screen, divide the amount across methods and charge each one.
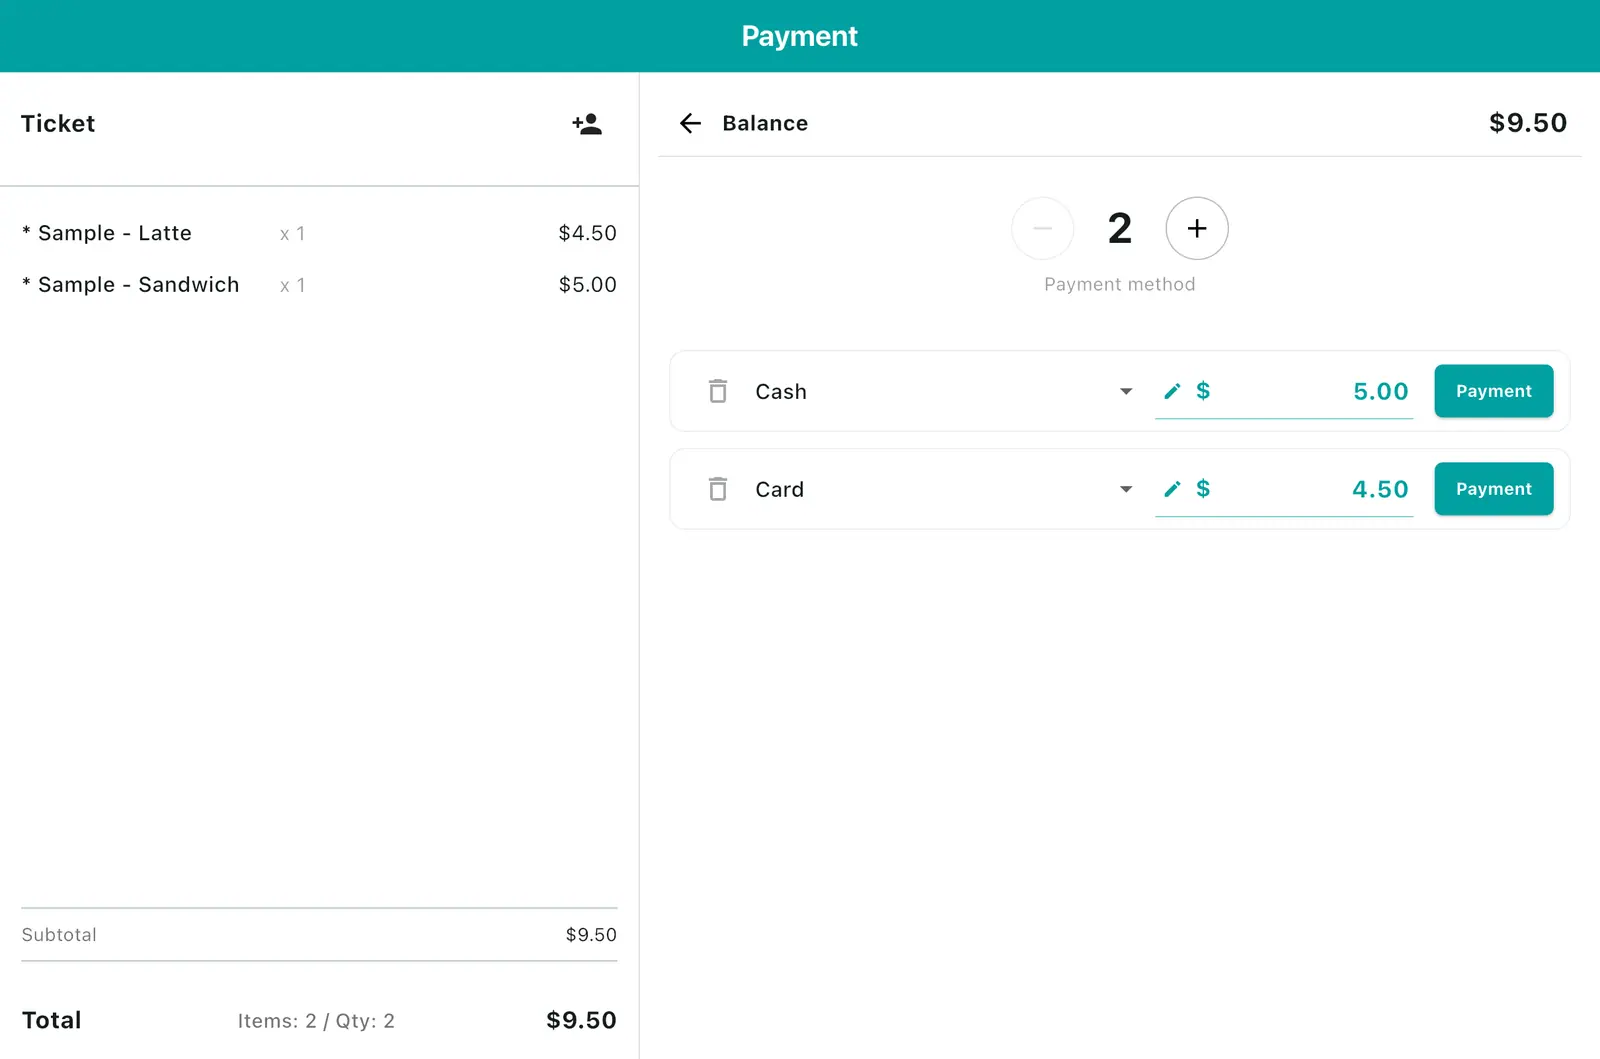
Once any one person is paid, going back is blocked so you cannot leave a half-paid order behind. Agree the amounts with the customer before you start.
5. Splitting the bill
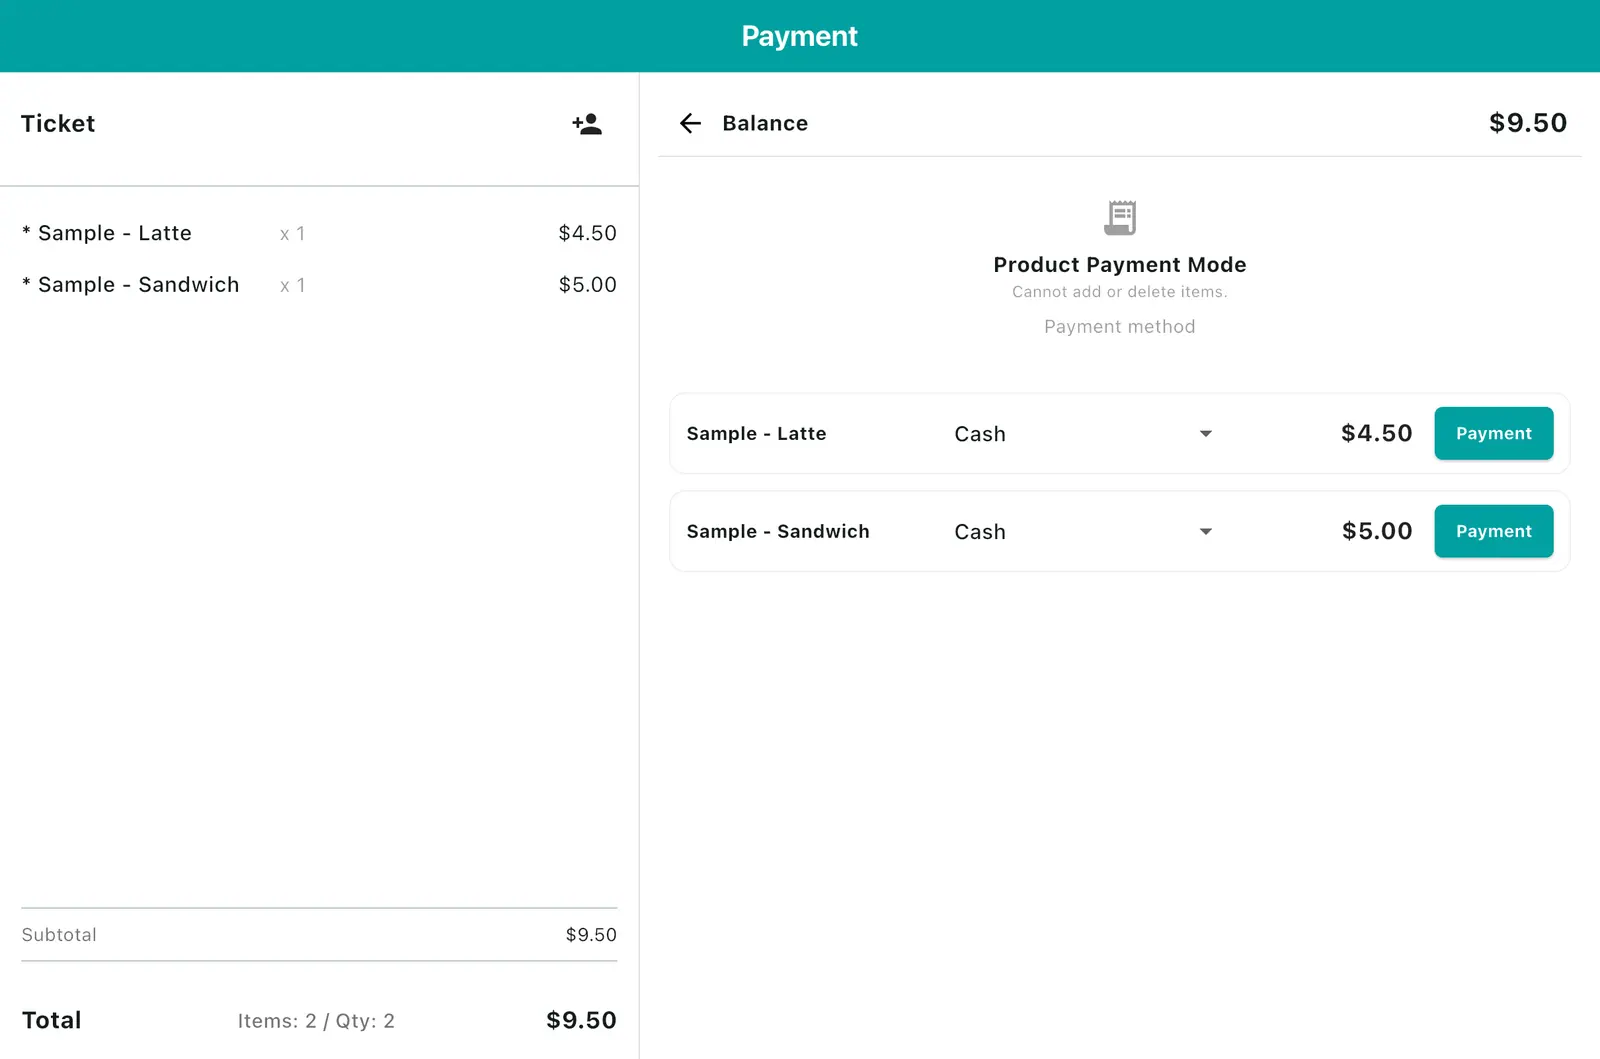
For several people paying only for what they had. Split payment divides the *amount*; splitting the bill divides the *items*. Picking it switches to per-item payment mode, where you select each person's items and charge them separately.
1On the payment screen, tap the Split the bill button.
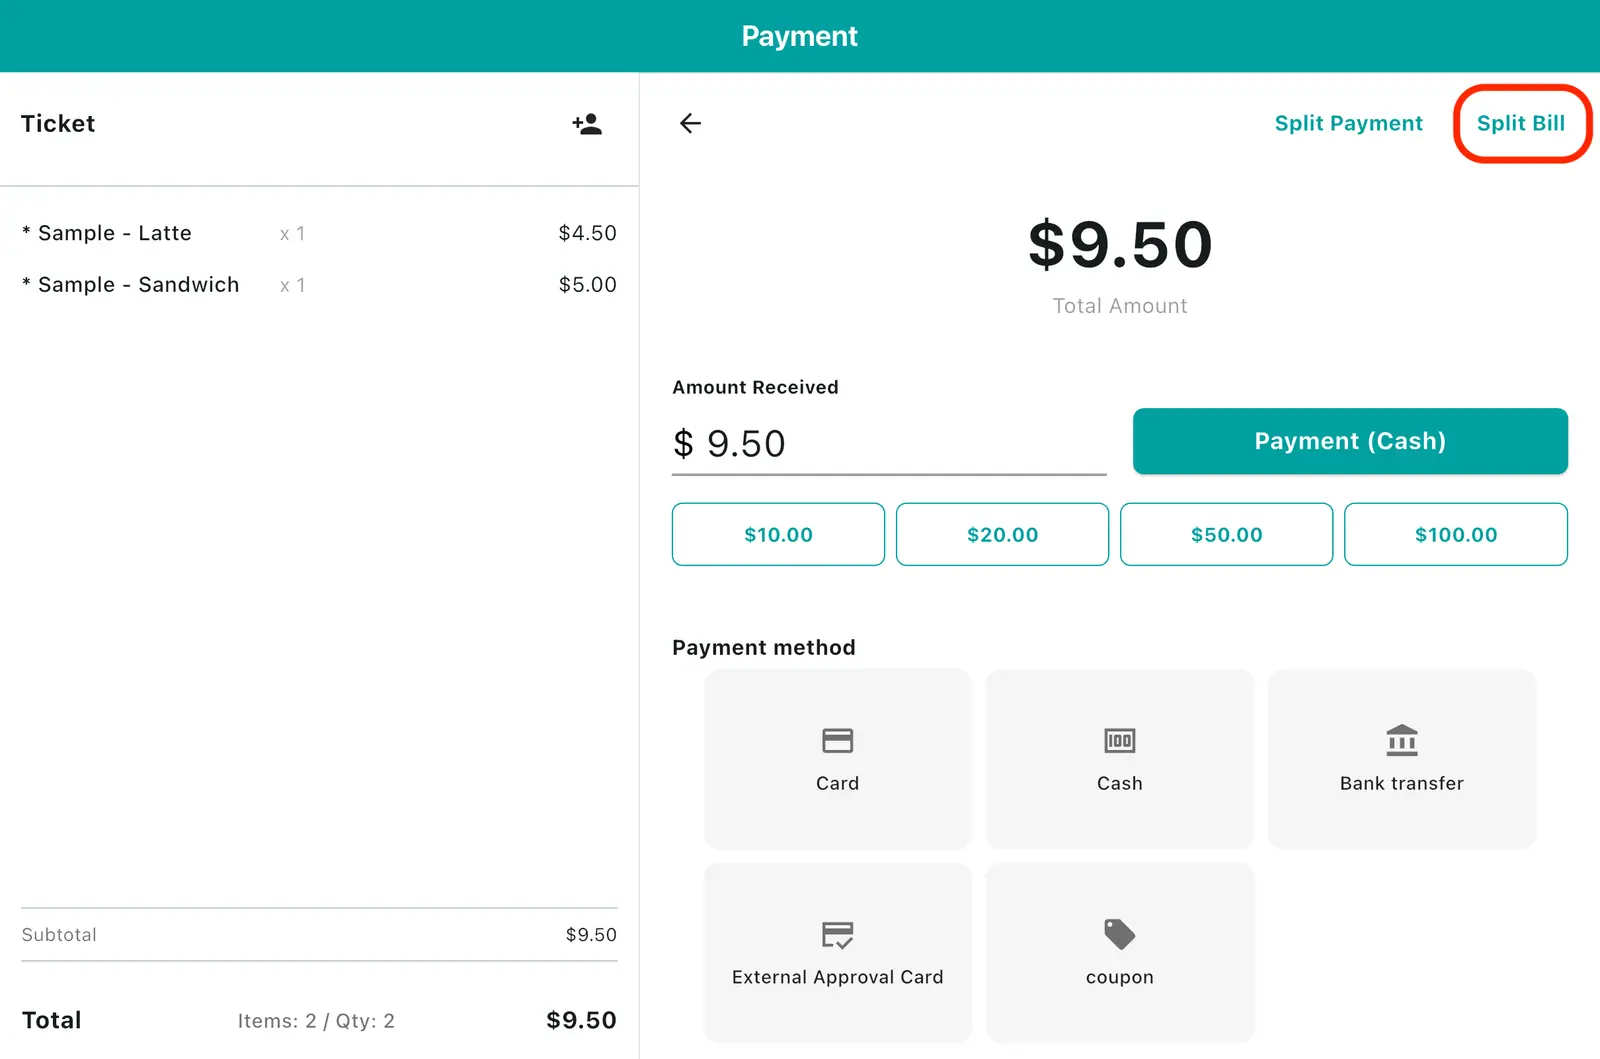
2On the split-the-bill screen, pick each person's items and charge them separately.
6. Cash receipts
Paying in cash prompts "Issue a cash receipt?". Tap Yes (or No if not needed), pick the type, enter the number (mobile number or business number), and the terminal issues it.
| Type | When |
|---|---|
| Personal (income deduction) | Regular customers. Issued against a mobile number |
| Business (expense proof) | Business customers. Issued against a business number |
Customers can ask later too — find the sale on the Receipts screen and issue it from there.